version-new-1.png

Tutorial on SSH Agent

shape
shape
shape
shape
shape
shape
shape
shape

What is an SSH Agent?

The SSH agent is a key manager for SSH service, which allow us to authenticate remote Linux system interactively. It stores the user’s SSH key and passphrases in process memory. It is one type of single sign-on (SSO). It uses stored SSH keys and passphrases to authenticate to the remote server without typing a password or passphrase again.

In this tutorial on SSH Agent, we will explain how to set up an SSH-Agent and use it to authenticate a remote Linux system.

How to generate SSH Key pair?

Before starting, you will need to create a SSH key pair ( create public and private SSH Key pair ) to authenticate the remote Linux system without using a password.

Letโ€™s run the ssh-keygen command to generate a public and private SSH key:

ssh-keygen -t rsa

Define your SSH key path and passphrase as shown below:

sshkey

As you can see, both public and private keys are created and stored in the  ~/.ssh directory. 

Now, you will need to add the public key on the remote Linux server for password-less authentication. 

You can use the ssh-copy-id command followed by the remote Linux server IP address to add the SSH key on the remote Linux server:

ssh-copy-id [email protected]

You will need to provide the root password to add the public key on the remote server:

add sshkey

At this point, the SSH key is added to the remote server. You can now proceed to set up an SSH agent.

How to setup an SSH-Agent

Before setting up this, you will need to start the agent.

How to start an ssh agent?

To start, first open your command-line terminal and run the following command:

eval $(ssh-agent)

The above command will start the ssh-agent service in a daemon mode:

Agent pid 7019

user@desktop:#$ eval "$(ssh-agent -s)"
Agent pid 7019

Next, add the SSH key passphrase which you have defined during the ssh key pair generation process to the SSH agent using the ssh-add command:

ssh-add

You will also need to provide your SSH key passphrase to add it to the SSH agent as shown below:

ssh-add

Note: The SSH Key passphrases will automatically be removed from the system memory when you log out from your terminal session.

You can also define the specific time limit to remember the SSH passphrase. You can define it in seconds, minutes, or hours.

How to set time limit in ssh agent?

To set a time limit of 600 seconds, run:

ssh-add -t 600

To set a time limit of 50 minutes, run:

ssh-add -t 50m

To set a time limit of 1 hour, run:

ssh-add -t 1h

Now, verify the SSH passphrase cached by ssh-agent using the following command:

ssh-add -l

If everything is configured properly, you should see the following output:

2048 SHA256:qENeCHiuTkho5/oEfrr49MlFc+VKQiaXfYq47bnMCJU /home/vyom/.ssh/id_rsa (RSA)

How to list Keys added to ssh agent ?

You can also see all public key parameters using the following command:

ssh-add -L

You should get the following output:

ssh-rsa AAAAB3NzaC1yc2EAAAADAQABAAABAQDVOoidnUeRzBJ0ni4Tbr3T1n+aTP/MM6LyRI1t7MqIh426yjBroY+BYG3NEel5dAhKtB++ZEujp3dU+Mq7YydzCGzKj4Iv2qQ5iTdUIZyk9uOmH5bR0bq7YeIP9UOptniKoliaLfRQpPliCTXXBFZtEiKROJ6W1NHgsXNOT/JNtLgg7GN5NtRPpPZ0agwXPAMSeYExEBrfoz8pVEoRlhqMxnk9IsFnSMCREN4LNMRxY4gk9qf6ydi08t/pcusxaT7hf7vj5+6jJzC2jMzqIUzMNt7sqaqWOtSqk5tMaopEIIiJ4imCfRtczvaxy9BHb5prFJu/ONC3LxMSPl3vVkcL /home/vyom/.ssh/id_rsa

How to stop or disable ssh agent ?

You can use the below command to stop.

root@server:~$ eval "$(ssh-agent -k)"
Agent pid 182 killed

How to remove keys from ssh agent?

You can remove already added keys from using the command

ssh-add -D

How to Use ssh agent for Authentication on Linux

At this point, the passphrase of your key is added to the agent. Now, you donโ€™t need to provide an SSH passphrase when connecting to the remote server.

Let’s use the SSH command followed by remote server IP to connect to the remote Linux system:

ssh [email protected]

You should log in to the remote Linux system without any passphrase prompt:

Welcome to Ubuntu 18.04.6 LTS (GNU/Linux 5.4.0-110-generic x86_64)

 * Documentation:  https://help.ubuntu.com
 * Management:     https://landscape.canonical.com
 * Support:        https://ubuntu.com/advantage

174 updates can be applied immediately.
125 of these updates are standard security updates.
To see these additional updates run: apt list --upgradable

New release '20.04.4 LTS' available.
Run 'do-release-upgrade' to upgrade to it.

Your Hardware Enablement Stack (HWE) is supported until April 2023.
You have mail.
root@remote:~# 

You can also use the SSH Agent with SCP and SFTP commands to transfer files to and from the remote Linux server.

If you want to delete all cached passphrases, run the following command:

ssh-add -D

The – D argument supported by the command helps eliminate all the added keys from the client. However, the lowercase version of the argument, i.e., -d allows you to select individual keys.

What is ssh agent Forwarding?

SSH agent forwarding allows you to use the keys on your local computer to transparently authenticate the server and simplify the management of credentials on remote hosts.

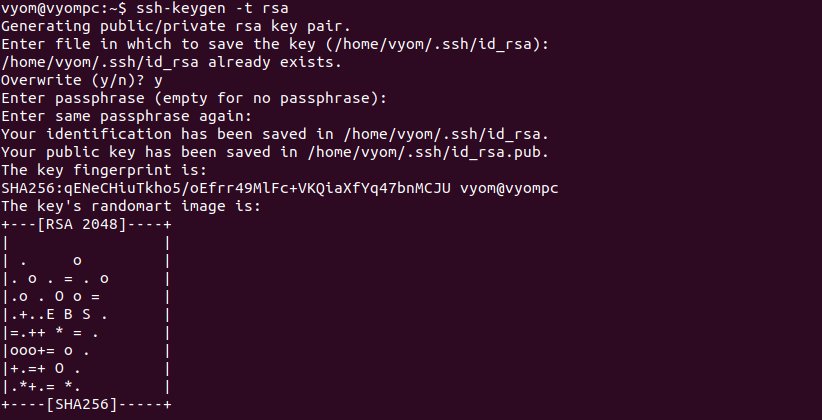
In order to create a secure connection between a server and a remote system, generally SSH keys, i.e., the Secure Shell keys are used. It is a network protocol that provides a better authentication process as well as encrypted data communications when two systems try to connect over an open network. 

SSH keys use a client-server model to connect a Secure Shell client application with an SSH server. They have public and private key pairs to authenticate the hosts.

SSH Public keys are the username that can be shared with anybody, whereas the private SSH keys are the passwords that are saved by the user locally on the computer and must not be shared with everyone or outside the organization’s network.

Once the ssh keys are generated, to verify and create a secure connection, the SSH requests for a passphrase that helps encrypt and decrypt the private keys. In simple terms, every time you want to use the private key, it sends you a request to enter your passphrase, which can annoy anyone. 

Hence, to manage this process and make it less annoying, SSH uses an agent. The role of the SSH agent is to store the decrypted private key in memory. It means you will not have to enter your passphrase each time until the active user session times out. Once the agent unlocks it, you gain the access to log into your servers securely without entering your passphrase again and again.

However, ssh-agent Forwarding is a deeper version, i.e., it is a tool that authentication agents use to forward authentication information securely to an intermediate service.

Purpose of SSH agent forwarding

The main purpose of agent forwarding is to provide single sign-on services and simplify the management of credentials on remote hosts.

The most common use case for SSH Agent Forwarding is when you want to access a private git repository on a remote server.

Let us say you want the remote server to pull a specific code from Github. Well! In this case, the server generally cross-checks the id_rsa files to get a solution, but sometimes it forwards the query to the local machine.

There are two ways to independently forward the SSH agent on a local machine. One is to try using a real command in a terminal, and the other is to use SSH config to forward SSH Agent.

The local machine, in return, answers the query with a response without including the private key. It does not matter to the Github or main server how you fetched the answer, it just sees the answer and allows the connection.

How to Configure SSH Agent Forwarding

First, you will need to configure an SSH agent forwarding for a specified remote server in your local system.

To do so, create a new configuration file on your local system:

nano /home/vyom/.ssh/config

Add the following lines:

Host remote-server-ip
  ForwardAgent yes

Save the SSH configuration file after you finish editing.

If you don’t want to create a configuration file, then you can use the -A flag to enable the agent forwarding:

ssh -A root@remote-server-ip

Next, you will also need to enable the agent forwarding on the remote server machine.

Now, log in to the remote server and edit the SSH configuration file using the nano editor to enable agent forwarding:

nano /etc/ssh/sshd_config

Scroll down the page and change the following line:

AllowAgentForwarding yes

Save the file after editing, then restart the SSH service:

systemctl restart ssh

After setting up agent forwarding, let’s check whether the agent forwarding works or not.

To test it, connect to the remote server from the client machine:

ssh root@remote-server-ip

After the successful authentication, you can SSH to other remote servers using your local systemโ€™s Public key.

ssh root@other-remote-server

If the connection is successful, that means you are successfully authenticated with the SSH key on your local machine.

Security Risks for Using Agent Forwarding

Like there are advantages to using SSH Agent, there are risks too. If you by any chance leave your terminal unattended, then any person who has physical access to the terminal can appeal as an authority and authenticate with the SSH server.

In simple terms, when you use agent forwarding to jump between SSH servers without copying a private key, there are high chances that any person with root access to the jump server can invoke the agent and misuse authentication.

Thus, it is necessary to follow best practices to tighten the agent usage and reduce the risk of getting compromised.

How can we use SSH Agent safely?

Here are a few ways through which you can minimize the risk of getting SSH agents getting compromised:

    1. Configure the Timeout Parameter

We recommend you use the ssh-add -t (timeout) argument with the ssh-add command to identify with a private key. Every time you run an ssh-add command, you get a request for a passphrase to decrypt the private key. Once provided, it is stored by the SSH agent in the memory throughout the active user session.

This feature, at the same time, also poses a risk. The longer timeout means you are giving enough time to an outsider to get physical access and misuse the SSH keys. However, by configuring the timeout parameter, you can determine the time frame up to which the mechanism will run and collapse. Once the sessions time out, you will need to provide the passphrase again for the next session.

    2. Eliminate All Unused Keys

Unused private keys can expose your data or create unauthorized SSH sessions on other devices. In order to remove the unused keys from the SSH agent, all you need to do is use the ssh-add -D command.

The – D argument supported by the command helps eliminate all the added keys from the client. However, the lowercase version of the argument, i.e., -d allows you to select individual keys.

    3. Make Sure to Always Exist Sessions

To create an SSH connection, the passphrase is needed during the initial SSH sessions. Once provided, you won’t be asked for the same in subsequent sessions. But leaving the SSH agent active with keys open is not a good idea.

The minute you think an SSH agent is not a requirement, use the eval “$(ssh-agent -k)” command to kill the ssh-agent or .logout or.bash_logout files for automatic session closure.

    4. Try ProxyJump rather than Agent Forwarding

First and foremost, be cautious and avoid forwarding SSH agents to random machines not worthy of your trust. Secondly, if you use the ProxyJump feature, you can jump to several servers without agent forwarding. It is a safe option and has been available since OpenSSH version 7.3.

Leave a Reply

Your email address will not be published. Required fields are marked *

Features

Others