How to move servers/migrate servers from one Ezeelogin installation to another?
Step-by-step guide to migrate ezeelogin installation to another server
Overview: This article describes how to migrate an old gateway server installation to a new gateway server using server export/import utilities, including verification steps and optional video guidance.
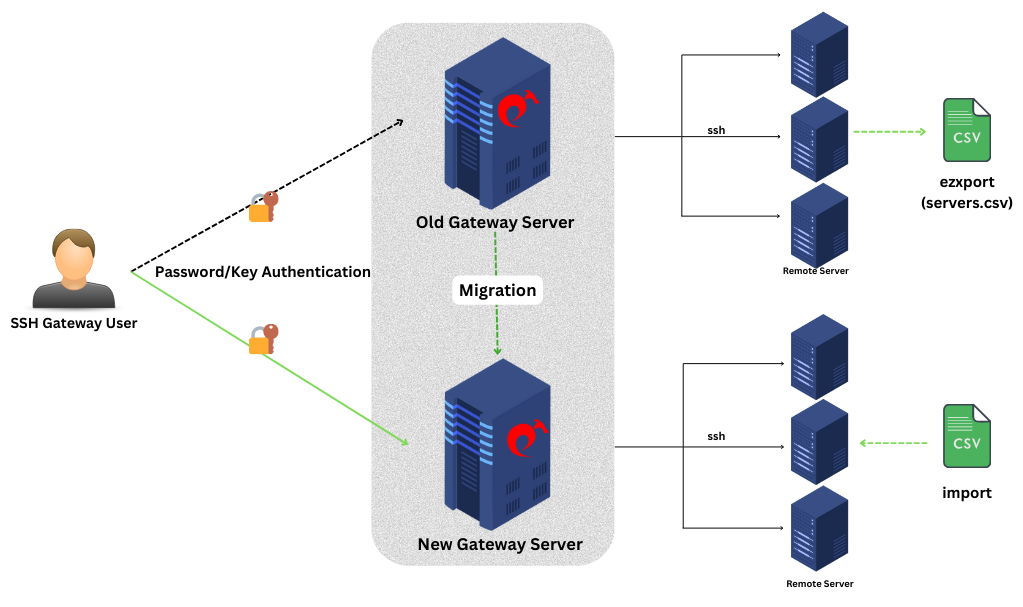
Migrating your Gateway server installation to a new gateway server involves several systematic steps to ensure a smooth transition.
Here’s how you can do it:
Step 1: Export Servers using ezxport Utility.
- Access the old gateway server.
- Run the following command in the gateway server (old server):
- Replace servers.csv with your desired output file name.
For Reference: How to export servers in CSV format.
root@gateway:~# php /usr/local/ezlogin/ezxport.php servers.csv
Step 2: Import servers to the new ezeelogin Installation.
- Before importing servers, ensure the necessary server groups are added to the new gateway server.
- Refer to the Ezeelogin documentation for detailed instructions on how to import servers.
Step 3: Verify Server Accessibility.
- After importing, verify if you can successfully log in to the servers imported into the new gateway server installation.
Step 4: Finalize Migration.
- Once you confirm everything is working correctly on the new server, you can proceed to delete the servers from the old gateway server installation to complete the migration process.
For a visual demonstration of the server migration process using Ezeelogin, watch the instructional video provided by Ezeelogin. This video will guide you through the steps involved in moving servers from one gateway instance to another, ensuring clarity and completeness in your migration efforts.
Contact our support department if you face any further difficulties.