How to use web portal proxy in ezeelogin ?
How to enable the web portal with the " use proxy " feature in Ezeelogin?
Overview: This article covers using the Ezeelogin gateway server as a proxy for web portal access. It includes installation and configuration steps for Node.js, dependencies, and SSL setup, with instructions for CentOS, Ubuntu, and Debian. It highlights prerequisites (Node.js 19 , kernel 4 , NPM 6 ) and provides troubleshooting tips for version checks, logging adjustments, and manual portal starts.
.png)
This feature enables the users to use the Ezeelogin gateway server itself as the proxy server while accessing the web portal.
Note: Ensure that the node version is 19 and above. Also, make sure the kernel version is 4 and above in the gateway server. You can check the kernel version using the below command.
:~# uname -r
Step 1: Install node js using npm and n module
Step 1(A): On Centos 7
:~# yum install epel-release
:~# yum install npm
Step 1(B): On Ubuntu 16/18 and Debian 10
:~# apt install npm
Step 1(C): On Ubuntu 20
Step 2: Install n, Node’s version manager
Step 2(A): If you are not using SSL, you need to set the repo to HTTP by running :
:~# npm config set registry http://registry.npmjs.org/
:~# npm install -g n
Step 3: Install node by running :
Step 3(A): To install the latest version:
:~# n latest
Step 3(B): To install the corresponding version :
:~# n version.number
- For example, the below command will install node 14
:~# n 21
:~# n --insecure latest

- In CentOS:
:~# yum -y install pango.x86_64 libXcomposite.x86_64 libXcursor.x86_64 libXdamage.x86_64 libXext.x86_64 libXi.x86_64 libXtst.x86_64 cups-libs.x86_64 libXScrnSaver.x86_64 libXrandr.x86_64 GConf2.x86_64 alsa-lib.x86_64 atk.x86_64 gtk3.x86_64 ipa-gothic-fonts xorg-x11-fonts-100dpi xorg-x11-fonts-75dpi xorg-x11-utils xorg-x11-fonts-cyrillic xorg-x11-fonts-Type1 xorg-x11-fonts-misc
- In Ubuntu:
:~# sudo apt-get install gconf-service libasound2 libatk1.0-0 libc6 libcairo2 libcups2 libdbus-1-3 libexpat1 libfontconfig1 libgcc1 libgconf-2-4 libgdk-pixbuf2.0-0 libglib2.0-0 libgtk-3-0 libnspr4 libpango-1.0-0 libpangocairo-1.0-0 libstdc 6 libx11-6 libx11-xcb1 libxcb1 libxcomposite1 libxcursor1 libxdamage1 libxext6 libxfixes3 libxi6 libxrandr2 libxrender1 libxss1 libxtst6 ca-certificates fonts-liberation libappindicator1 libnss3 lsb-release xdg-utils libgbm-dev wget
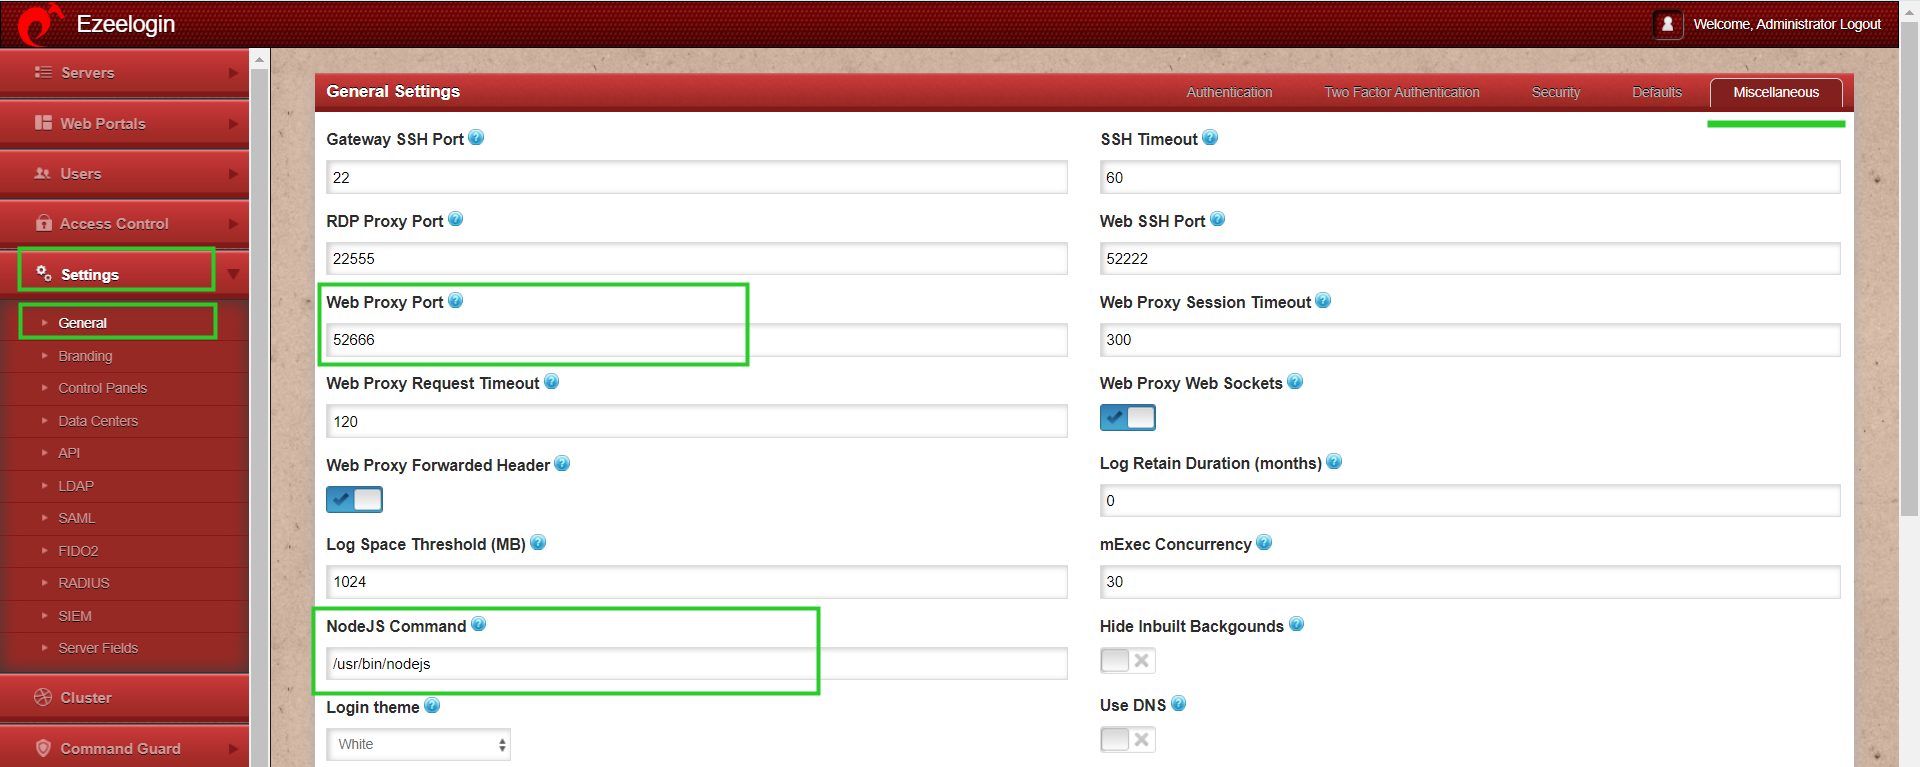
Note: Make sure to install SSL (self-signed or a valid cert )even if you have installed an SSL certificate on the Load balancer (ELB/ALB). Also, make sure to add a listener and routing for the port Web Proxy Port 52666
Step 6: To ensure SSL for the browser tab that opens up the web portal, generate a self-signed cert with the following command on the jump server/gateway server.
:~# openssl req -new -days 365 -x509 -nodes -newkey rsa:2048 -out /usr/local/etc/ezlogin/tls_cert.pem -keyout /usr/local/etc/ezlogin/tls_key.pem
Note: Make sure that the .pem files are readable by the web server user such as nobody/www-root/apache, etc. An easy way to grant the webuser read privileges would be chmod 644 /usr/local/etc/ezlogin/*.pem
1. php /usr/local/ezlogin/eztool.php -- -install_node_modules -node_component ezproxy
or
2. cd $(awk ’/^system_folder/ {print $2}’ /usr/local/etc/ezlogin/ez.conf)/application/external/ezproxy/&& npm install
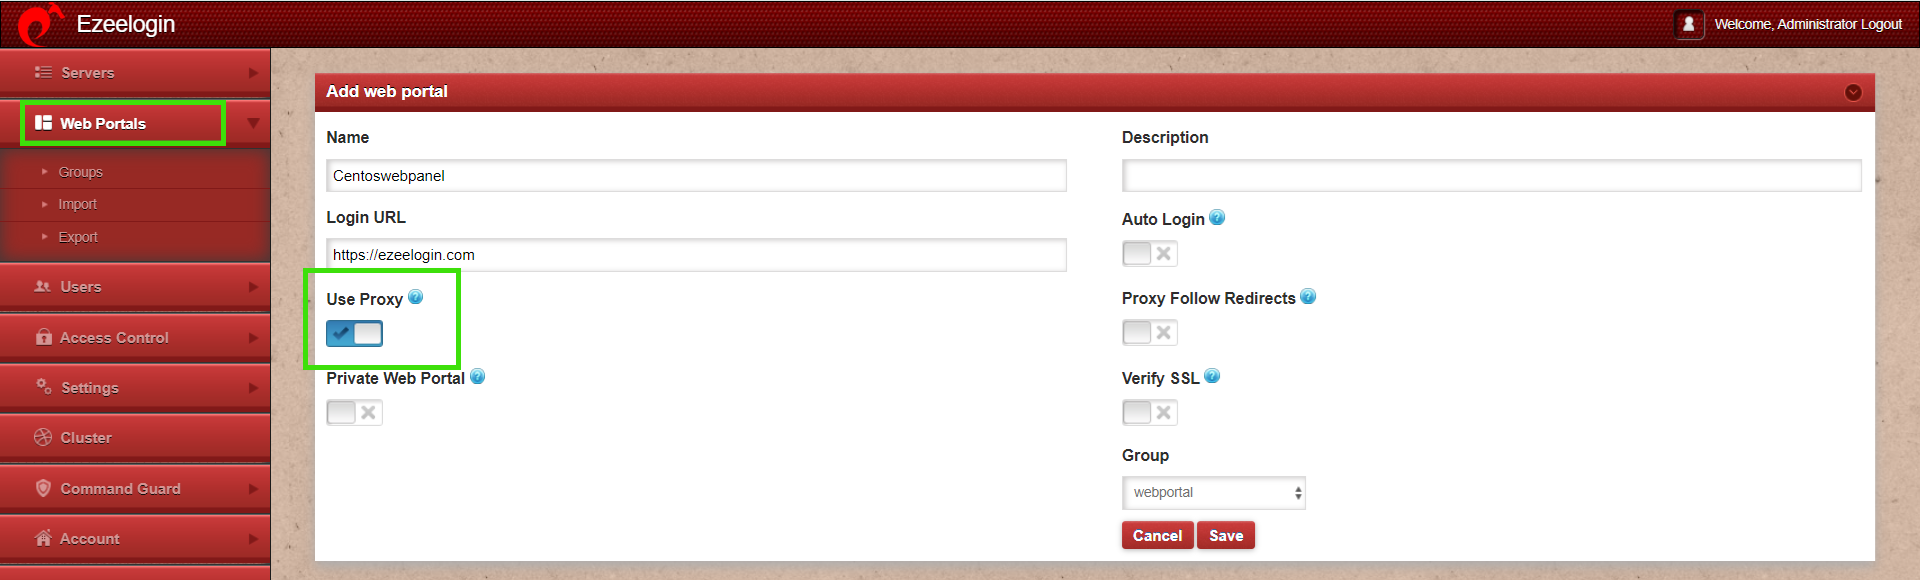
Step 9: Click on the arrow button to load the Web Portal with Useproxy enabled

Troubleshooting steps
Step1: Ensure that Node version is above 19, Kernal >= 4 and NPM Version is >=6
root@gateway:~# npm -v
6.14.6
root@gateway:~# node -v
v21.6.2
Step 2: To get more detailed errors, append log_level trace in ez.conf.
Step 3: After, kill the current running node
root@gateway:~# pkill node
Step 4: Run the below command to get the webportal start command from the latest log file, and then append DEBUG=* at the beginning of the command you get:
root@gateway:~# ( cd $(awk '/^system_folder/ {print $2}' /usr/local/etc/ezlogin/ez.conf)/application/logs/ && less $(ls -t log-*.php | head -n 1) ) | grep -i 'Web Proxy node: PORT'
DEBUG - 2025-05-27 10:19:43 --> start Web Proxy node: PORT=52666 XFWD=1 WS=1 SESSION_TIMEOUT=300000 REQUEST_TIMEOUT=120000 DBP='s}T@2Wrbu(33Ab@@*6Z.m9D@!7' PUPPETEER_CACHE_DIR=/usr/local/ezlogin /usr/local/bin/node /var/www/ezlogin/application/external/ezproxy/index.js >/dev/null 2>&1 &, 0, Array
For example:
root@gateway:~# DEBUG=* PORT=52666 XFWD=1 WS=1 SESSION_TIMEOUT=300000 REQUEST_TIMEOUT=120000 DBP='s}T@2Wrbu(33Ab@@*6Z.m9D@!7' PUPPETEER_CACHE_DIR=/usr/local/ezlogin /usr/local/bin/node /var/www/ezlogin/application/external/ezproxy/index.js
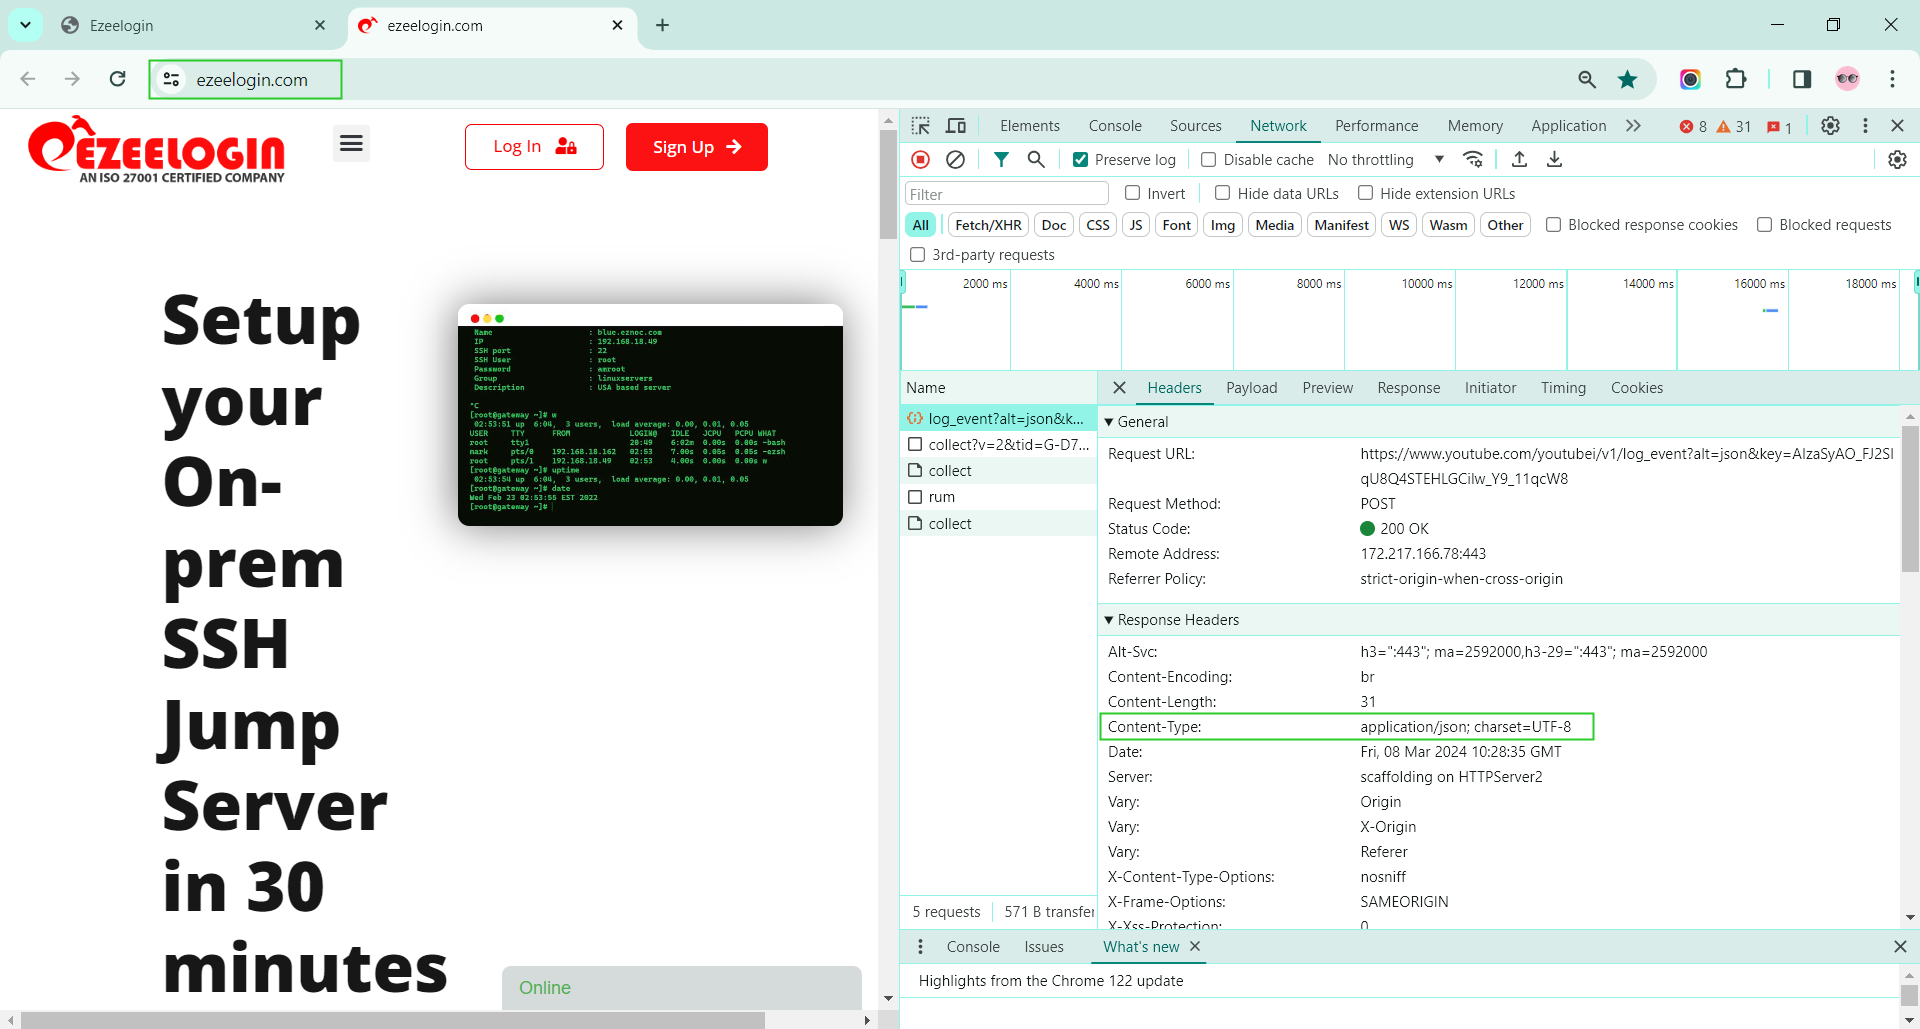
Note: Web portal proxy may not work in all cases such as when the login is javascript-based or when it uses certain dynamic security tokens. The screenshot below shows an example of JSON based web portal
Related Articles:
Webproxy, Webpanel, Webportal, Controlpanel
Unauthorized IP address when using proxy
Increase web proxy session timeout