How to install OpenLDAP and phpLDAPadmin on ubuntu?
Install OpenLDAP and LDAP Admin on Ubuntu
Overview: This article guides you through installing OpenLDAP and LDAP Admin on Ubuntu. It includes setting the hostname, installing OpenLDAP, adding base DNs, installing phpLDAPadmin, accessing the admin dashboard, troubleshooting common errors, and creating groups and users in LDAP.
Make sure to set your system hostname and add it to file /etc/hosts. Replace admod.ezeelogin.com with your hostname or valid domain name.
root@ubuntu:~# hostnamectl set-hostname admod.ezeelogin.com
root@ubuntu:~# vi /etc/hosts
192.168.1.11 admod.ezeelogin.com
root@ubuntu:~# apt update
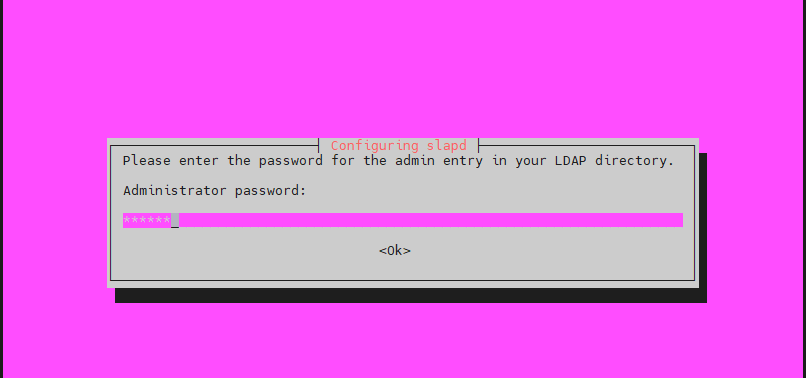
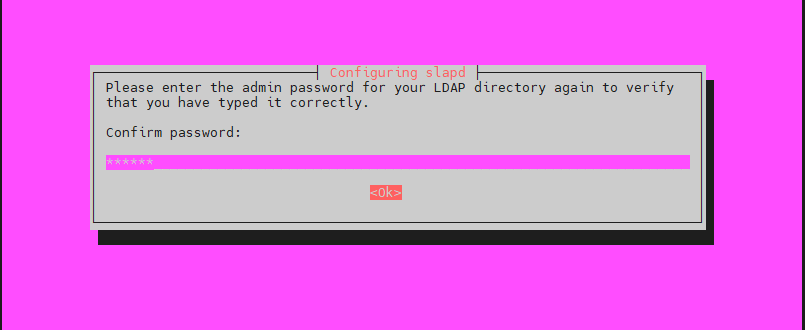
root@ubuntu:~# apt -y install slapd ldap-utils
root@ubuntu:~# slapcat
dn: dc=com
objectClass: top
objectClass: dcObject
objectClass: organization
o: com
dc: com
structuralObjectClass: organization
entryUUID: 5eeea770-459c-103b-9cad-53d18c55e0b0
creatorsName: cn=admin,dc=com
createTimestamp: 20210510052901Z
entryCSN: 20210510052901.084178Z#000000#000#000000
modifiersName: cn=admin,dc=com
modifyTimestamp: 20210510052901Z
dn: cn=admin,dc=com
objectClass: simpleSecurityObject
objectClass: organizationalRole
cn: admin
description: LDAP administrator
userPassword:: e1NTSEF9Z0V1WnUzU2M5bENGcnJxWWFoZGtLRjNKc09DbFU3V3A=
structuralObjectClass: organizationalRole
entryUUID: 5eef2bf0-459c-103b-9cae-53d18c55e0b0
creatorsName: cn=admin,dc=com
createTimestamp: 20210510052901Z
entryCSN: 20210510052901.087602Z#000000#000#000000
modifiersName: cn=admin,dc=com
modifyTimestamp: 20210510052901Z
root@ubuntu:~# vi basedn.ldif
dn: ou=people,dc=ezeelogin,dc=com
objectClass: organizationalUnit
ou: people
dn: ou=groups,dc=ezeelogin,dc=com
objectClass: organizationalUnit
ou: groups
root@ubuntu:~# ldapadd -x -D cn=admin,dc=ezeelogin,dc=com -W -f basedn.ldif
Enter LDAP Password:
adding new entry "ou=people,dc=ezeelogin,dc=com"
adding new entry "ou=groups,dc=ezeelogin,dc=com"
root@ubuntu:~# apt -y install apache2 php php-cgi libapache2-mod-php php-mbstring php-common php-pear
root@ubuntu:~# a2enconf phpX.X-cgi
root@ubuntu:~# service apache2 reload
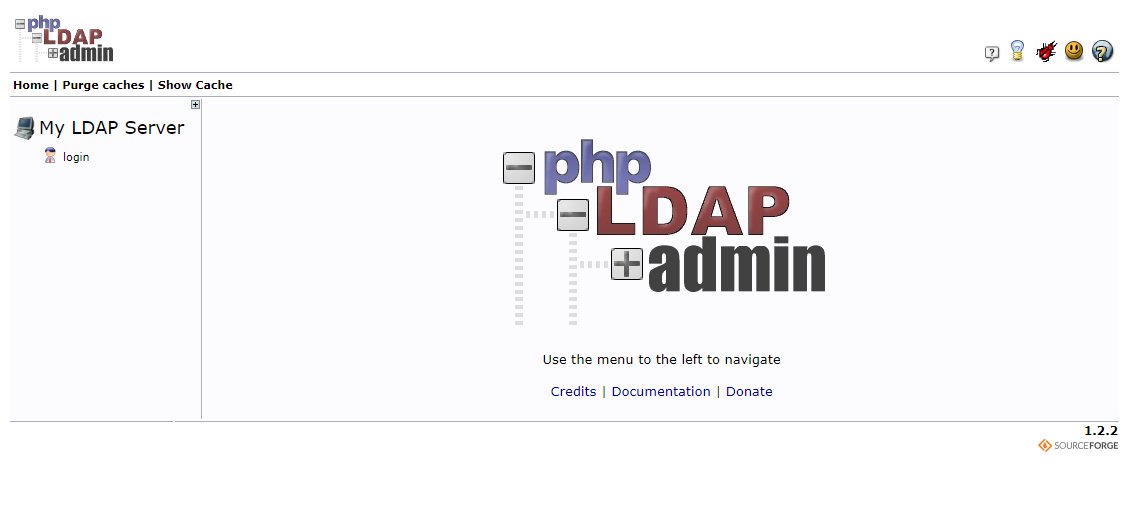
root@ubuntu:~# apt -y install phpldapadmin
http://(server 's hostname or IP adress)/phpldapadmin
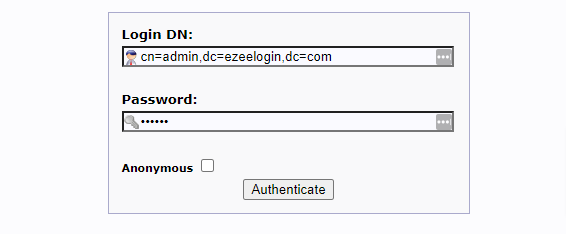
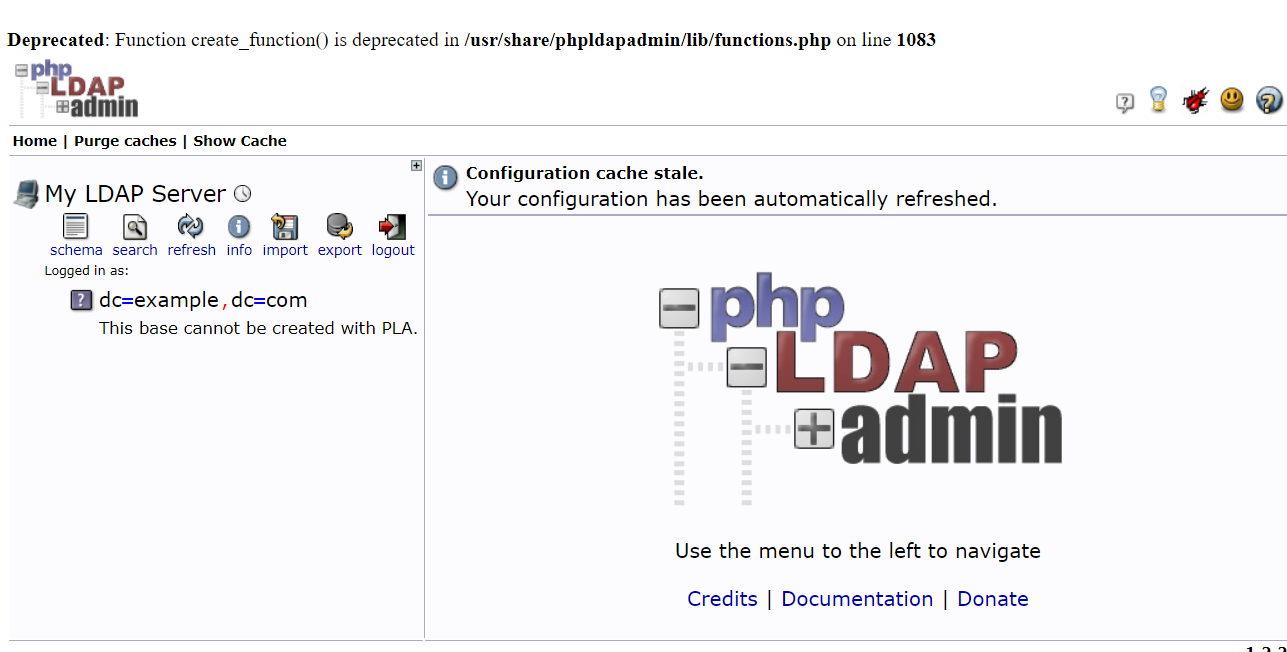
Note:
If you get the below error message on the dashboard, edit the /etc/phpldapadmin/config.php file. Somewhere near line 300, you'll find the following lines, replace Example and com with your basedn to clear the error message.
vi /etc/phpldapadmin/config.php
$servers->setValue('server','base',array('dc=example,dc=com'));
$servers->setValue('login','bind_id','cn=admin,dc=example,dc=com');
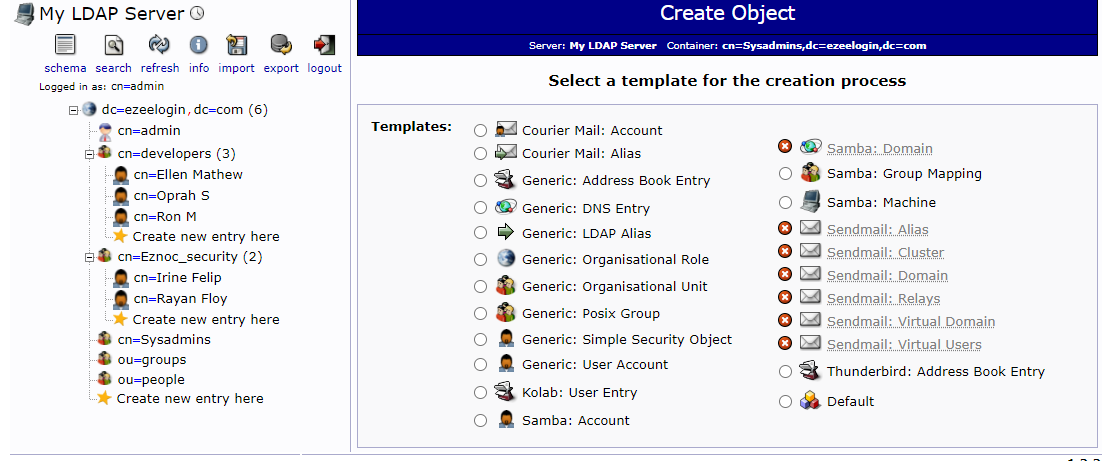

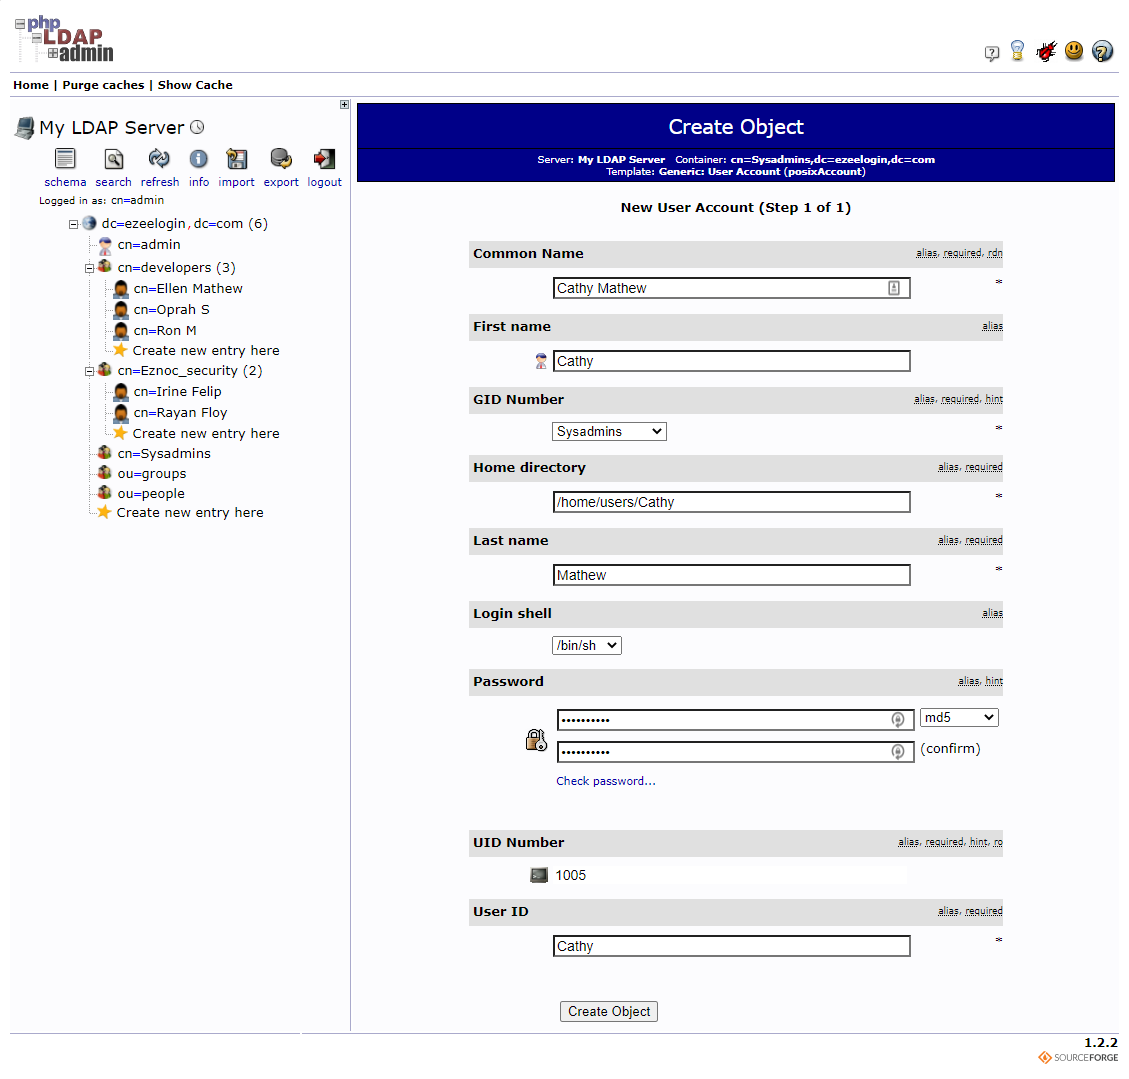
Click on the create a child entry and select Generic: User Account. Specify the username, select the GID Number from the drop-down menu, provide home directory, Password, user ID and then click on create Object to create the user.
Related Articles: