DNS load balancing for HA using AWS Route 53
How to implement DNS load balancing in Ezeelogin cluster for high availability (HA)?
Overview: This article explains how to implement DNS load balancing in an Ezeelogin cluster using AWS Route 53 to achieve high availability (HA), by directing traffic between a primary and a hot-standby secondary node based on DNS weight configuration and health checks.
In the following example we will configure the hostname gateway.cloudweg.com to point to the primary node (primary.cloudweg.com/65.0.103.183) using weights in the DNS load balancer (Route 53). In the event of failure of the primary node the traffic would be directed to the secondary node (secondary.cloudweg.com/3.109.185.205) which is in the hot standby mode.
The node secondary.cloudweg.com needs to be switched to the master state to perform read/write operations.
Refer article to switch the node states
Diagram explaining DNS weight distribution:
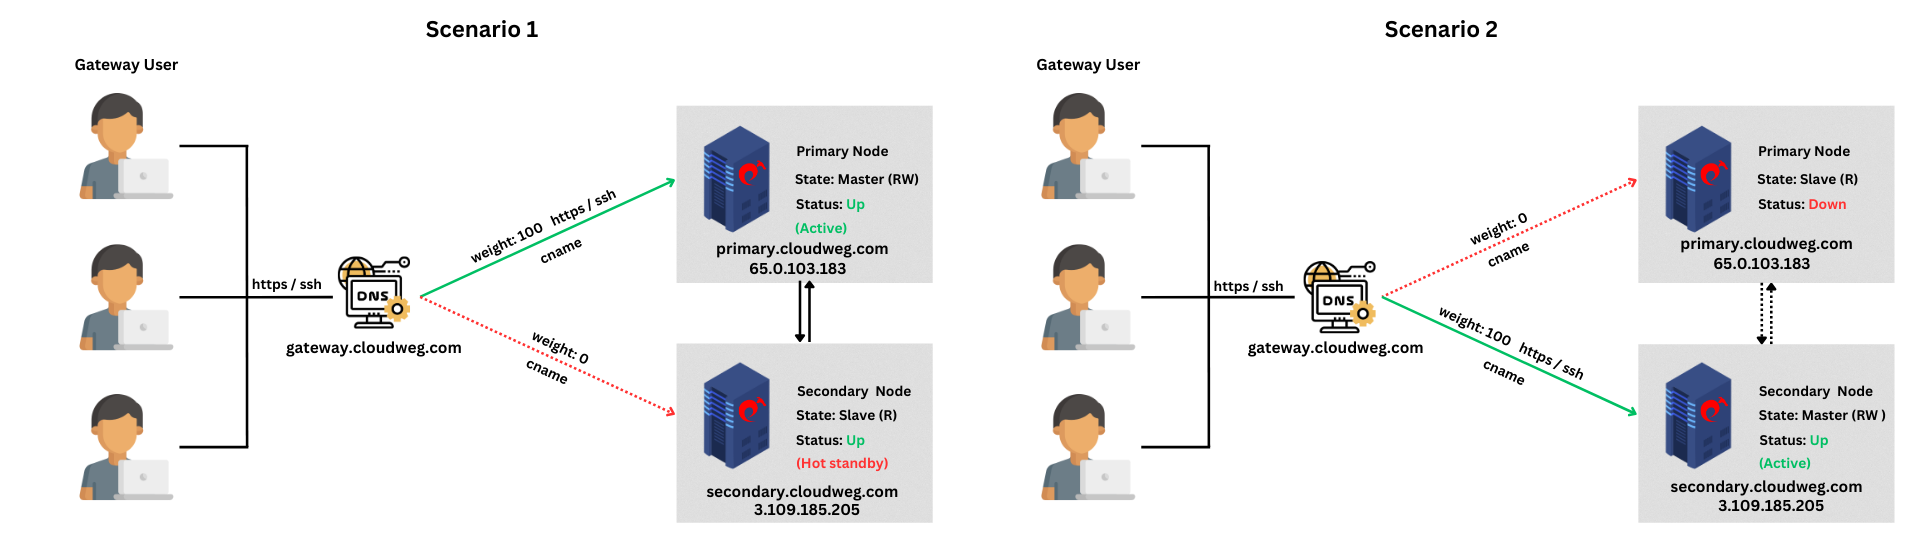
Scenario 1: Primary node is in active state and secondary is in the hot standby mode. Traffic is routed to the primary node.
Scenario 2: Primary node is down and secondary node is in the active state. Traffic is routed to the secondary node.
Steps to set the DNS in AWS Route 53:
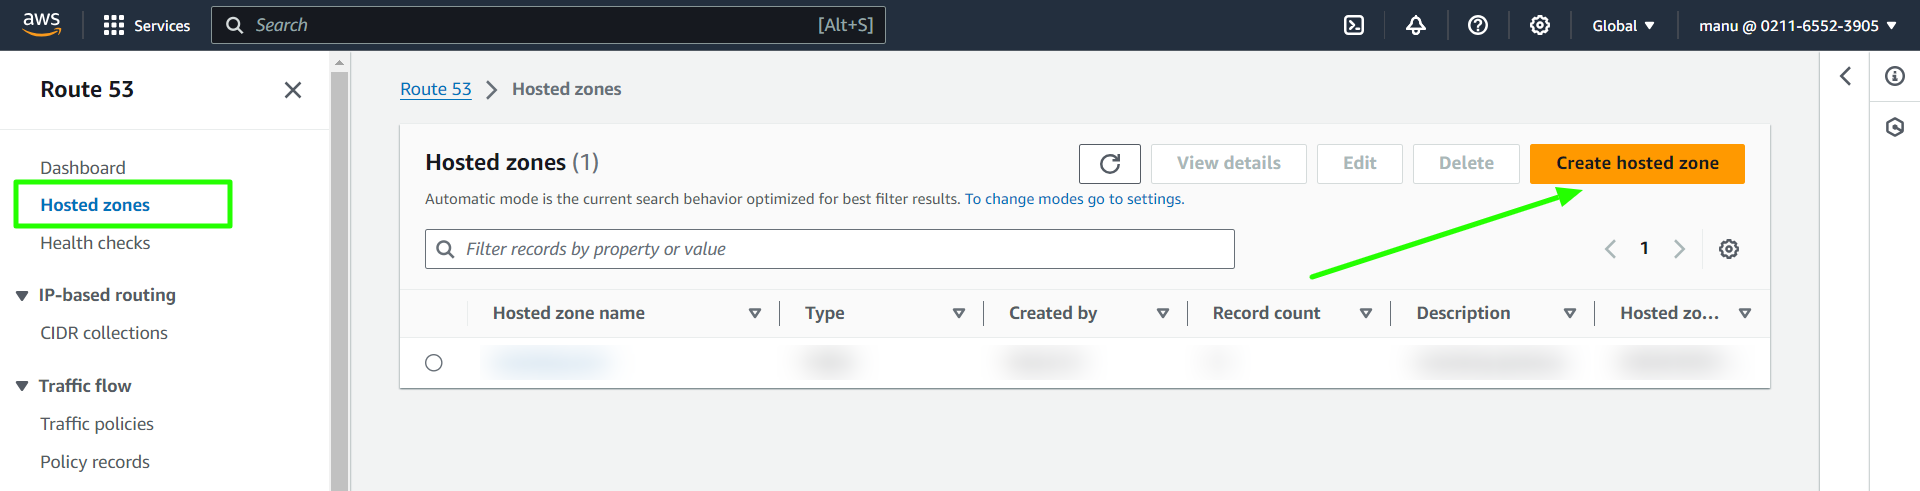
Step 1: Login to AWS account and search for Route 53.

Step 2: Select Hosted zones and create new hosted zone.
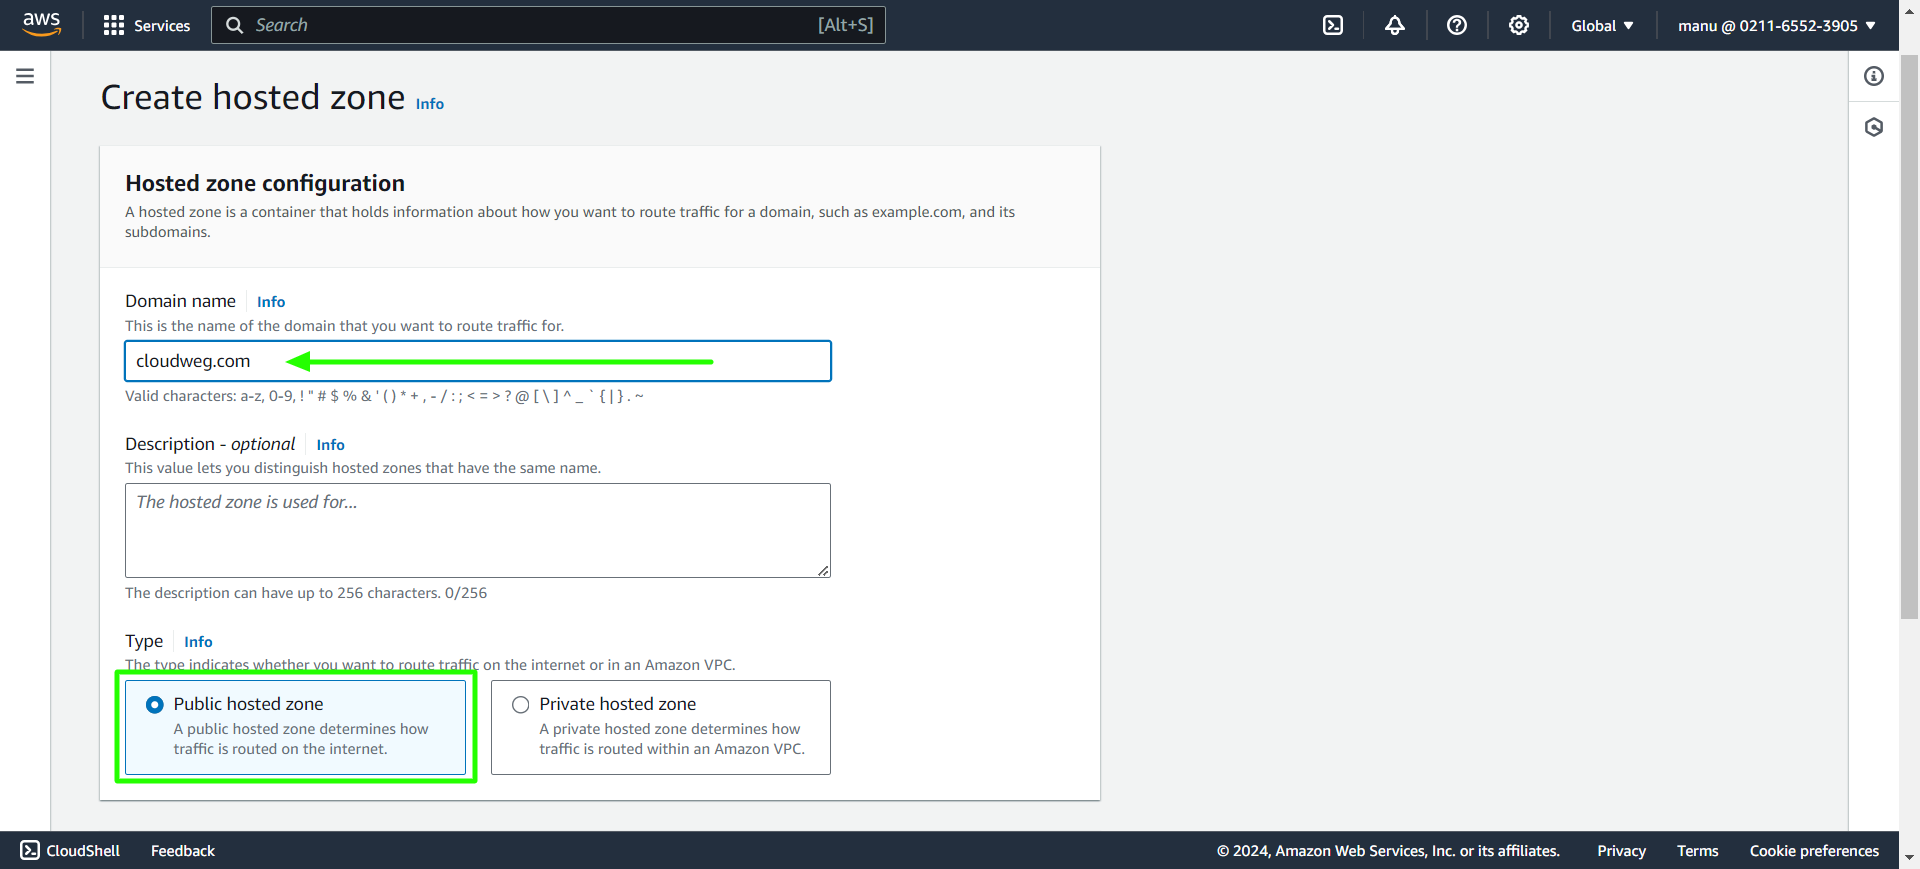
Step 3: Provide domain name in hosted zone configuration and select public hosted zone.
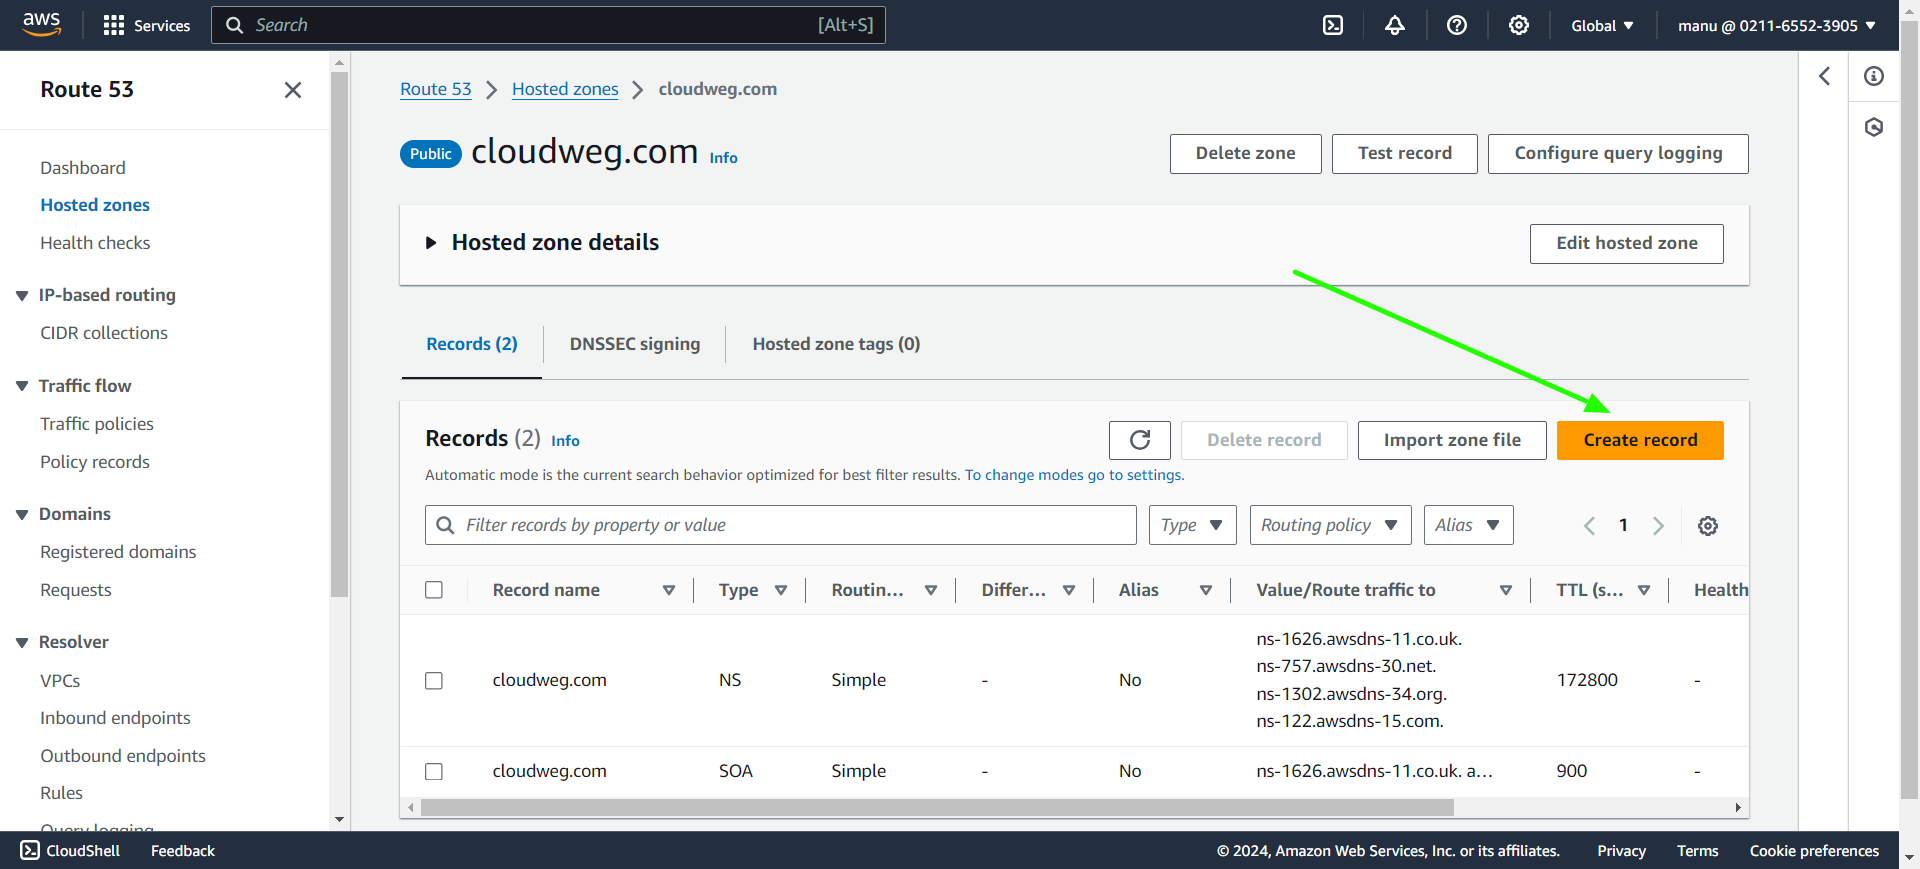
Step 4: Create new record under new domain name created.
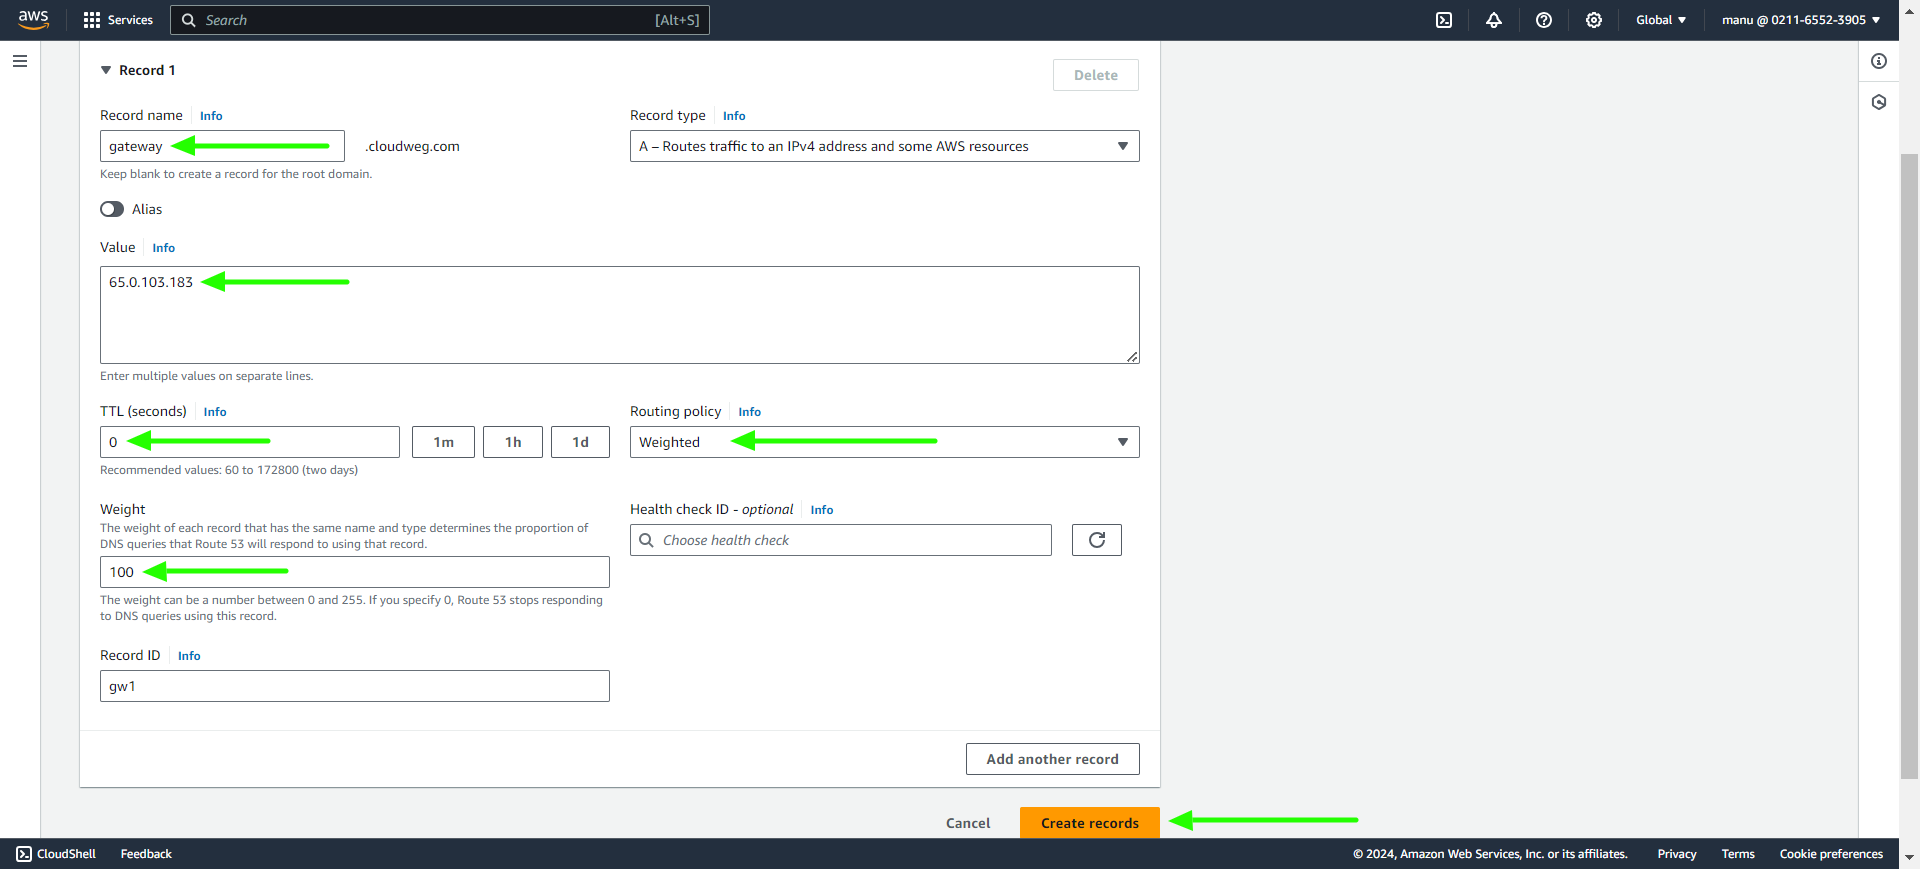
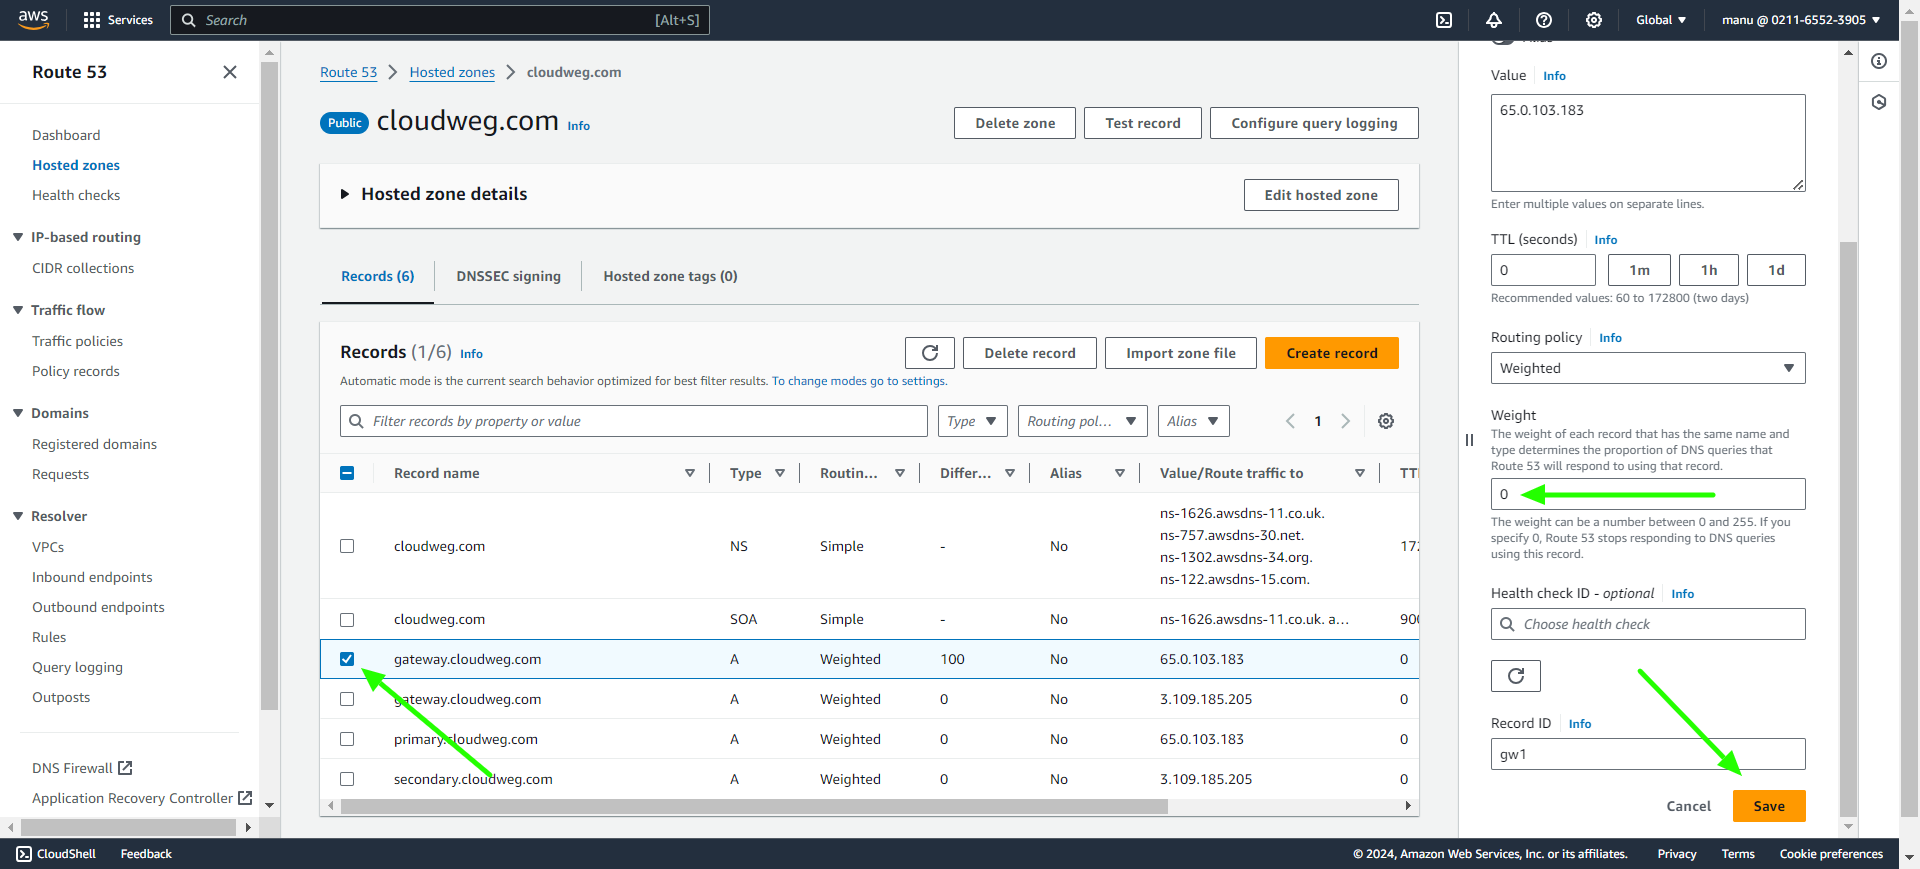
Step 5: Provide the name of the record to be used for calling Ezeelogin. Paste the public IP of the primary node, set the TTL seconds to 0, choose the routing policy as weighted with a weight of 100, provide the record ID, and then proceed to create the record.
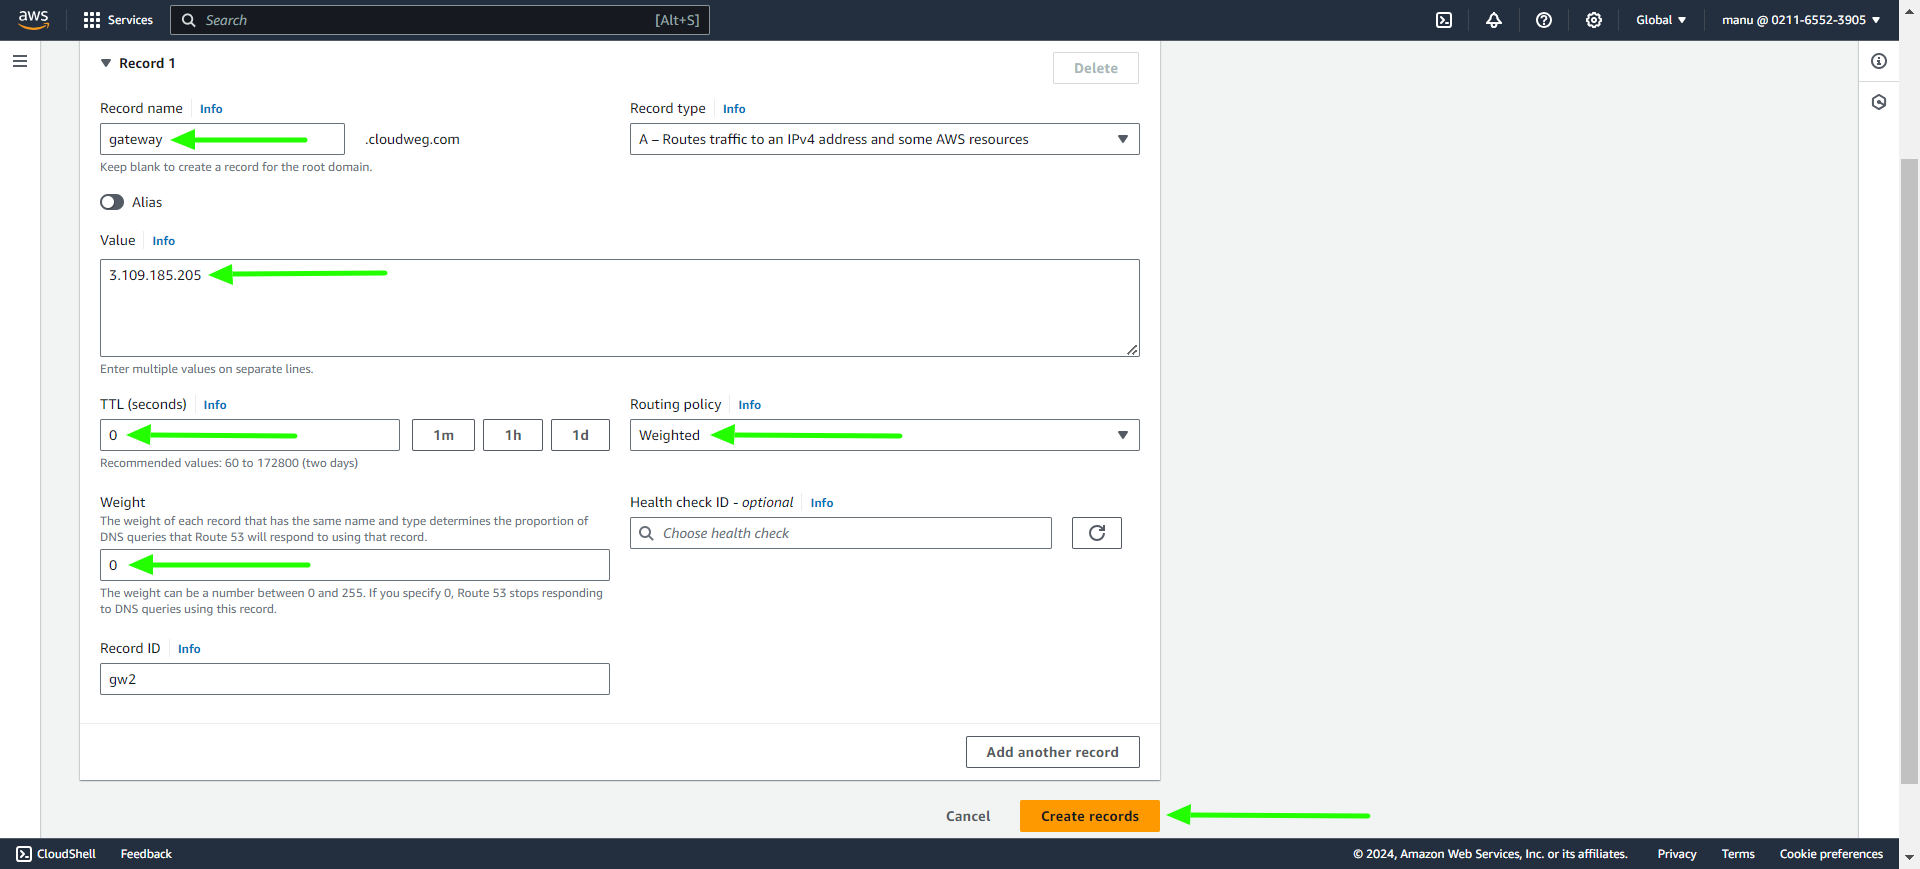
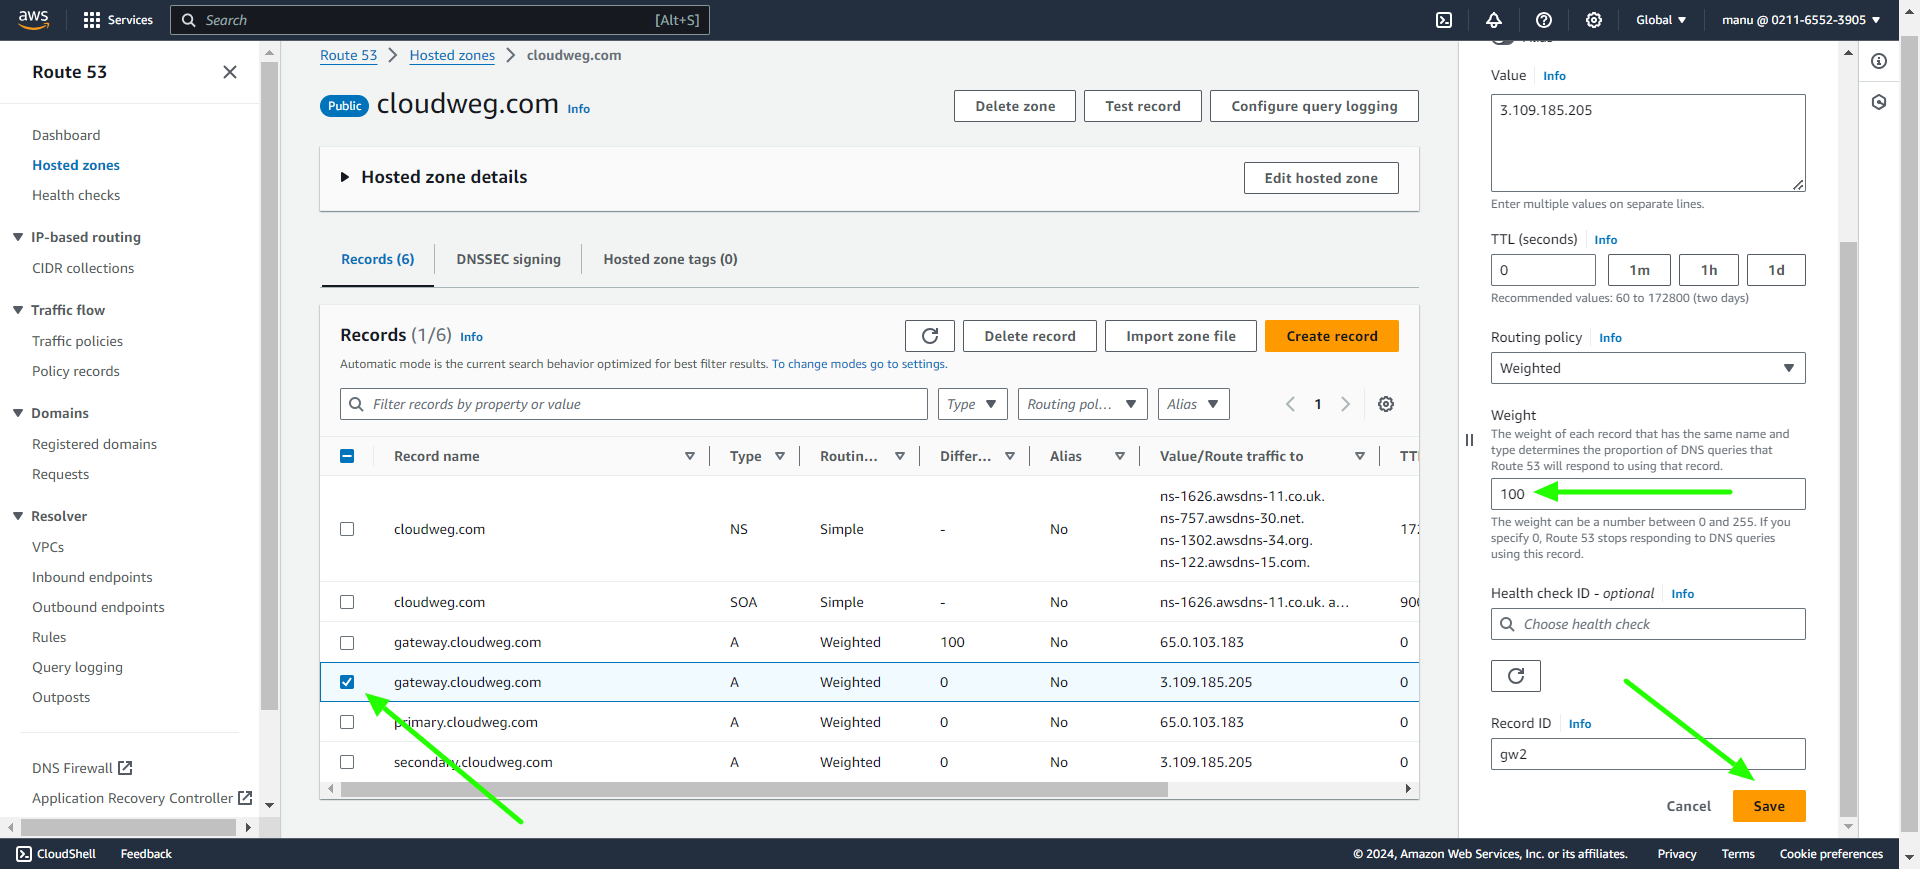
Step 6: Provide the same name of the record to be used for calling Ezeelogin. Paste the public IP of the secondary node, set the TTL seconds to 0, choose the routing policy as weighted with a weight of 0, provide the record ID, and then proceed to create the record.
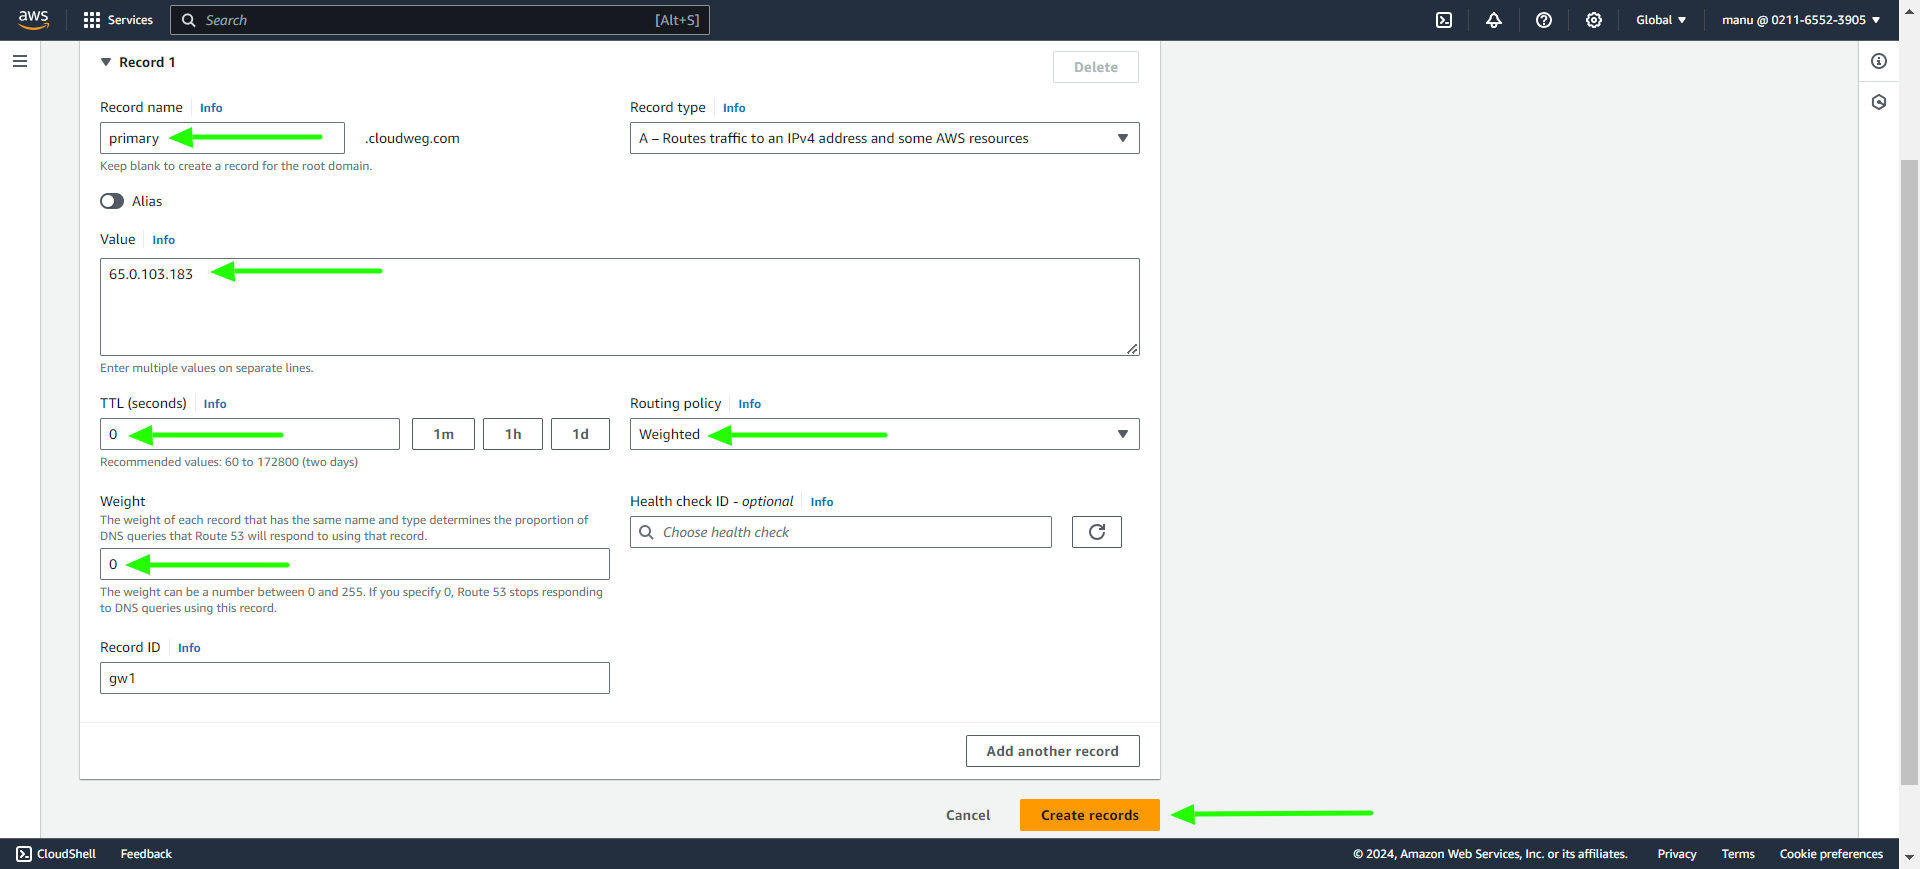
Step 7: Create another record for primary with primary public IP.
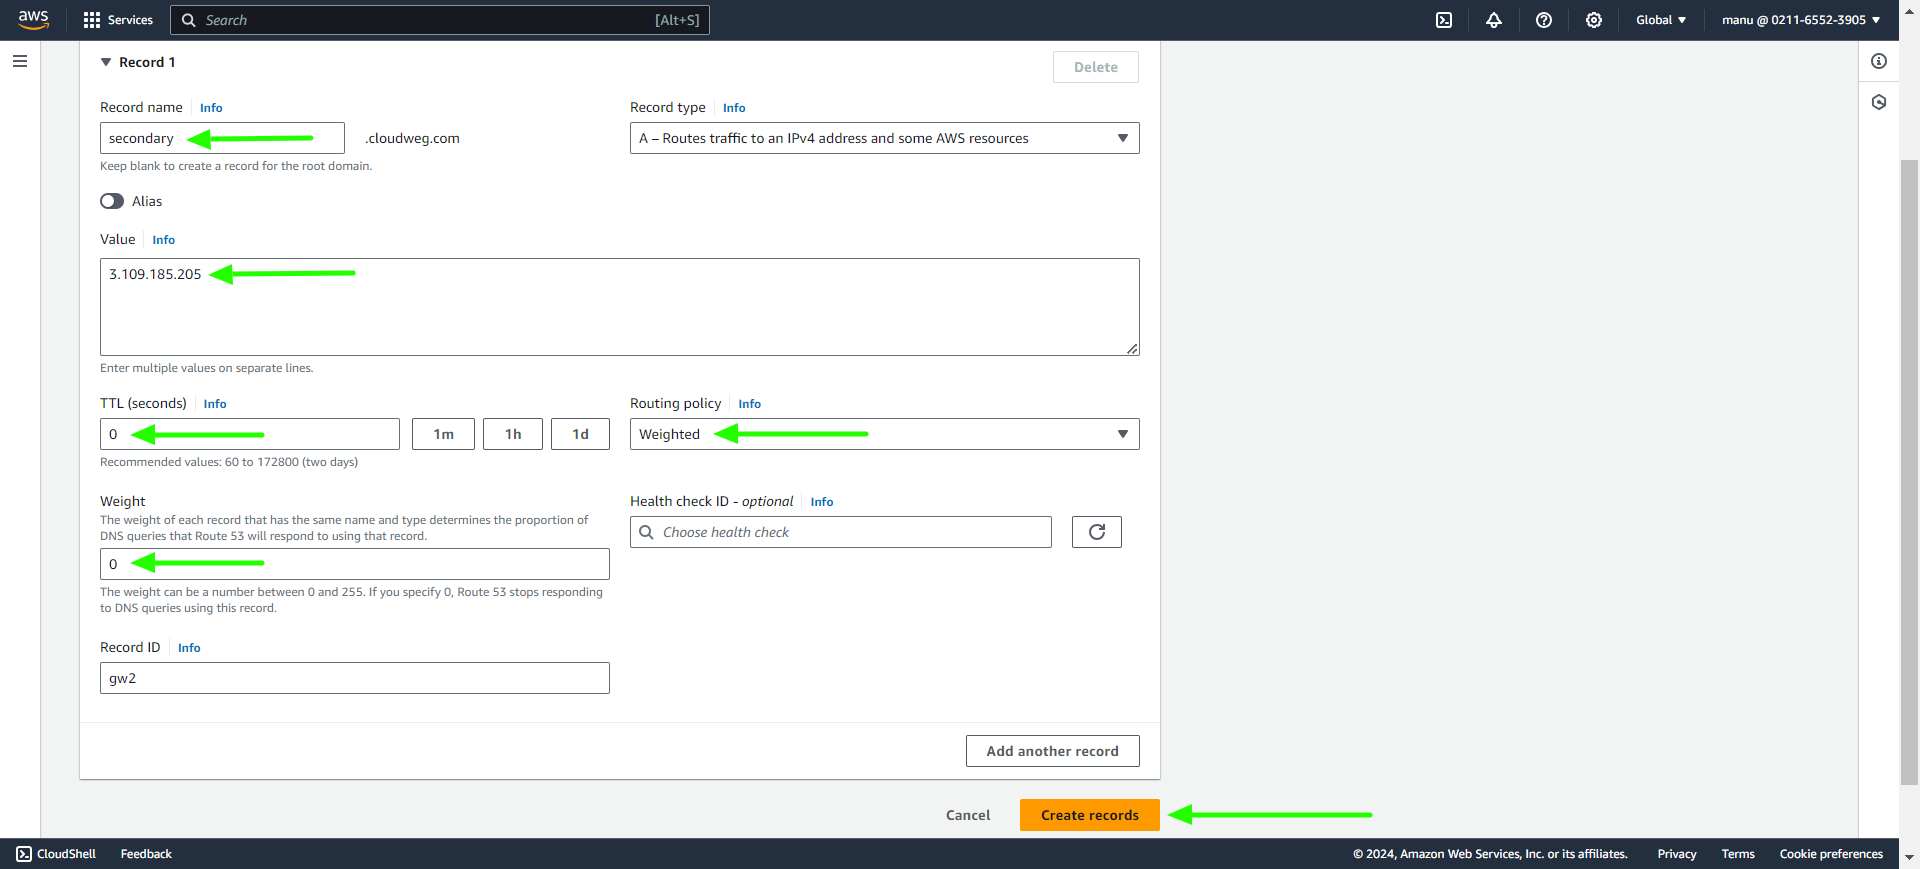
Step 8: Create another record for secondary with secondary public IP.
Step 9: Created records can be viewed under hosted zones.
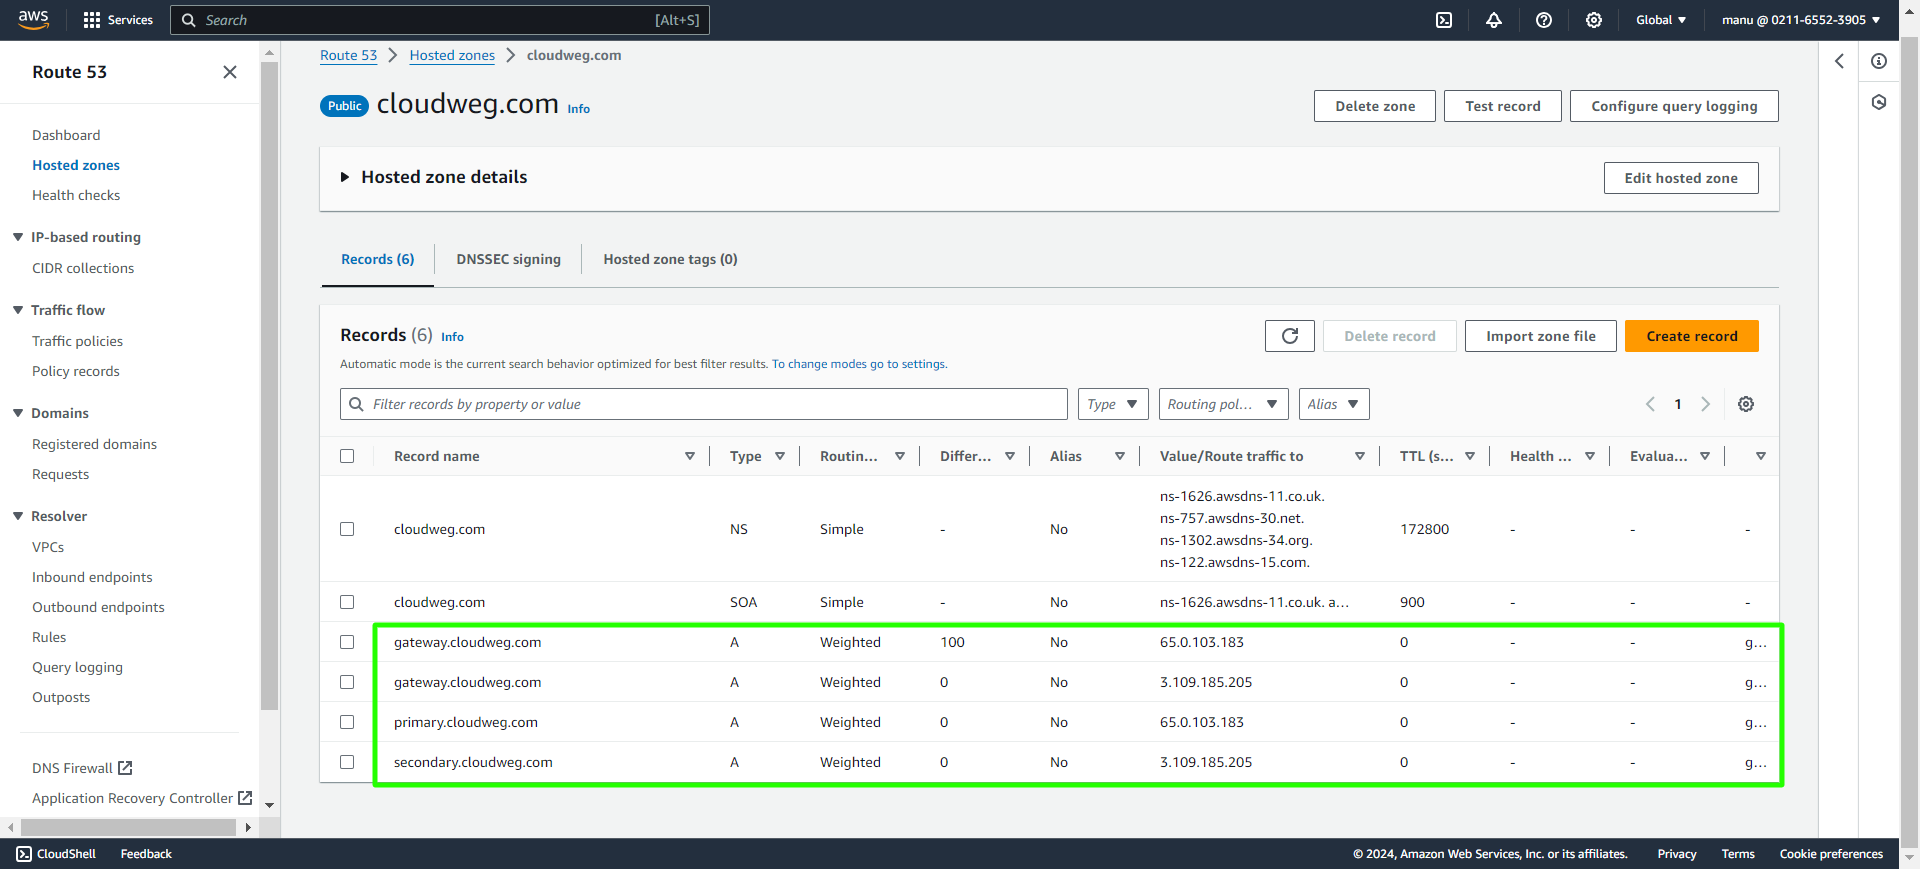
Step 10: To change the weight, select the secondary record -> edit record -> change weight to 100 and save.
Select the primary record -> edit record -> change weight to 0 and save.
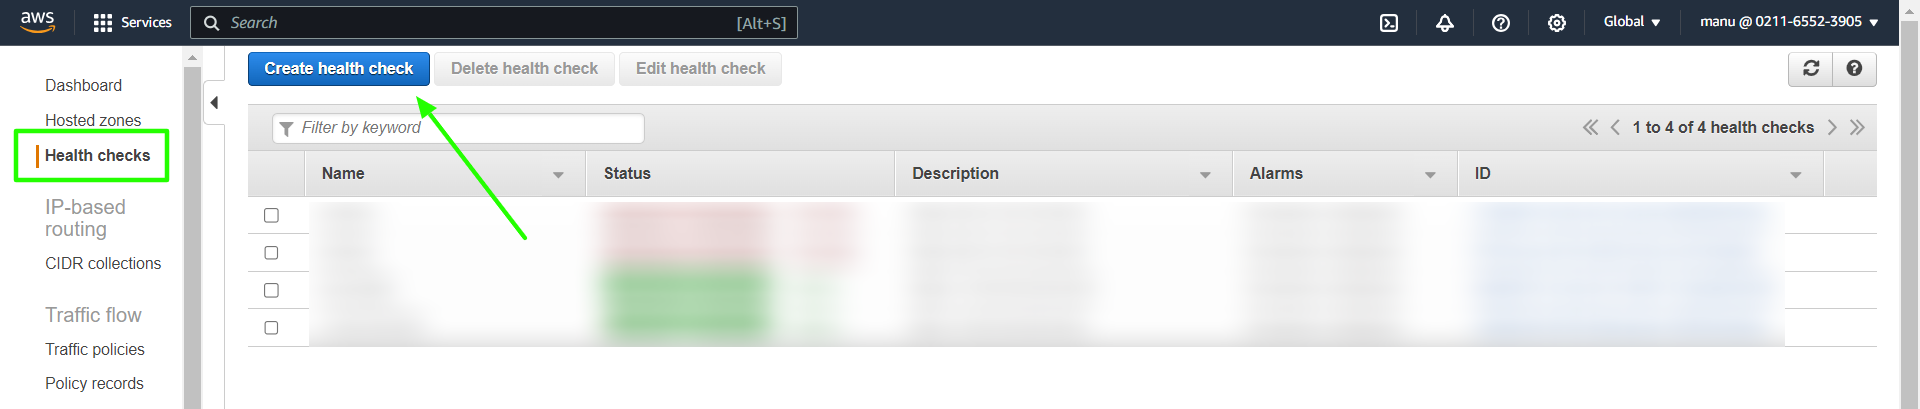
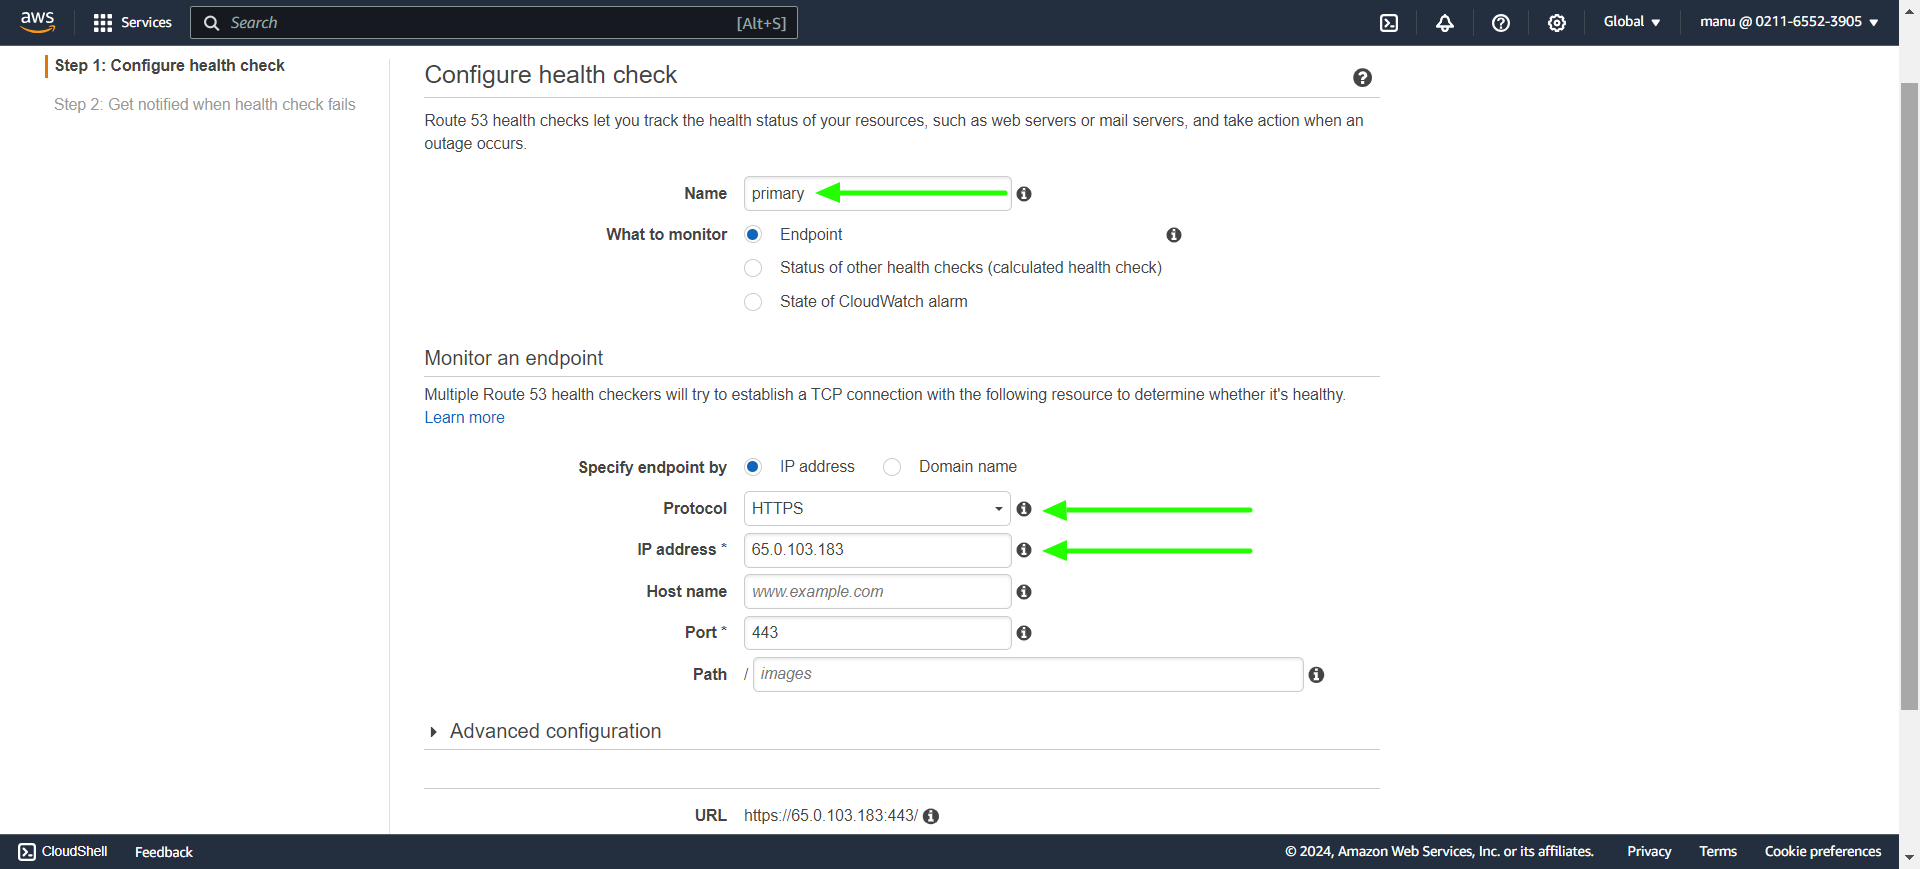
Step 11: Click on health checks and create new health check for both primary and secondary.
Provide a name for the primary health check settings, select the protocol, paste the public IP of the primary node, and then save the settings.
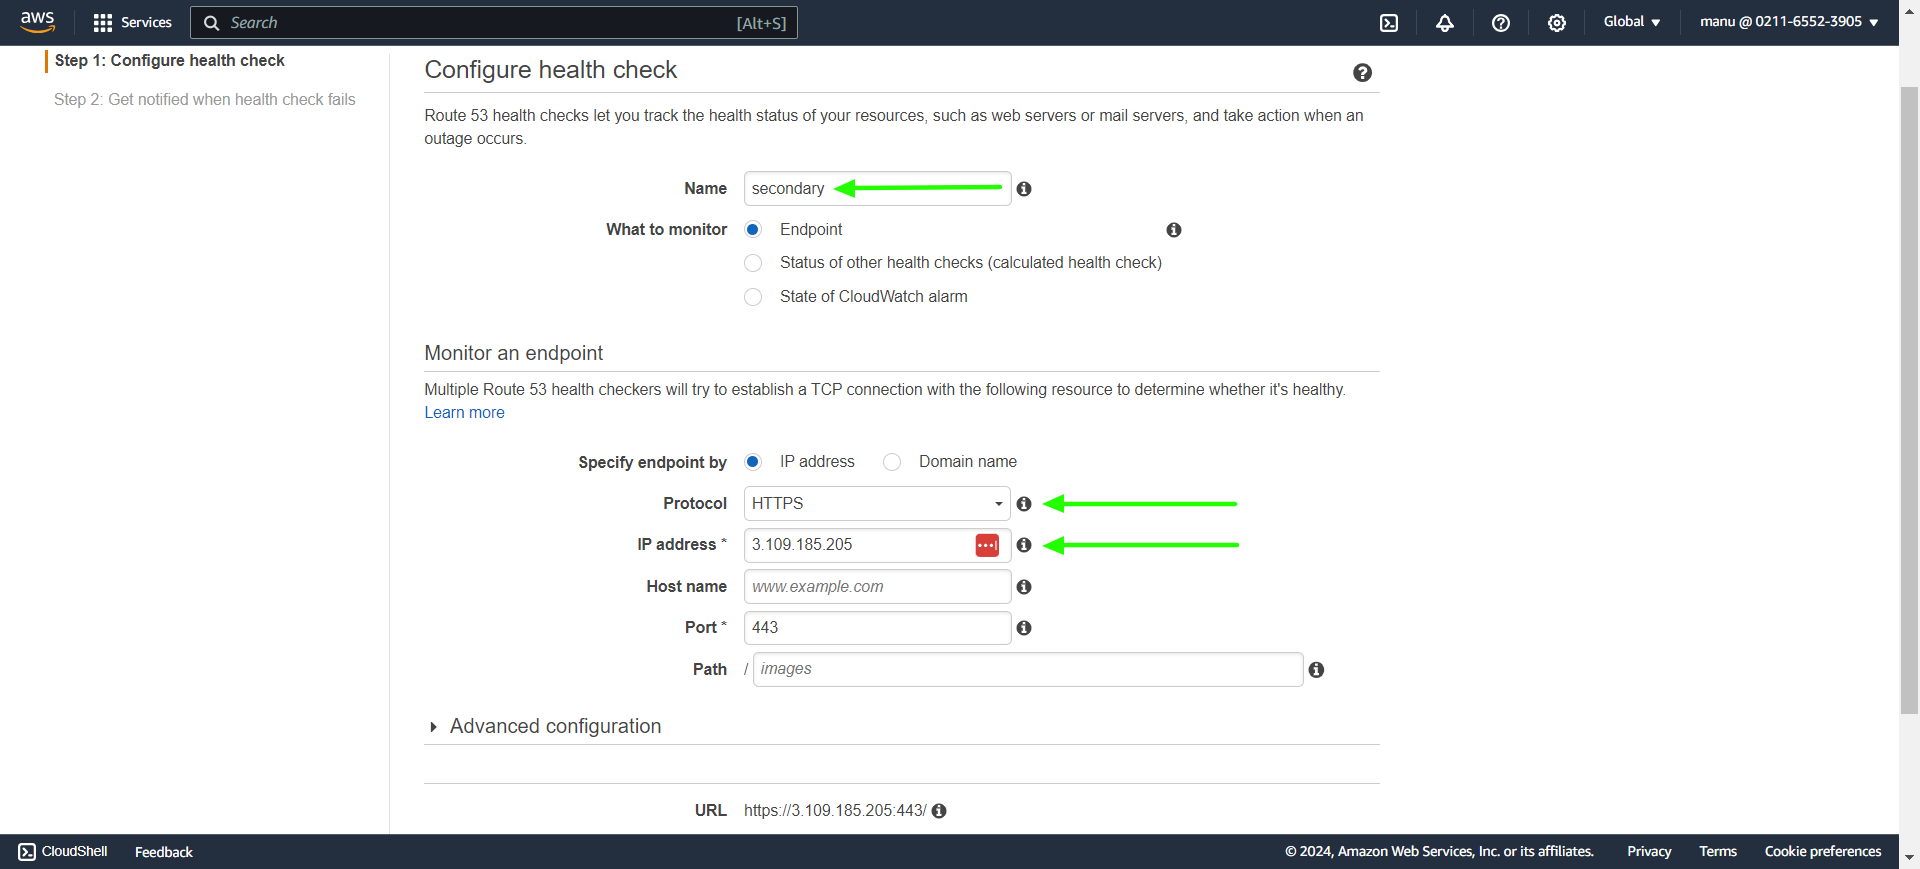
Provide a name for the secondary health check settings, select the protocol, paste the public IP of the secondary node, and then save the settings.
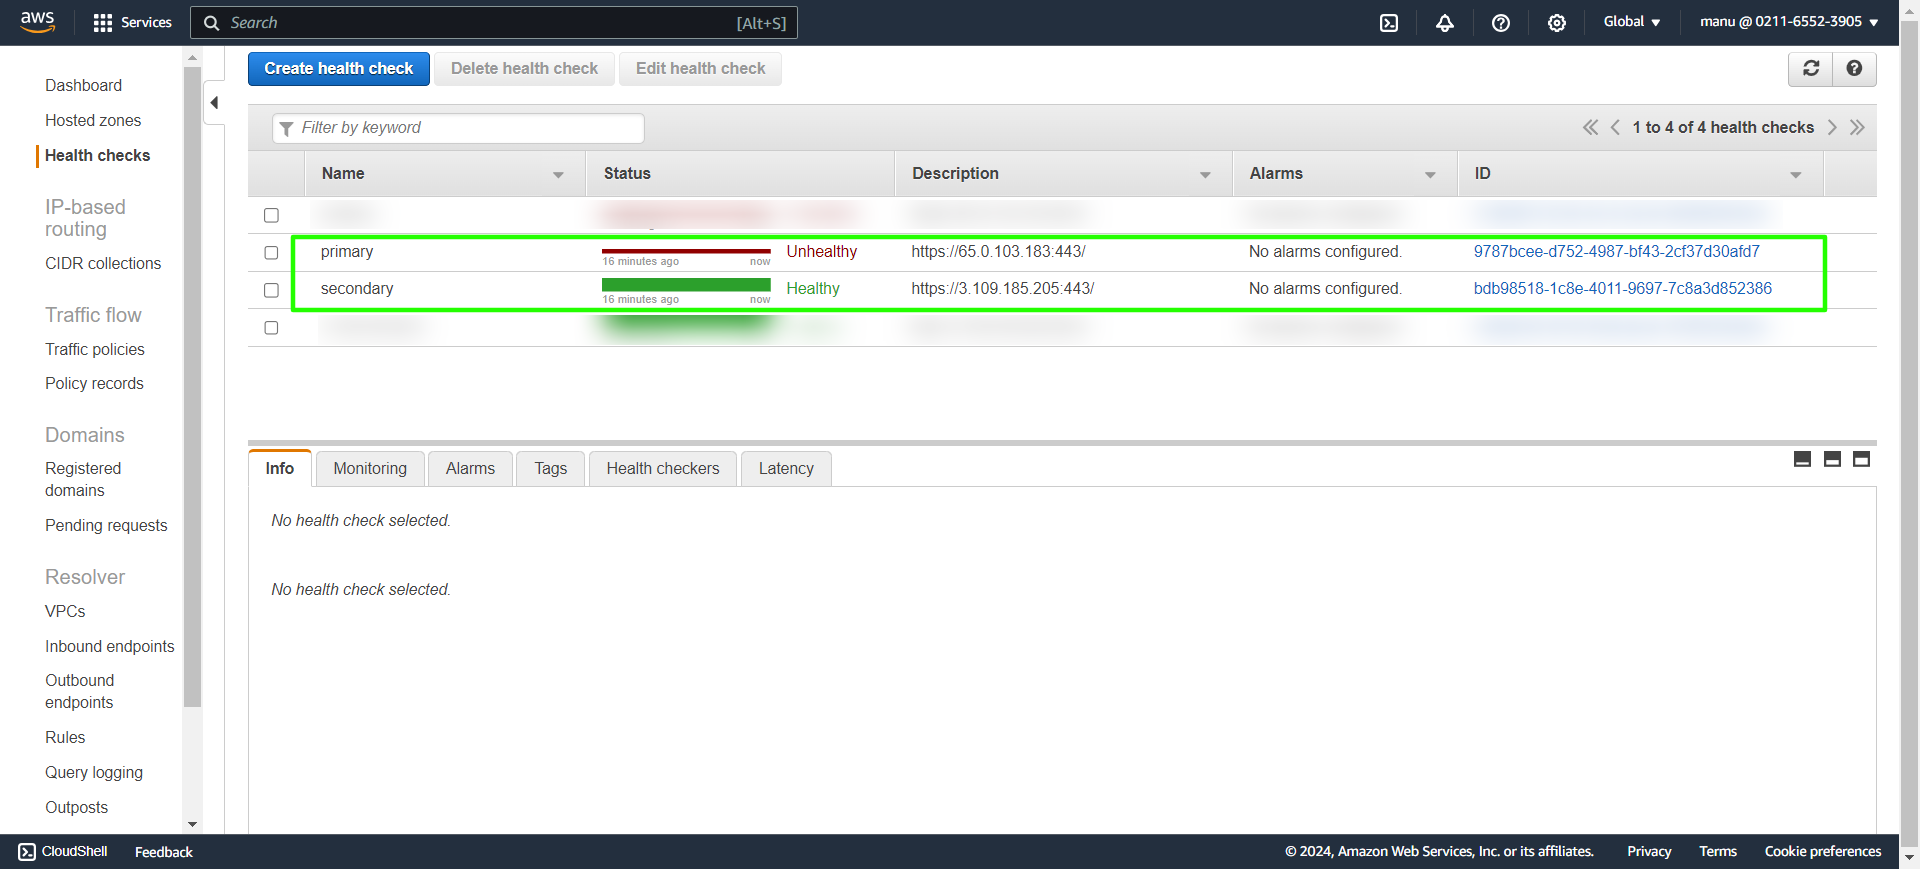
Step 12: The health check settings have been created, and their status can be viewed in the health checks tab.
Step 13: Now gateway server can be access with gateway.cloudweg.com and according to the weight distribution the primary or secondary node can be accessed.
Related Articles:
Install slave / secondary node for high availability in jump server
Cluster (Master-Slave) explained in Ezeelogin