Add a server using ssh key pair in ezeelogin
How to add a server using ssh key pair in Ezeelogin?
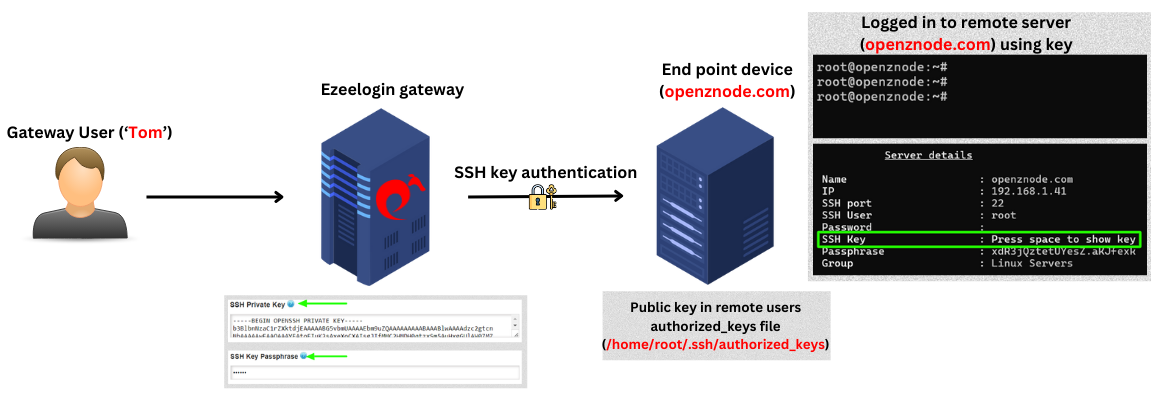
Overview: This article guides gateway users through the process of adding a remote server to a jump server (gateway server) using an SSH key pair. It also explains how to add a gateway server using Ezeelogin's global key, enabling users to add a remote server without needing to enter a password.
1. How to add a Linux server using private keys?
Step 1(A): Create a ssh key pair on the server using the below command:
/root/.ssh/id_rsa already exists.
Overwrite (y/n)? y
Enter passphrase (empty for no passphrase):
Enter same passphrase again:
Your identification has been saved in /root/.ssh/id_rsa.
Your public key has been saved in /root/.ssh/id_rsa.pub.
The key fingerprint is:
SHA256:eUKBEdUlDVzQgCKT3QHBVwHHCH0IjWa8cDdNkRBrvZM root@ipa.server.com
The key’s randomart image is:
---[RSA 2048]----
| =B#B/@%o |
| = @ @=B.o |
| B = o. |
| .o . o |
| S E |
| o . |
| |
| |
| |
----[SHA256]-----
Now, the public key has been saved in the file /root/.ssh/id_rsa.pub and private key in /root/.ssh/id_rsa.
You can skip step 1(A) if you already have your own SSH key pair.
Step 1(B): Click on the servers tab and then click on add server on the right.

Step 1(C): Fill in the details of the server to be added. Copy the private from /root/.ssh/id_rsa and paste the entire private key into the SSH Private Key field without providing the password. Also, provide the exact SSH Key passphrase used during the key generation (leave blank if no passphrase was used).
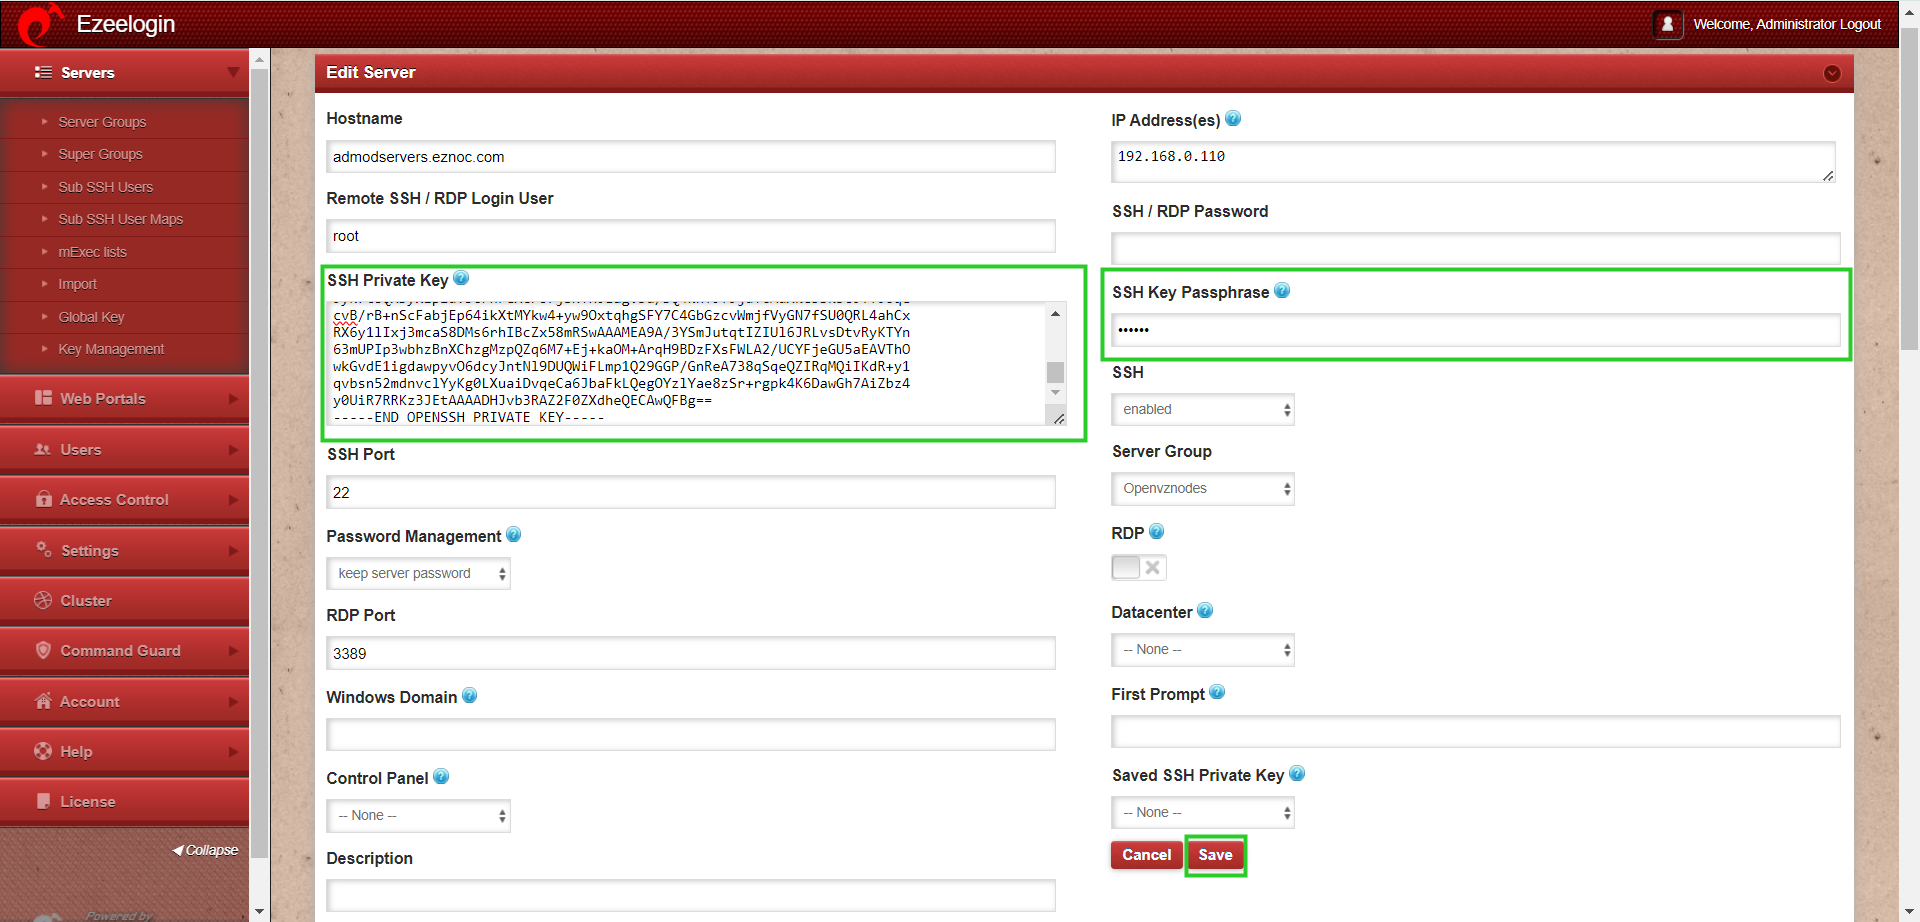
While adding private key make sure to add the entire key including "BEGIN RSA PRIVATE KEY" and "END RSA PRIVATE KEY". Even a missing "-" could result in corrupted key.
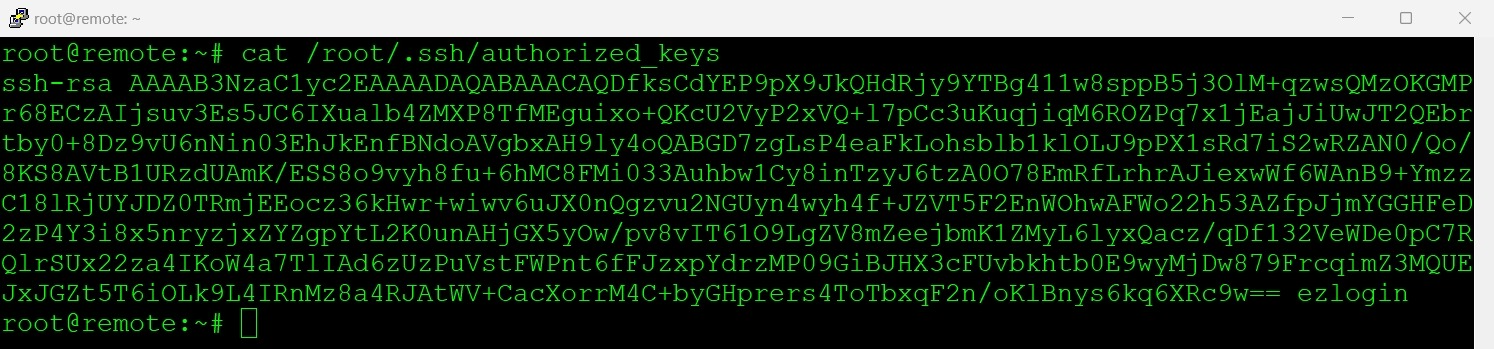
root@remote_server:~# vi /root/.ssh/authorized_keys
ssh-rsa AAAAB3NzaC1yc2EAAAADAQABAAACAQCzCOoNRS9t6Eg86XMmnH9V8irlmDQn+G1x+d41aIEwrgllgrfCHe1QwJeTUhME7SnarbjmVLQfYuSVLpb0BtFoqdHQXY/Kp6yuyuJWsRntiPzH5YuVhN0zaITdmnmALTLip9A9hi+pbMy51tDAwJCJPJjvf51VW313ddG9lxmWbzHTHbIQHwV0TPFP8lj2BDDCSL5nw+2QiQ+R36GI8YVpn0aB1RqRMCPyE+lWJOsvfRs+SvUawkbUgTCg9nhEBPb/Xj1INtZnU6A0J2T6mk5tsMb70pEvDWbd6QPpwhOo/3UT5vk5Qt4Q+RBKyheS6jP7lhlpfG9cwtqYRmZ3n74f8qnmwiRCVppiRmSW6YepM0/KoL1byk7RVbaiYWxQZJwdiH/Xfda/nGji6cb0mrsBxKV7QXpF/kstlMQ7zT5HoEGXRYRN4rll+ekCFnpFkCjZ75ss+hOwrmd1iW9luiGdHiV3aQaGTMxWqD48OXXZuoAeC6NVE5LEiqRbOn4W3KPDky4b490UedMhpRdhVXm+Ow3GQJgCPOGqbPP2Huftxn5ZIm3XGfW85J4SsChQ+b3jrxeZF5h/e+nrYWqoTbPxH7DCWVRoI1lu174eBkdUR5oJc4C5v5qTbyzqNE6WK3jsgcazfK32eabCyKfH2AeKAGZM1o4Zn3MozmGFKfNrw
ssh -p <port_number> <gateway_user>@<gateway_ip>
Example: ssh ezadmin@192.168.0.110


Step 2(A): Copy the public key (global key) of Ezeelogin from the GUI or from backend which is under /usr/local/etc/ezlogin/id_key.pub.
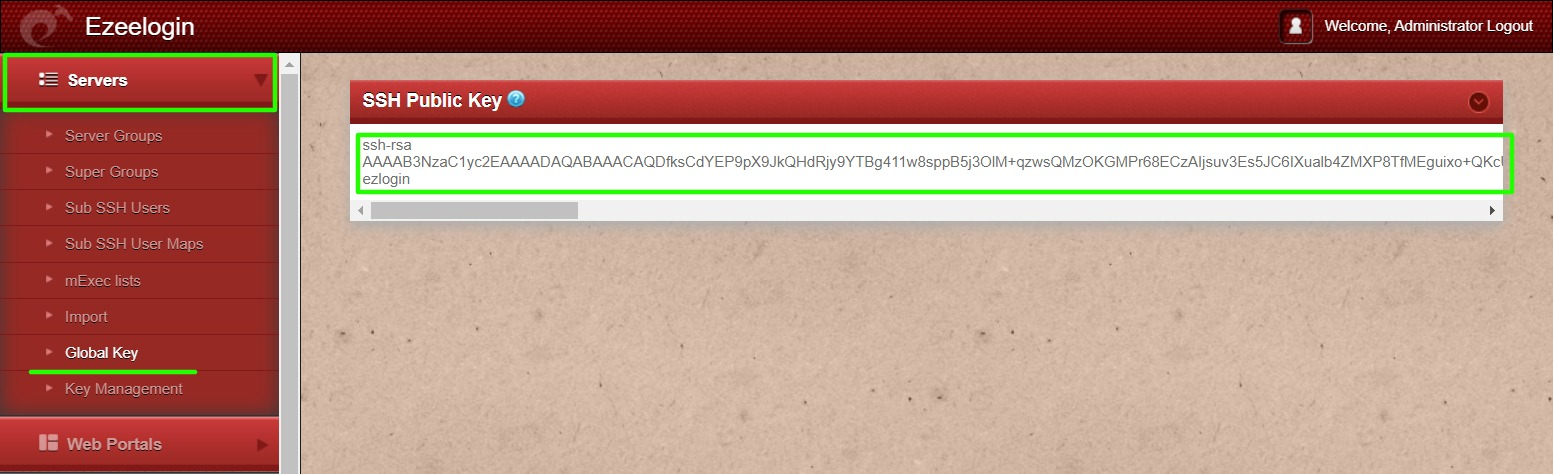

Step 2(B) Paste the global key inside the authorized_keys of the user in the remote server.
ssh -p <port_number> <gateway_user>@<gateway_ip>
Example: ssh ezadmin@192.168.0.110
How to resolve the error “An error occurred while trying to submit the form (error: Unknown)” occured while adding the key?
This error, “An error occurred while trying to submit the form (error: Unknown),” usually occurs when the maximum execution time for PHP scripts has been exceeded. By default, PHP scripts are allowed to run only for a limited duration, after which they are terminated if execution is not completed.
Follow the below steps to resolve the issue:
Step 1: Check the latest application logs for the errors
Run the following command to navigate to the log directory and tail the latest logs.
root@gateway:~# cd $(awk '/^system_folder/ {print $2}' /usr/local/etc/ezlogin/ez.conf)/application/logs/
root@gateway:/var/www/ezlogin/application/logs# tail -f <the latest log file>
For Example:
root@gateway:~# cd $(awk '/^system_folder/ {print $2}' /usr/local/etc/ezlogin/ez.conf)/application/logs/
root@gateway:/var/www/ezlogin/application/logs# tail log-2026-05-05.php -f
ERROR - 2026-05-05 13:26:50 --> Severity: Error --> Maximum execution time of 30 seconds exceeded /var/www/ezlogin/application/third_party/vendor/phpseclib/phpseclib/phpseclib/Crypt/Blowfish.php 631
Since the maximum execution time of 30 seconds has been exceeded in this case, the issue can be resolved by increasing the max_execution_time limit.
Step 2: Increase PHP Execution Time
Increase the maximum execution time for PHP scripts by modifying the max_execution_time limit in php.ini file.
root@gateway:~# nano /etc/php/8.1/apache2/php.ini ---> (change into corresponding PHP version)
max_execution_time = 300
Step 3: After making the change, restart the PHP service for the changes to take effect:
root@gateway:~# systemctl restart php-fpm or systemctl restart apache2/httpd