How do I configure Ezeelogin to authenticate using OpenLdap or Window AD server?
Configuring Ezeelogin for authenticating with OpenLDAP or Windows AD server
Overview: This article explains how to set up Ezeelogin to authenticate with OpenLDAP or Windows AD servers. It covers the use of the autocreate feature to automatically create system users, outlines the steps for integrating OpenLDAP and Windows AD, and details the process of importing LDAP users into Ezeelogin for secure authentication, all while preserving existing directory attributes.
While using auto-create feature, the backend SSH authentication would not be using PAM-LDAP, instead, it would create a system user on the server and uses system authentication for the backend access. The advantage of using the autocreate feature is that it eliminates the need to configure LDAP for SSH or modify your existing Active Directory or OpenLDAP attributes.
Do read more about the drawbacks, since the SSH authentication would not be via LDAP, here
1. Install PHP-LDAP extension on the gateway server.
root@gateway:~# apt-get install phpx.x-ldap
eg: :~# apt-get install php8.2-ldap
root@gateway:~# systemctl restart apache2
Step 1.b: For CentOS 8, etc, RHEL 9, 8, etc, RockyLinux 9, 8, etc, AlmaLinux 9, 8, etc, run below command.
root@gateway:~# yum install php-ldap ; apachectl restart
2. Integration of OpenLDAP in Ezeelogin jumpserver.
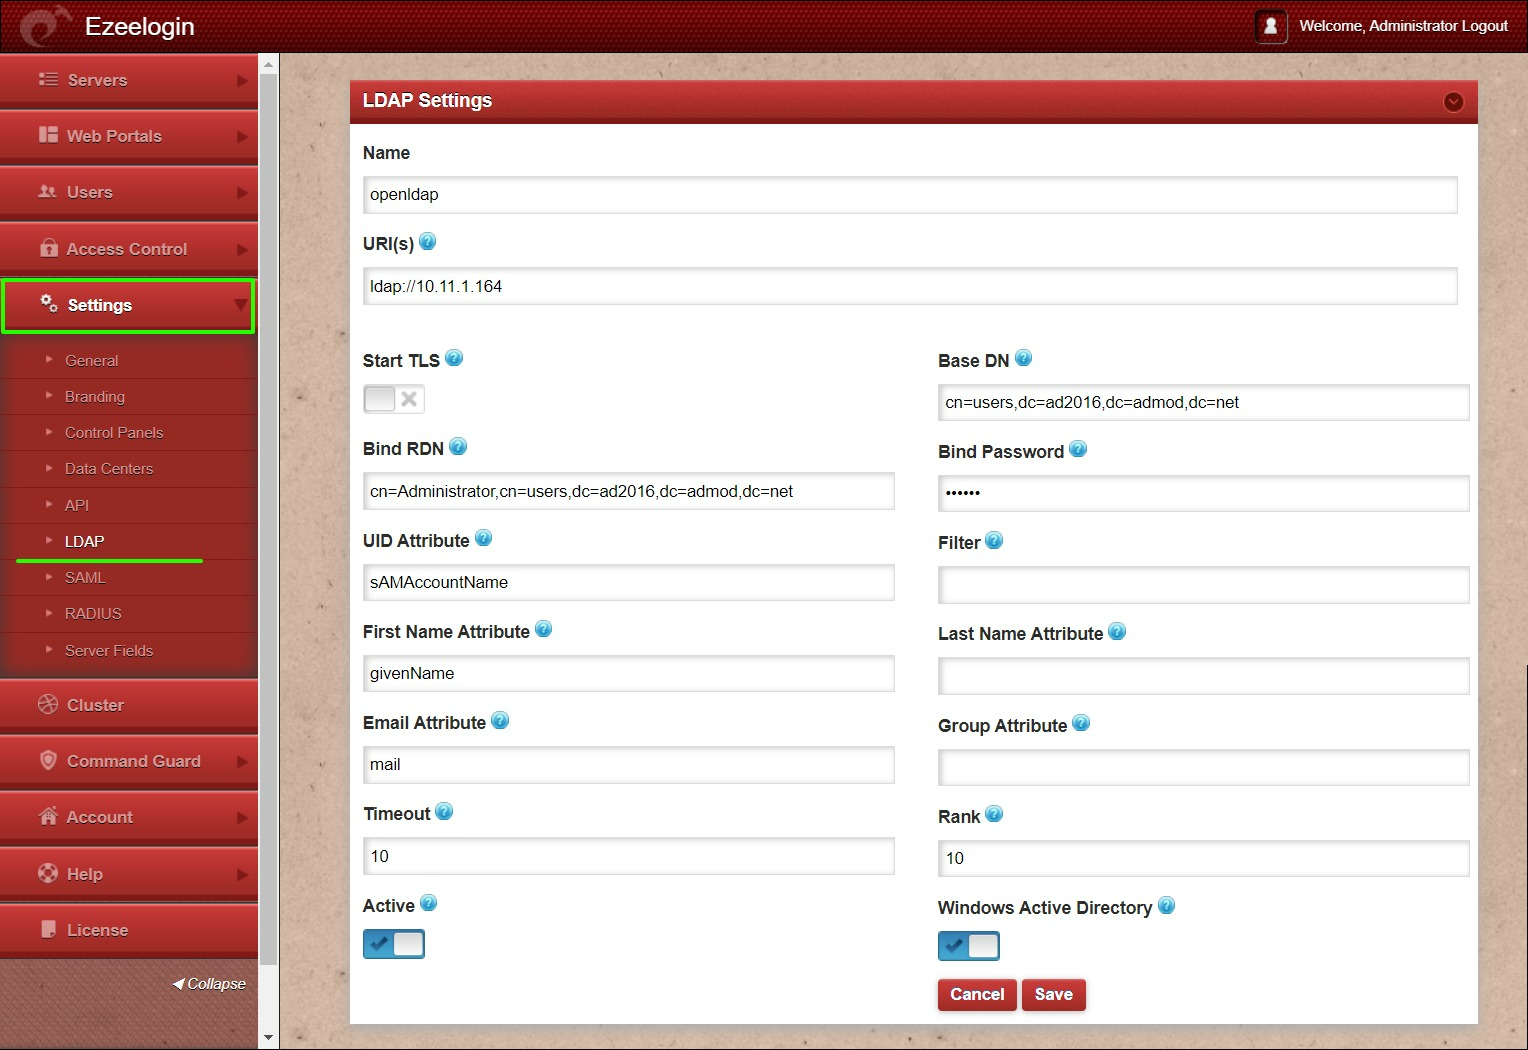
Step 2.a: Login to Ezeelogin GUI -> Settings -> LDAP
Step 2.b: Add the details of LDAP configurations. Refer below screenshot.
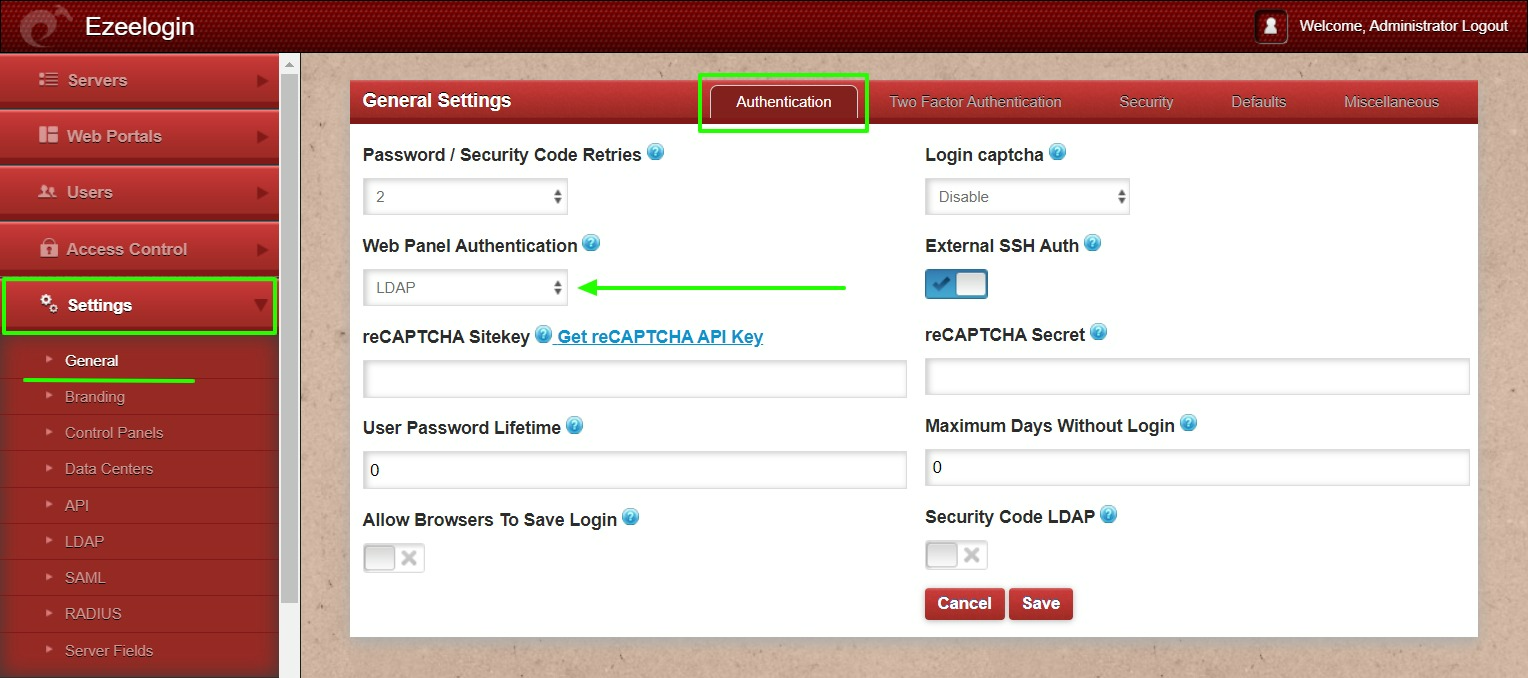
Step 2.c: Open Settings -> General -> Authentication -> Change Web Panel Authentication to LDAP.

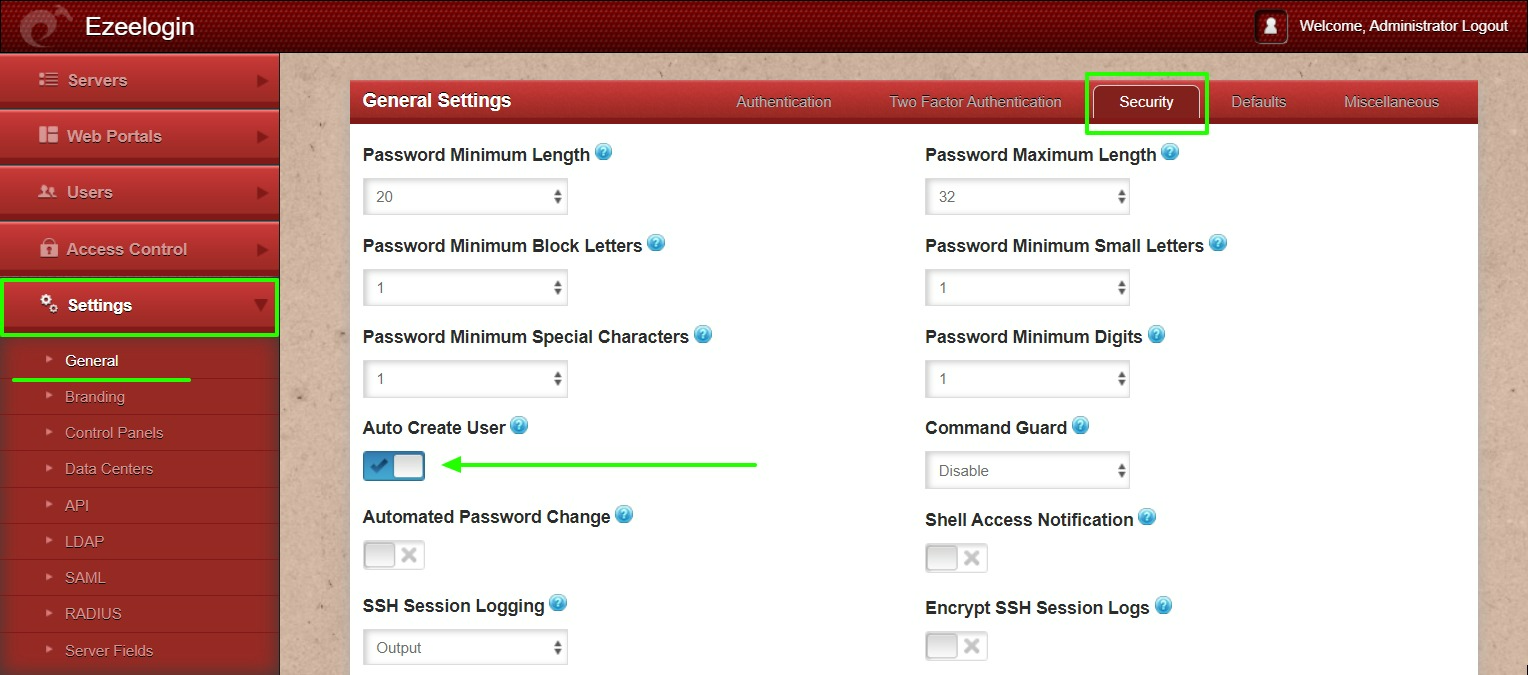
Step 2.d: Open Settings -> Settings -> Security -> Enable Auto Create User.

Step 2.e: Navigate to Users -> LDAP and select the LDAP users and import them to Ezeelogin.
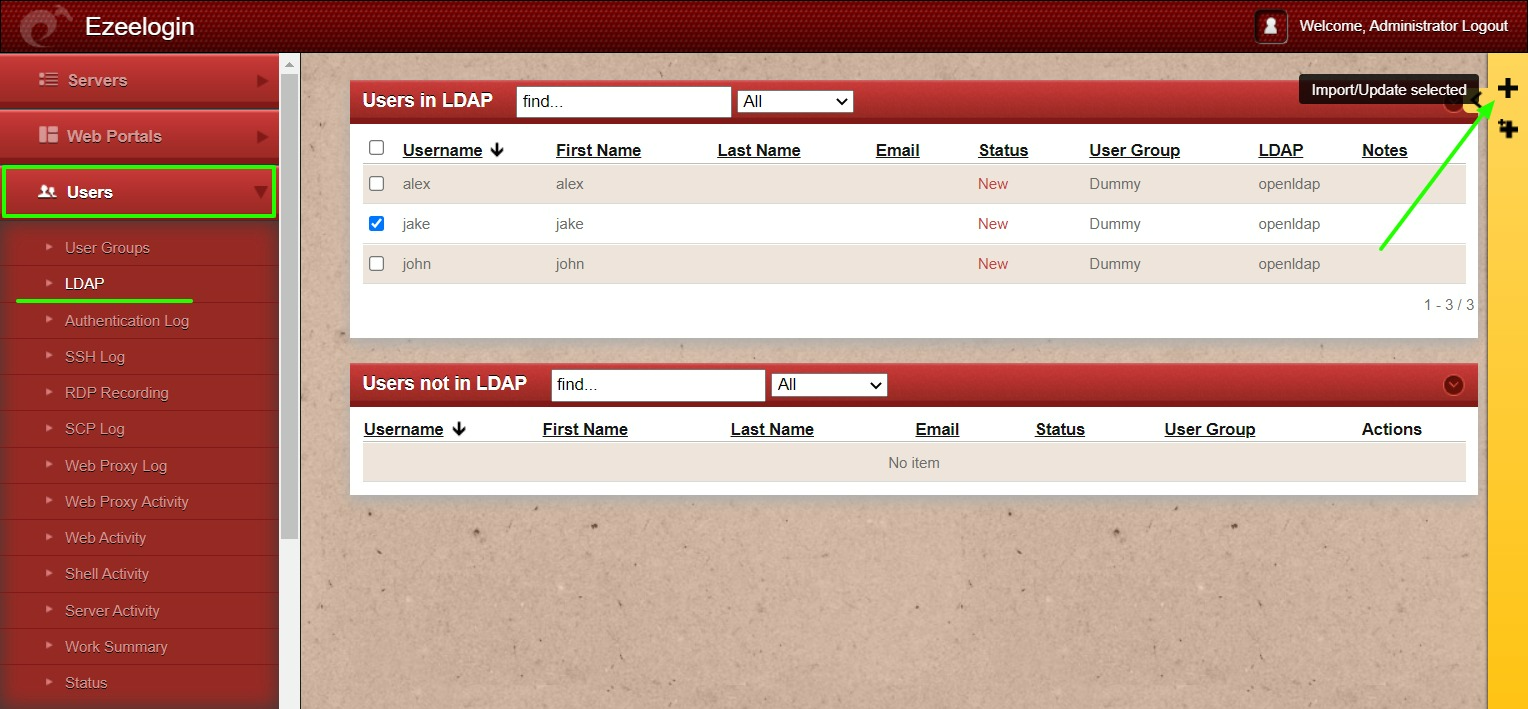
Step 2.f: Imported LDAP users were listed in the Users tab.
After importing the users to Ezeelogin, log in with the user and set up the security code for the user under Account -> Password -> New Security Code.
3. Integration of Windows AD in Ezeelogin(Import Windows AD user to jump server)
Step 3.a: Login to Ezeelogin GUI -> Settings -> LDAP
Step 3.b: Add the details of LDAP configurations & enable the Windows Active Directory.

Step 3.c: Open Settings -> General -> Authentication -> Change Web Panel Authentication to LDAP.
Step 3.d: Open Settings -> General -> Security -> Enable Auto Create User.
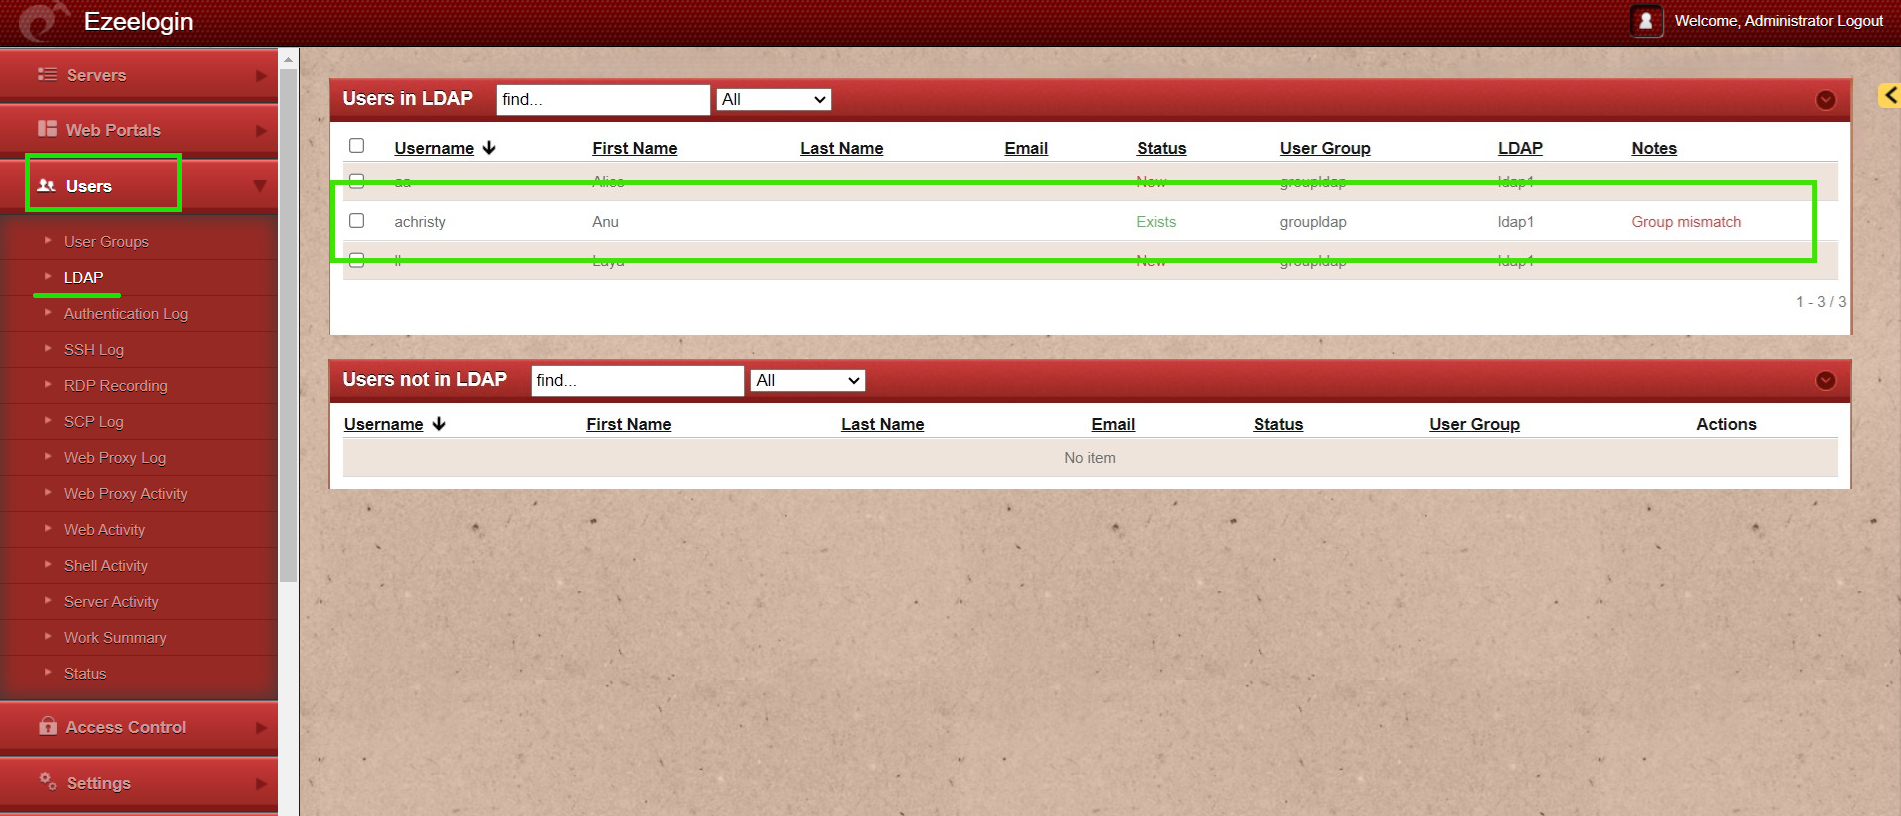
Step 3.e: Navigate to Users -> LDAP and select the LDAP users and import them to Ezeelogin.

When importing an LDAP user, they will be assigned to the default group or the mapped user group. After the import, if we change the LDAP user to another user group, we will receive a note saying "Group Mismatch." This is not an error.
Step 3.f: Imported LDAP users were listed in the Users tab.
After importing the users to Ezeelogin, log in with the user and set up a security code for the user under Account -> Password -> New Security Code.
Related Articles:
Error: User not found. Contact administrator.
Configure Ezeelogin to authenticate using Windows_AD(Pam-Ldap) in Ubuntu
How do I configure Ezeelogin to authenticate using Windows_AD(Pam-LDAP) in CentOS
How do I configure Ezeelogin to authenticate using OpenLdap(Pam-Ldap) in CentOS
How to configure Ezeelogin to authenticate using Open_Ldap(Pam-Ldap) in Ubuntu
Assigning user groups for LDAP users?
Can we map the existing user group in LDAP to ezeelogin as the ezeelogin user group?