Integrate Jumpcloud SSO with Ezeelogin
Configure Jumpcloud SSO SAML-based Authentication in Ezeelogin GUI.
Overview: This article provides a brief guide to configuring Jumpcloud SSO SAML-based authentication in Ezeelogin GUI, covering application setup, metadata configuration, and user authentication.
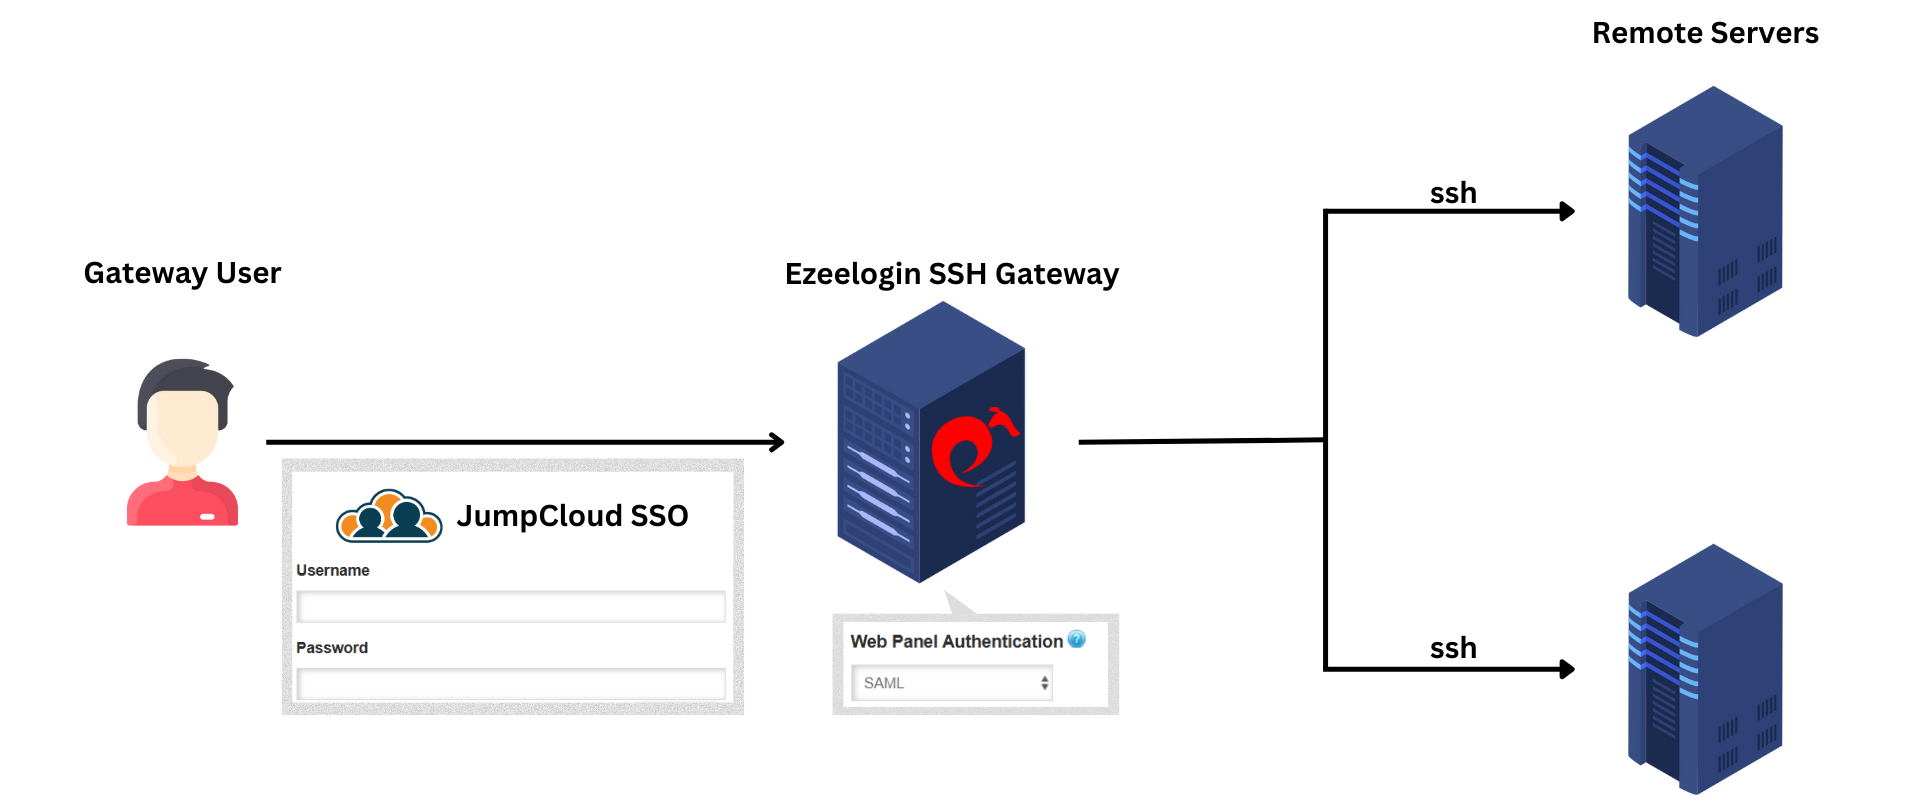
SAML is an authentication mechanism for web applications. It's based on web protocols and it cannot be used for user authentication over SSH.
Step 1: Log in to JumpCloud Admin Portal: Navigate to https://console.jumpcloud.com.
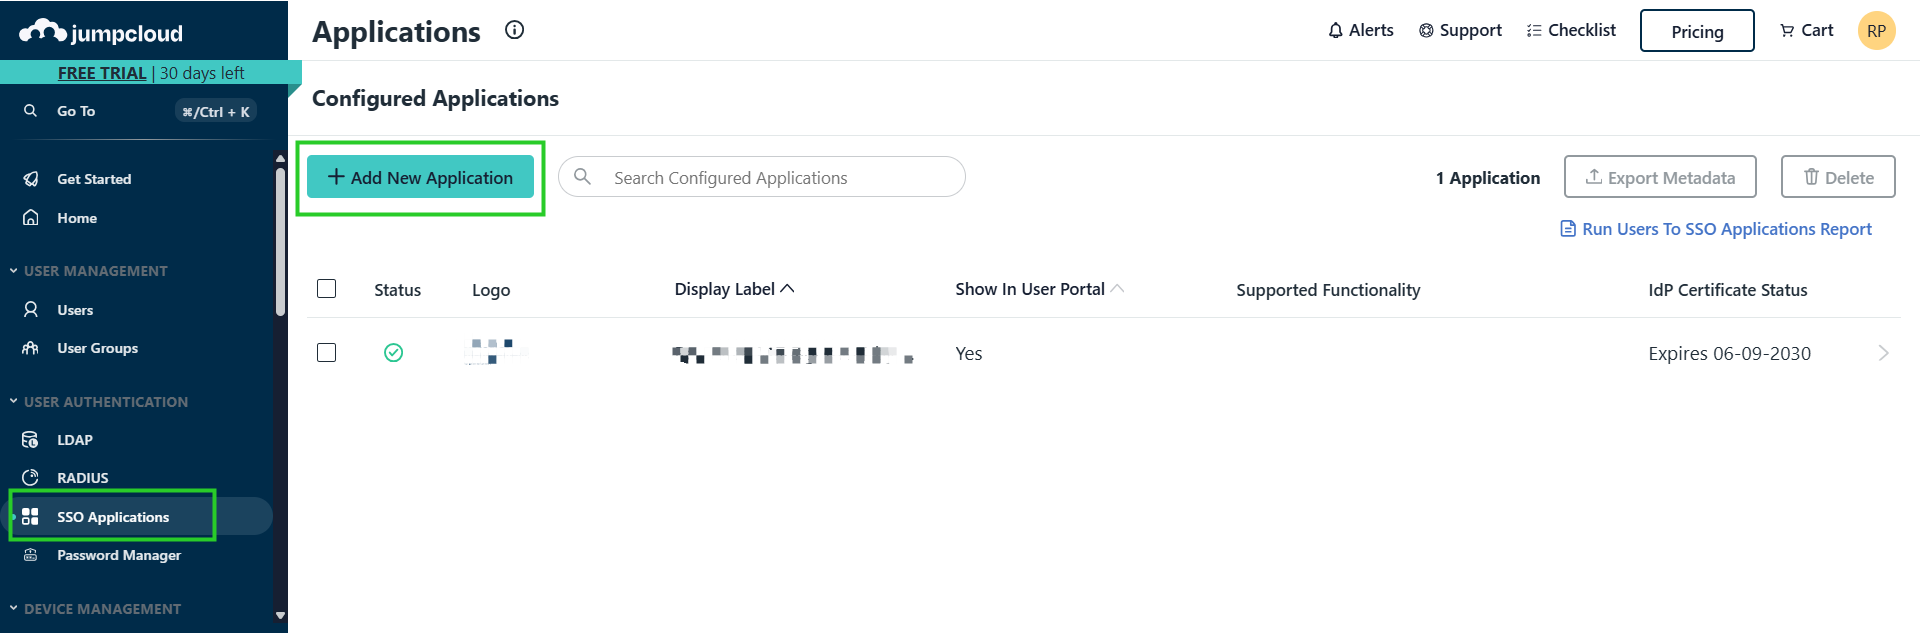
Add a New Application: Go to User Authentication > SSO Applications. And Click > + Add New Application.
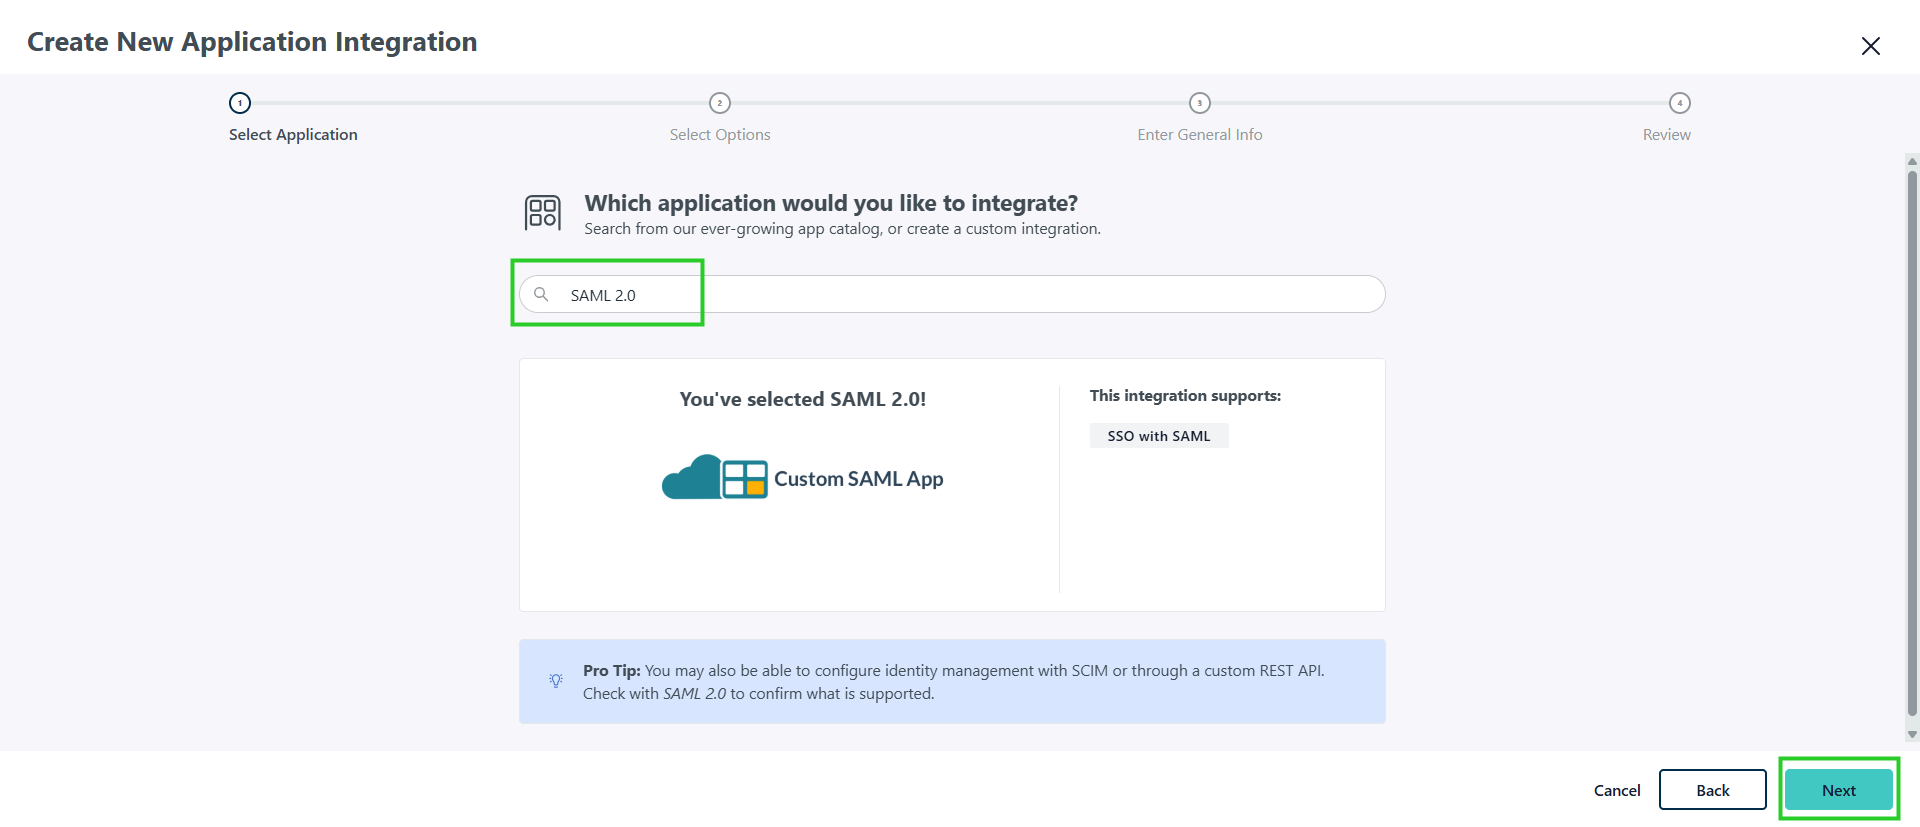
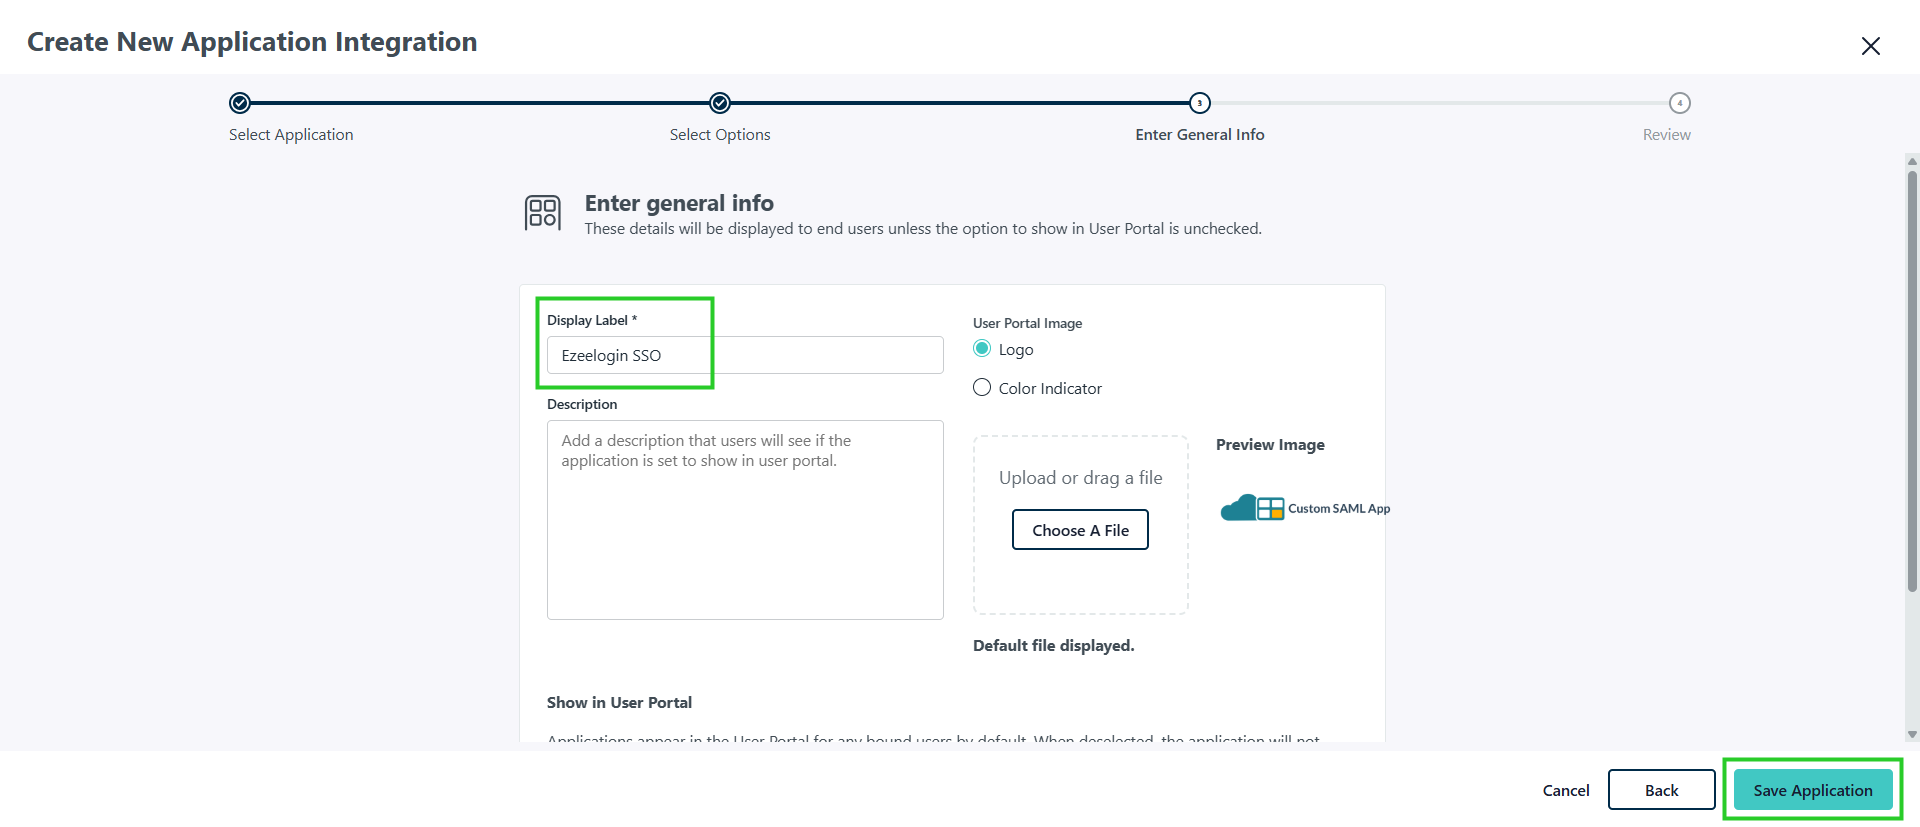
Step 2: Search for SAML 2.0 and select it. Provide a Display Label (e.g., "Ezeelogin SSO") and Save Application.
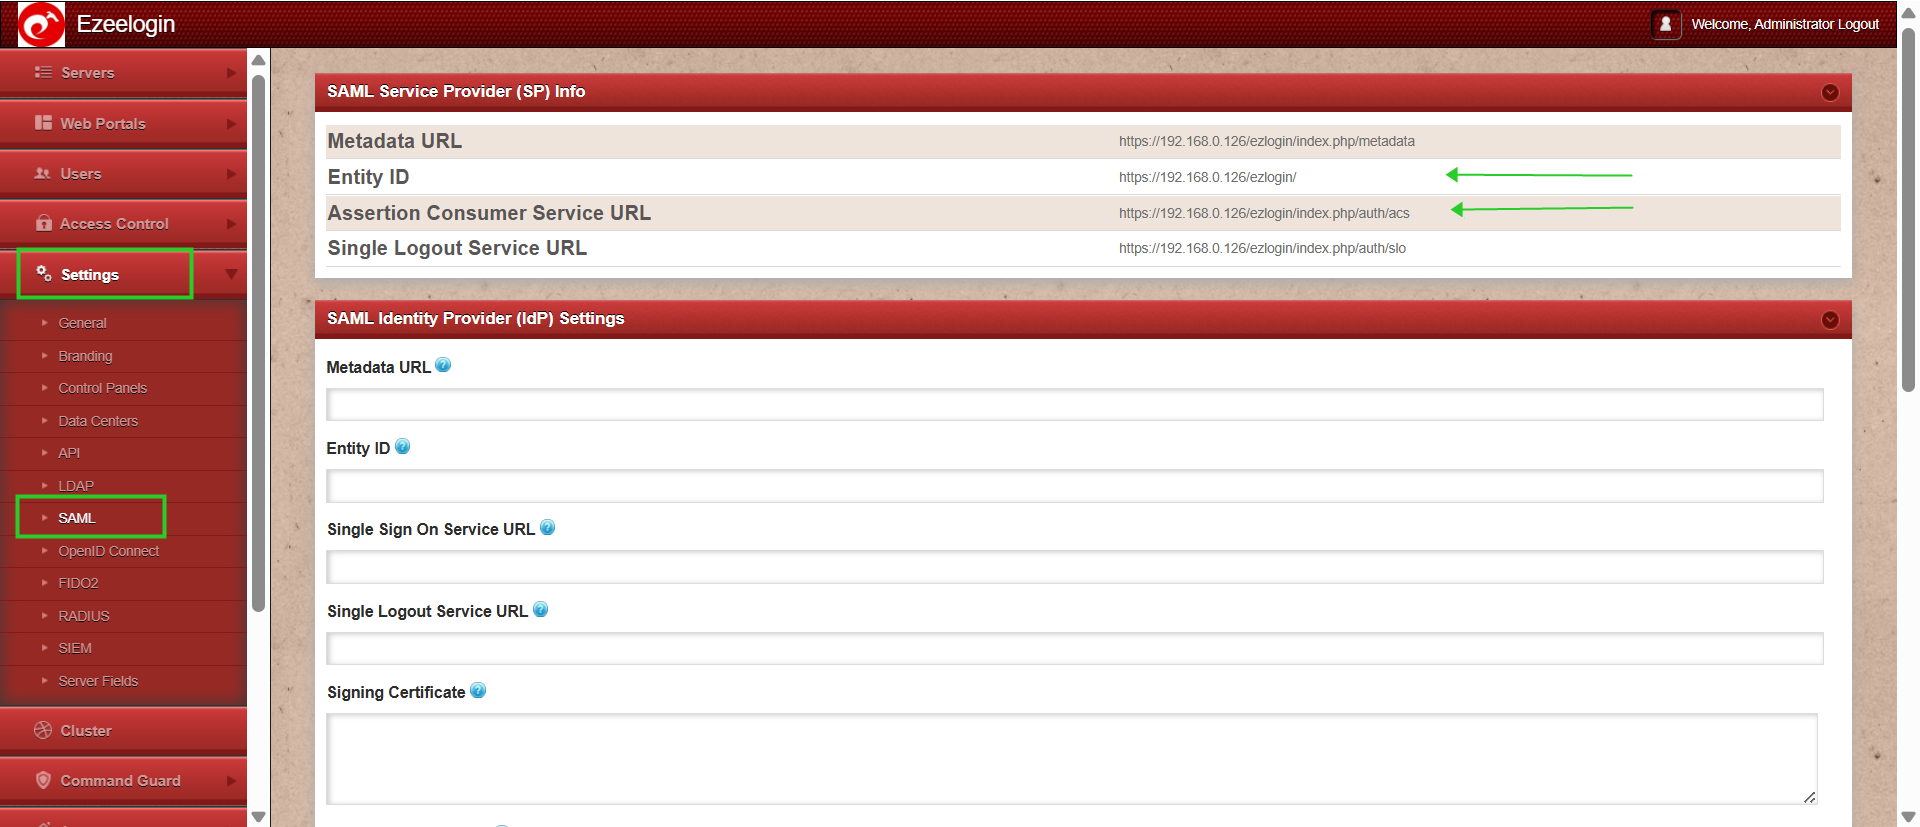
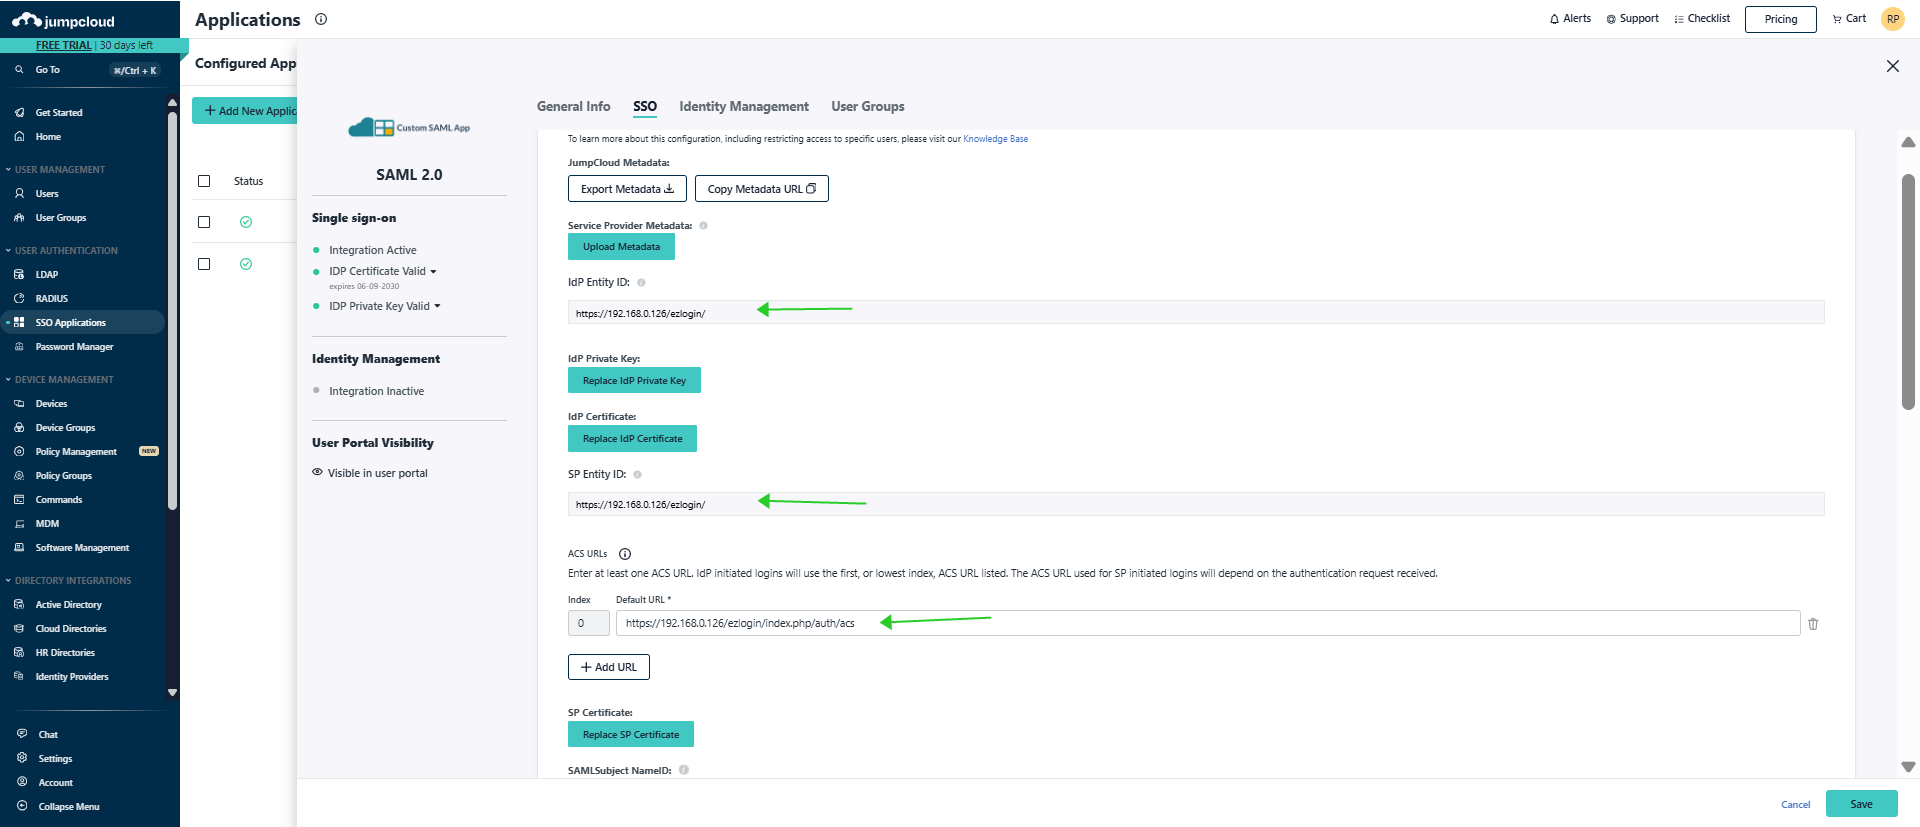
Step 3: Click on > Configure Application: In the SSO tab, enter IdP Entity ID - Entity ID , SP Entity ID - Entity ID , ACS (Consumer) URL - Assertion Consumer Service URL the following details from Gateway server under Settings > SAML.
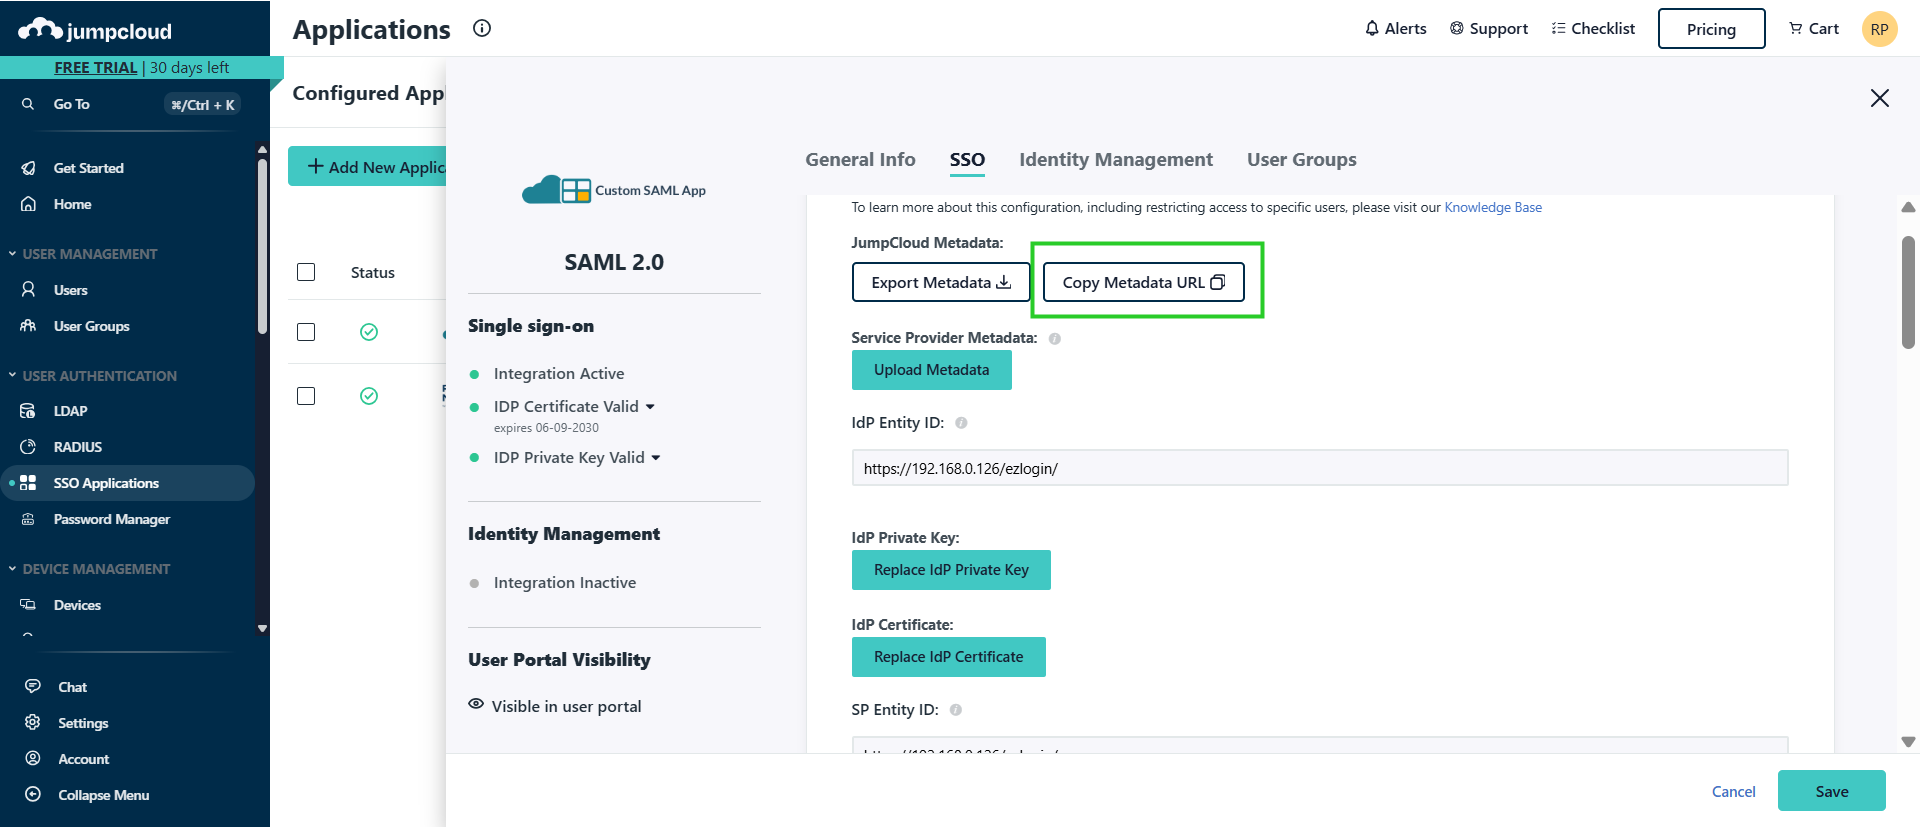
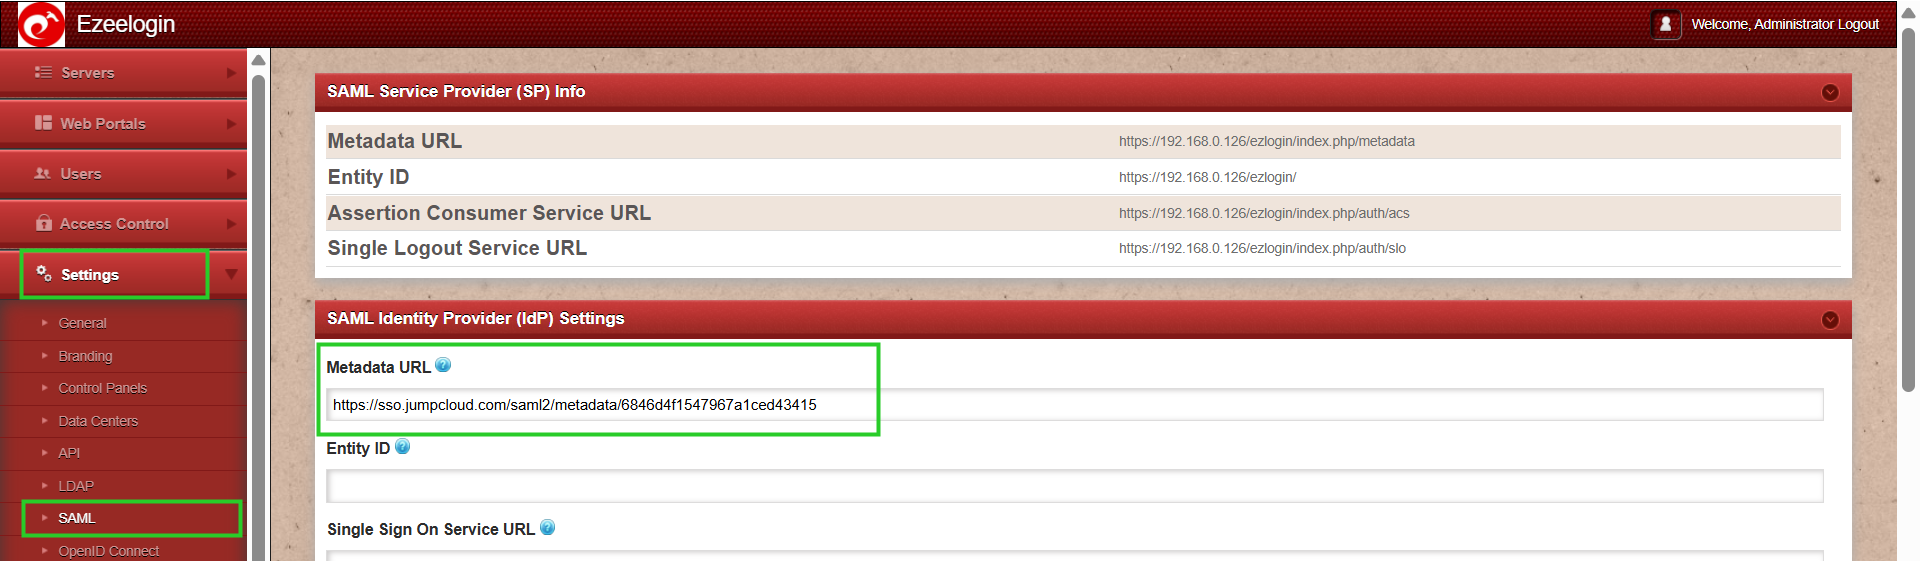
Step 4: Copy Metadata URL and paste in Gateway server under Settings > SAML. Paste the URL in Metadata URL and click on Fetch and Save it.


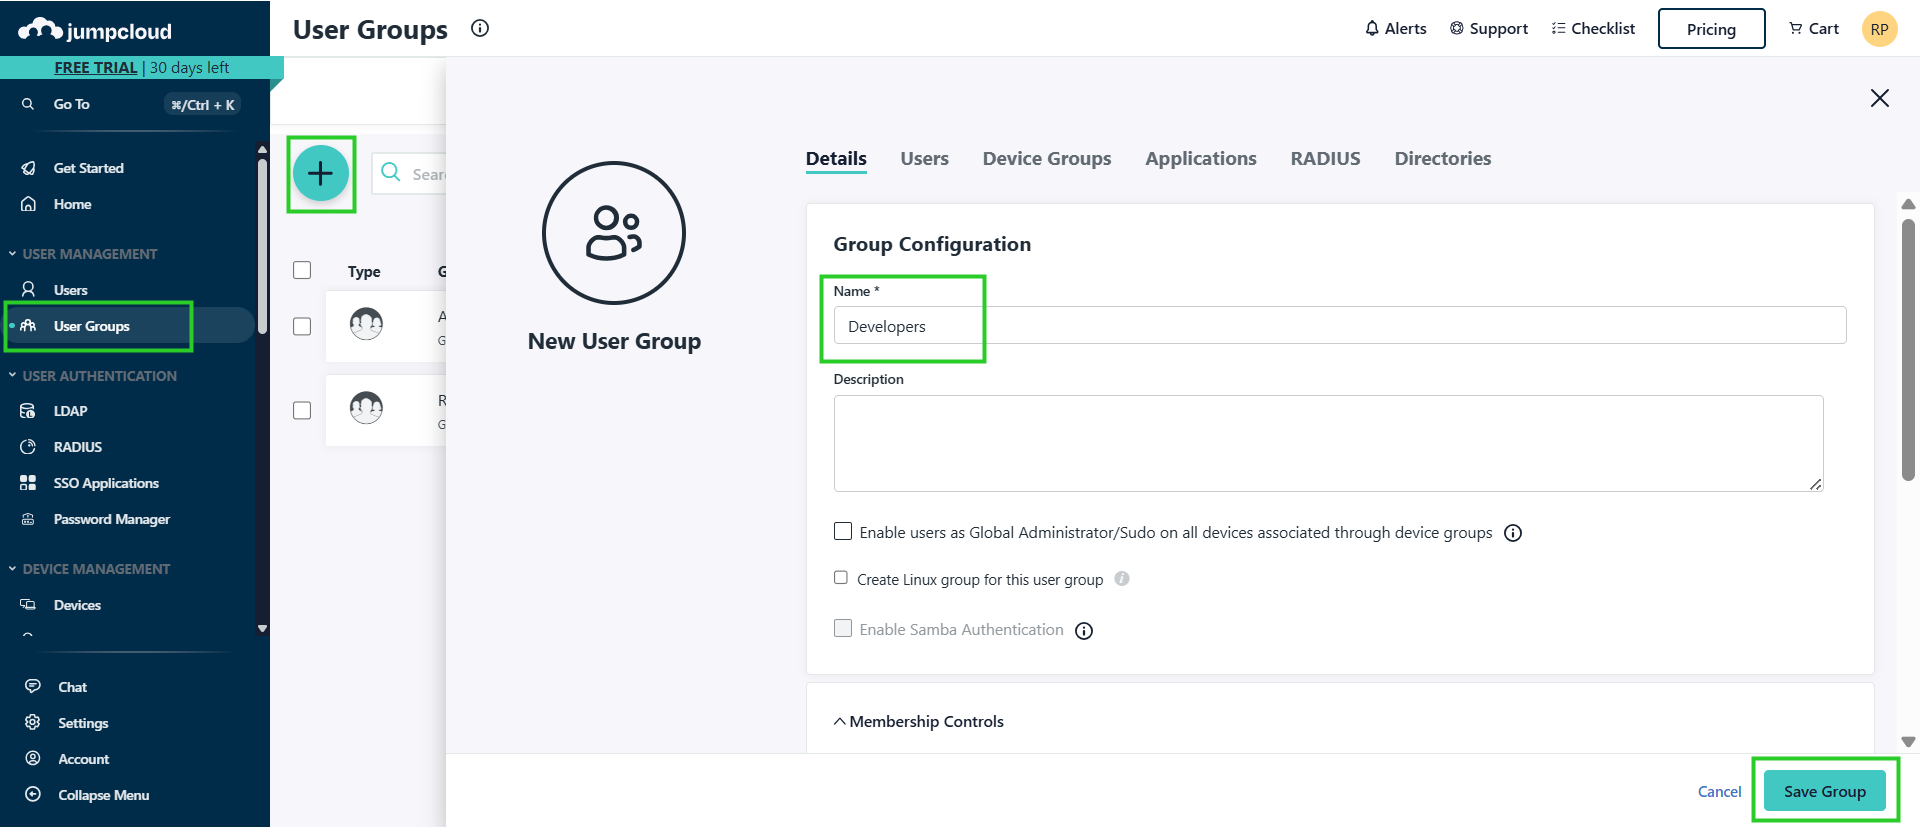
Step 5: Select the user group tab from the left panel, add the user group name, and save it.
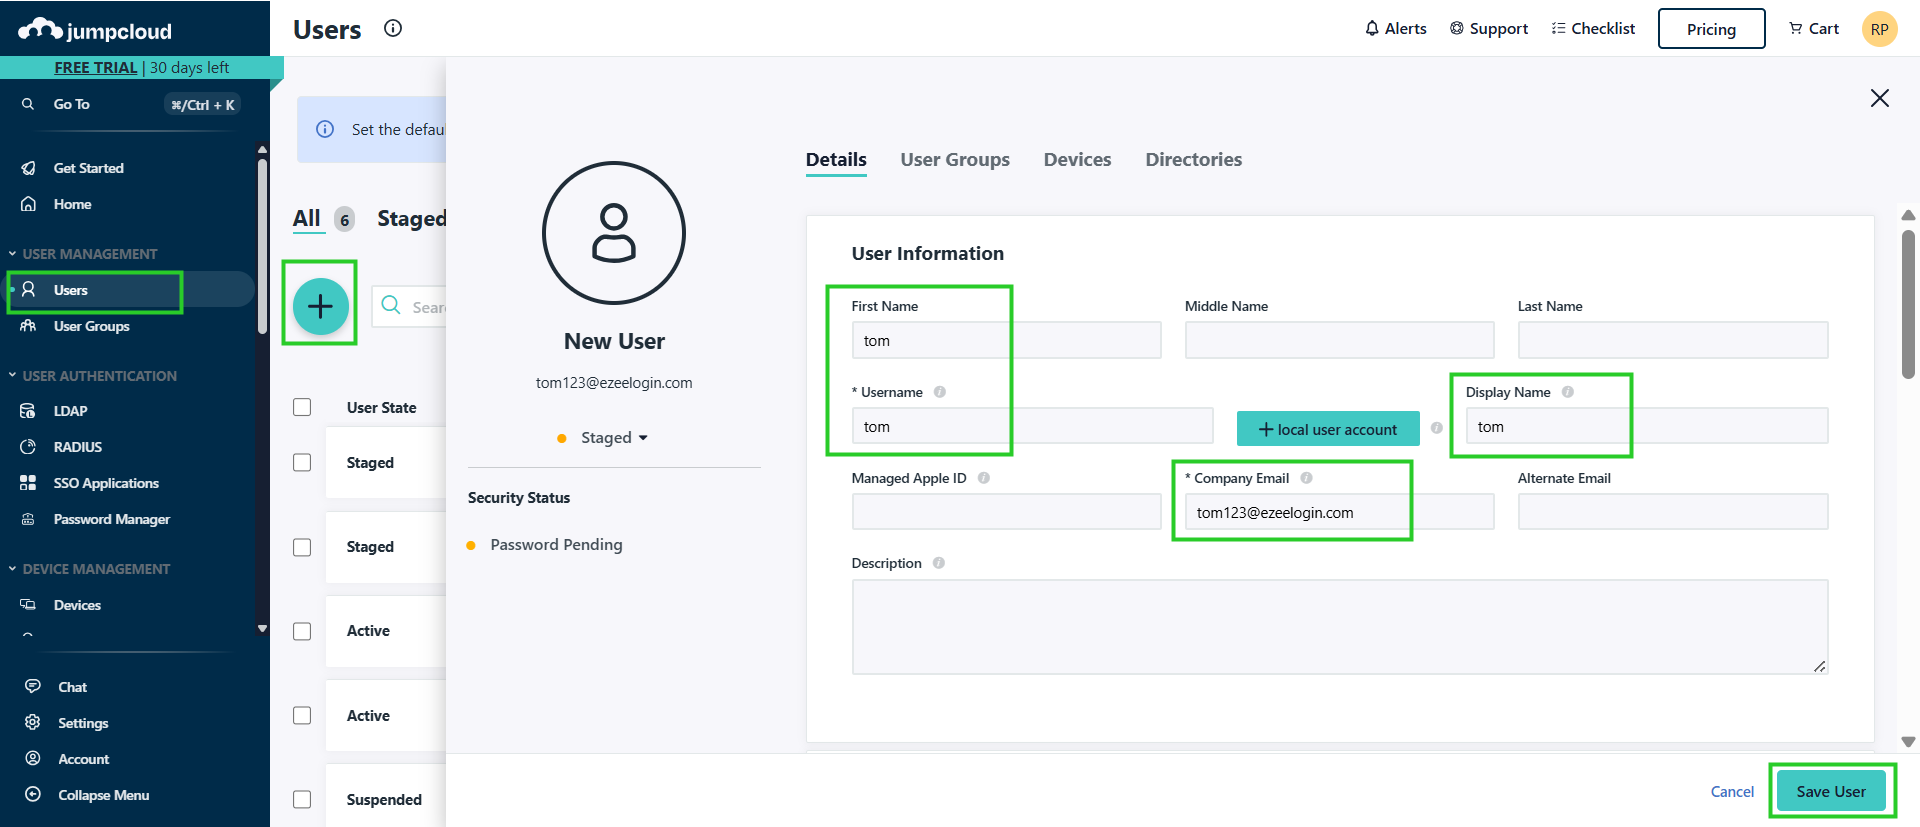
Step 6: Add the user by selecting the users tab.
Step 7: Select the SSO applications from left panel and assign the user group to that application.

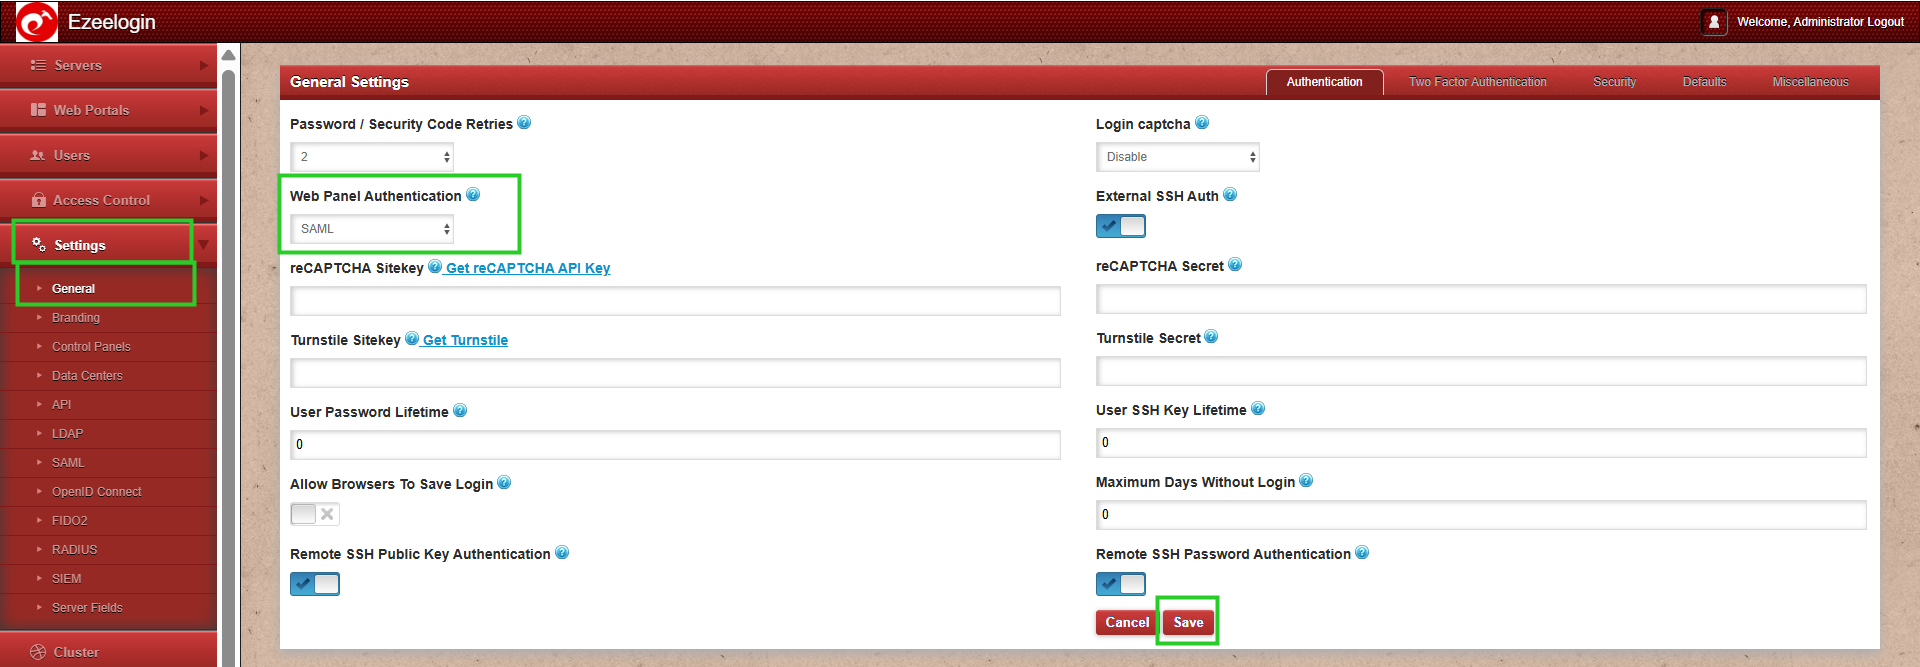
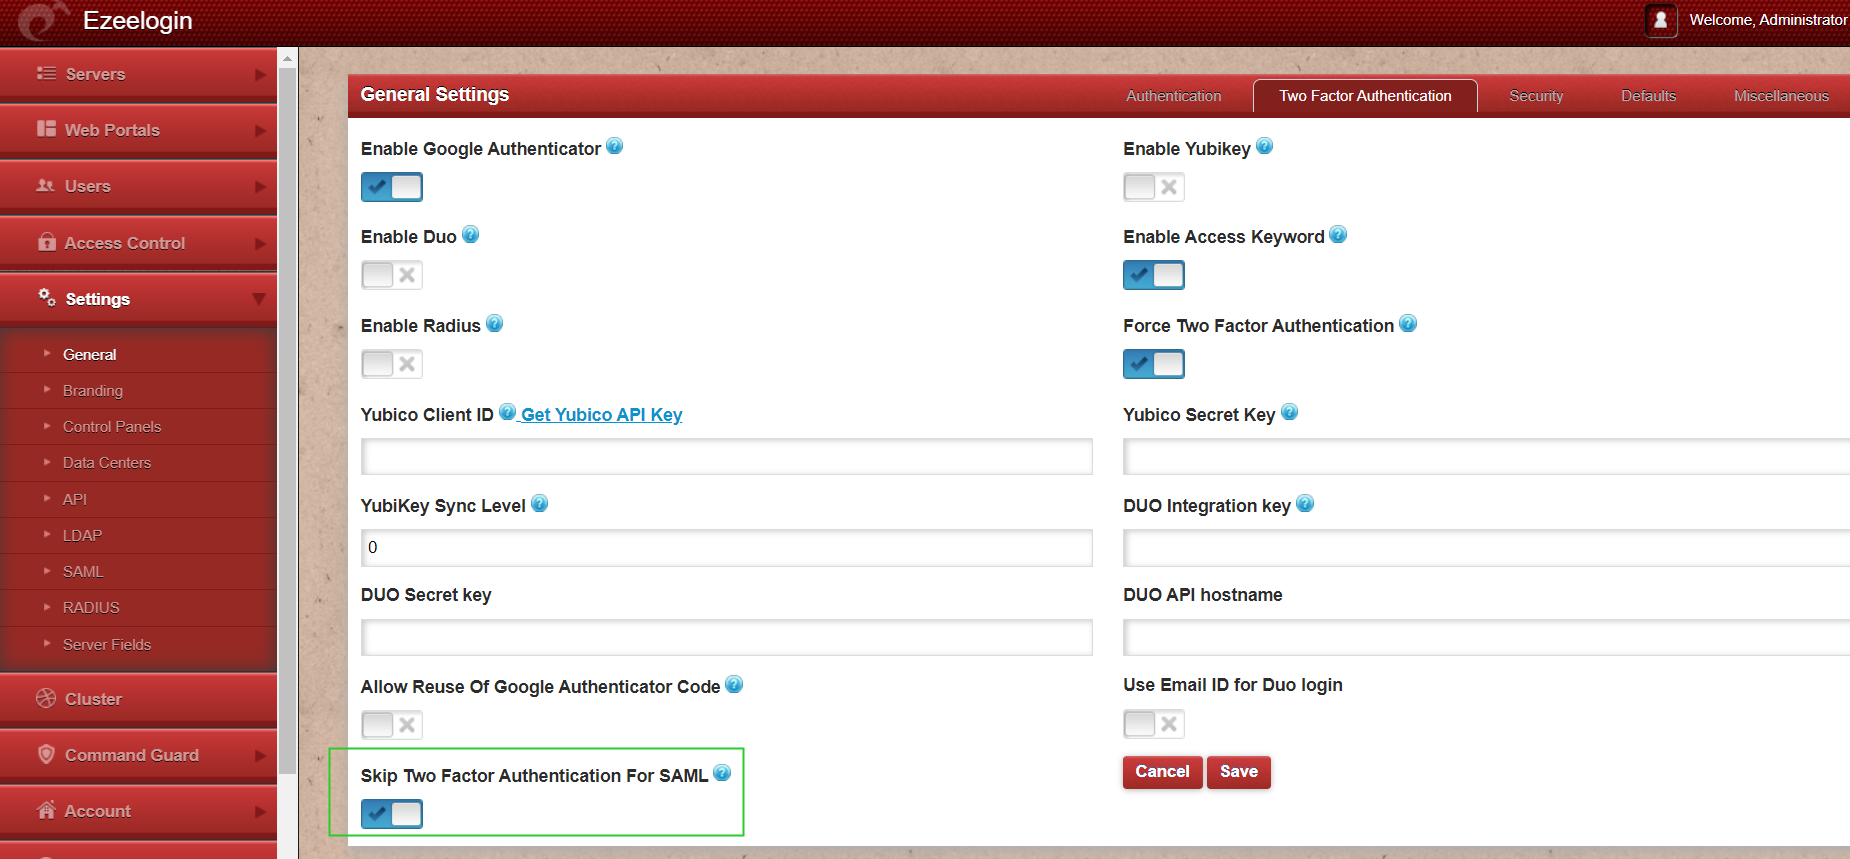
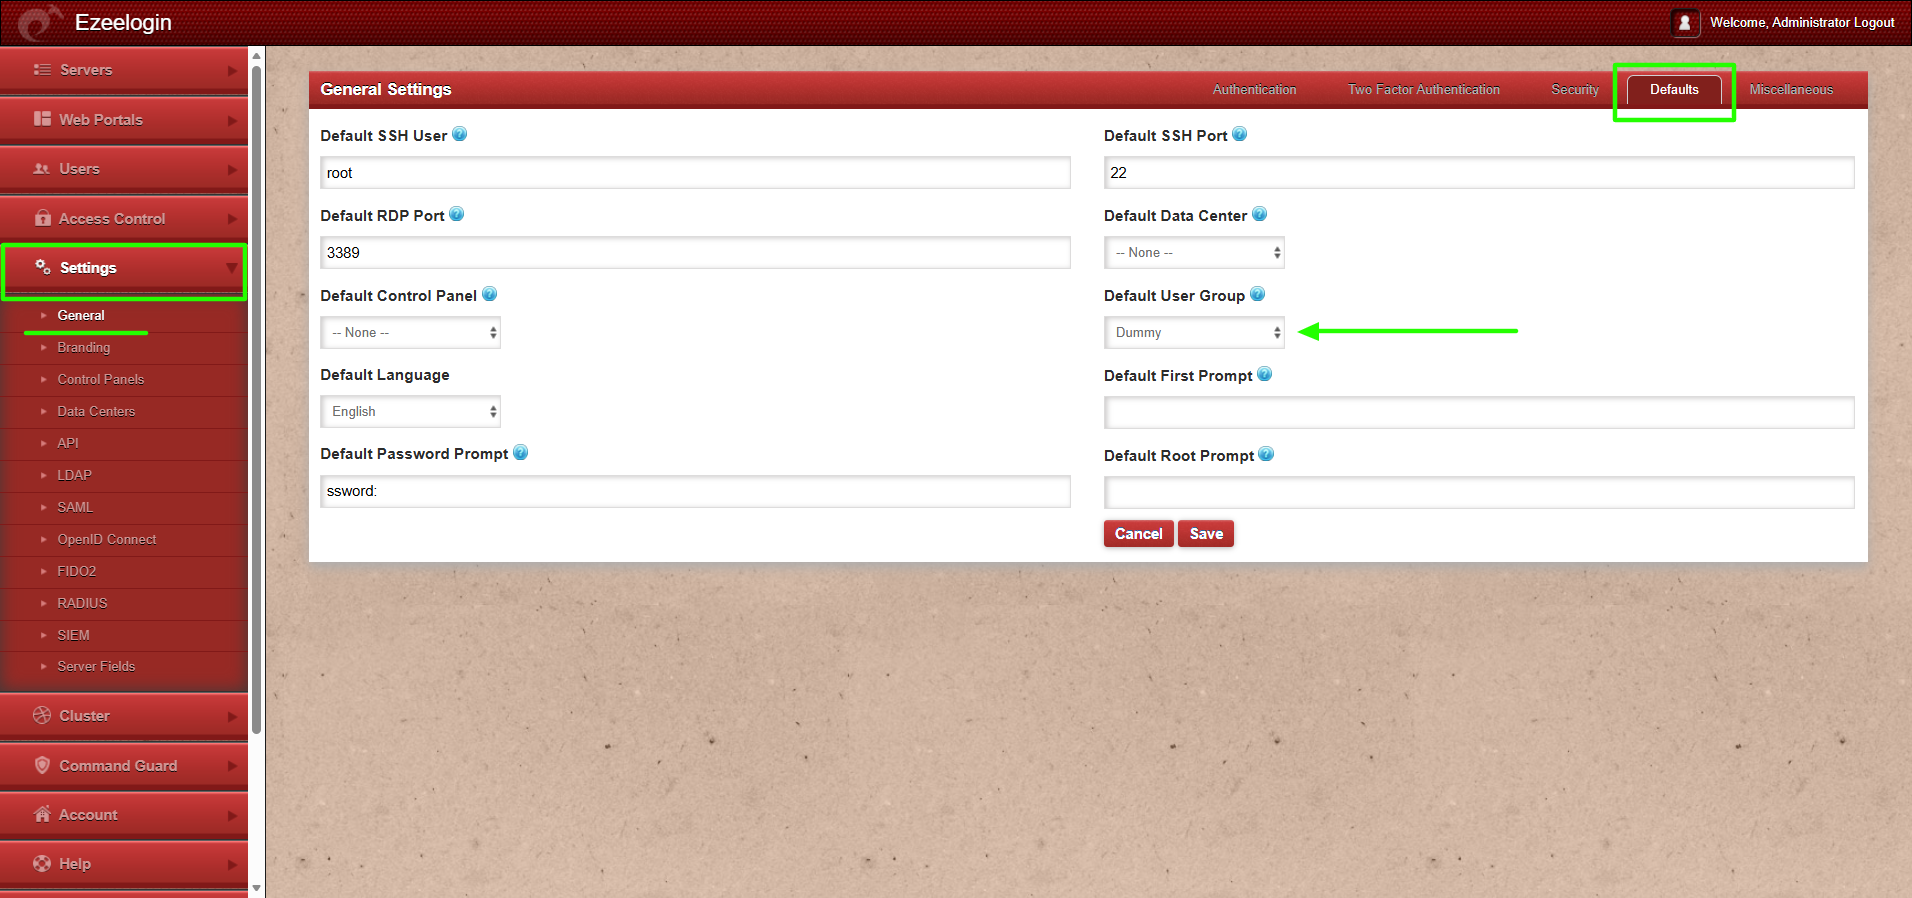
Step 8: Change Web panel Authentication to SAML from Ezeelogin GUI > Settings > General >Authentication.
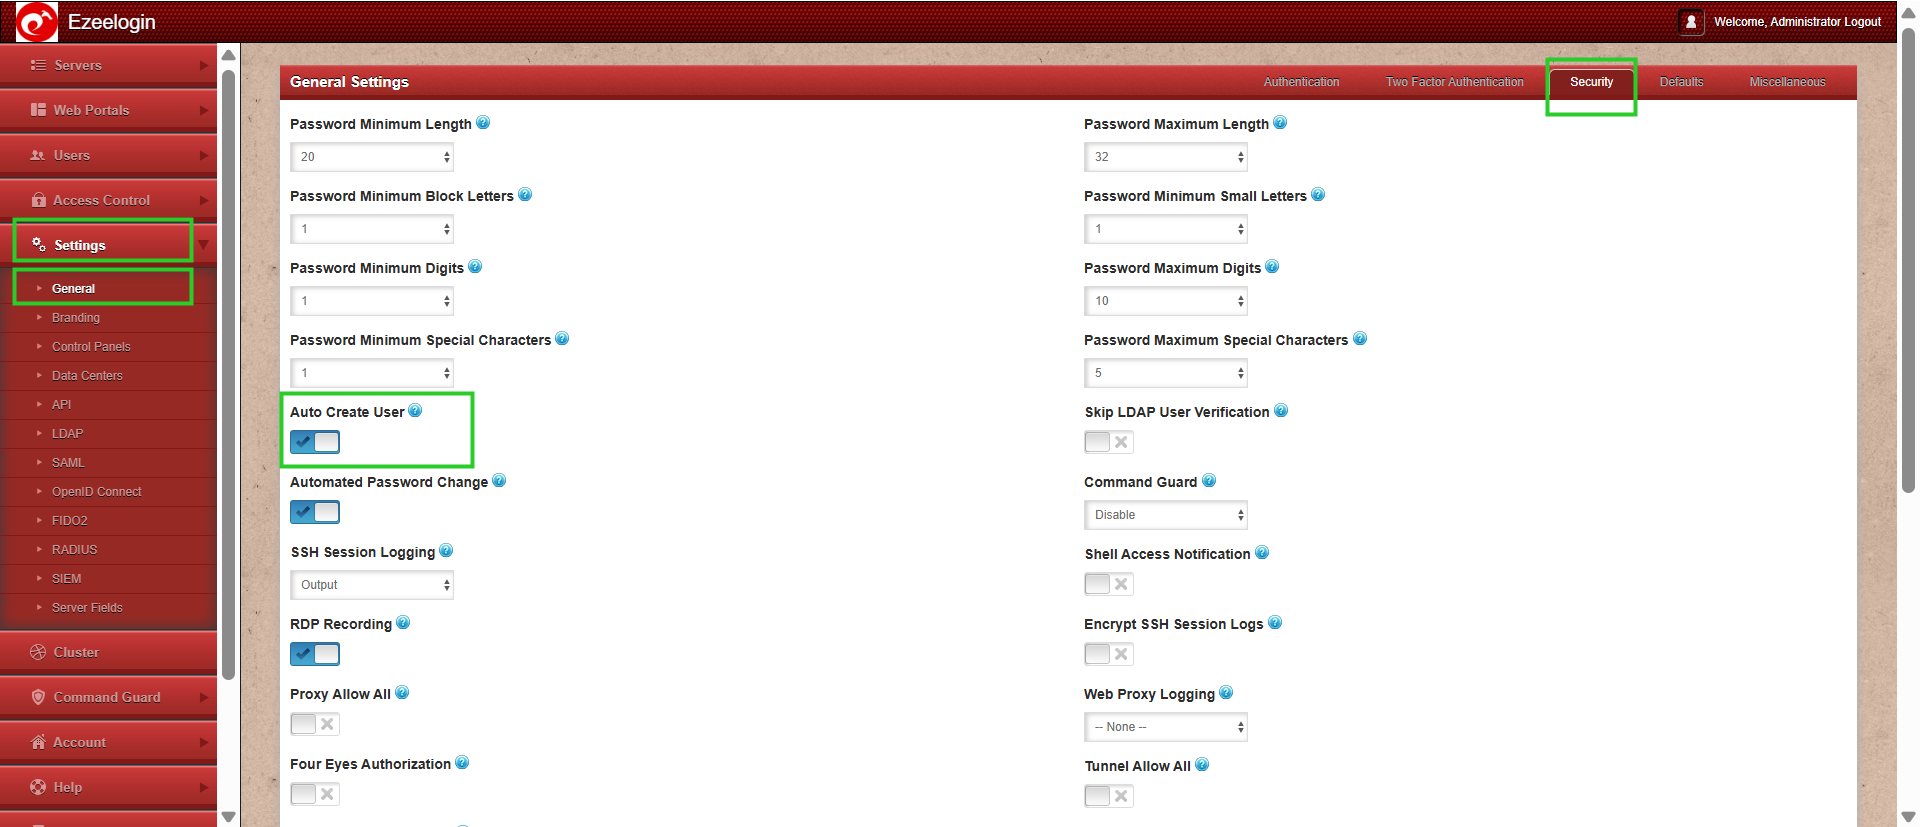
Step 9: Enable Auto Create User from Ezeelogin GUI -> Settings -> General -> Security -> Enable Auto Create User
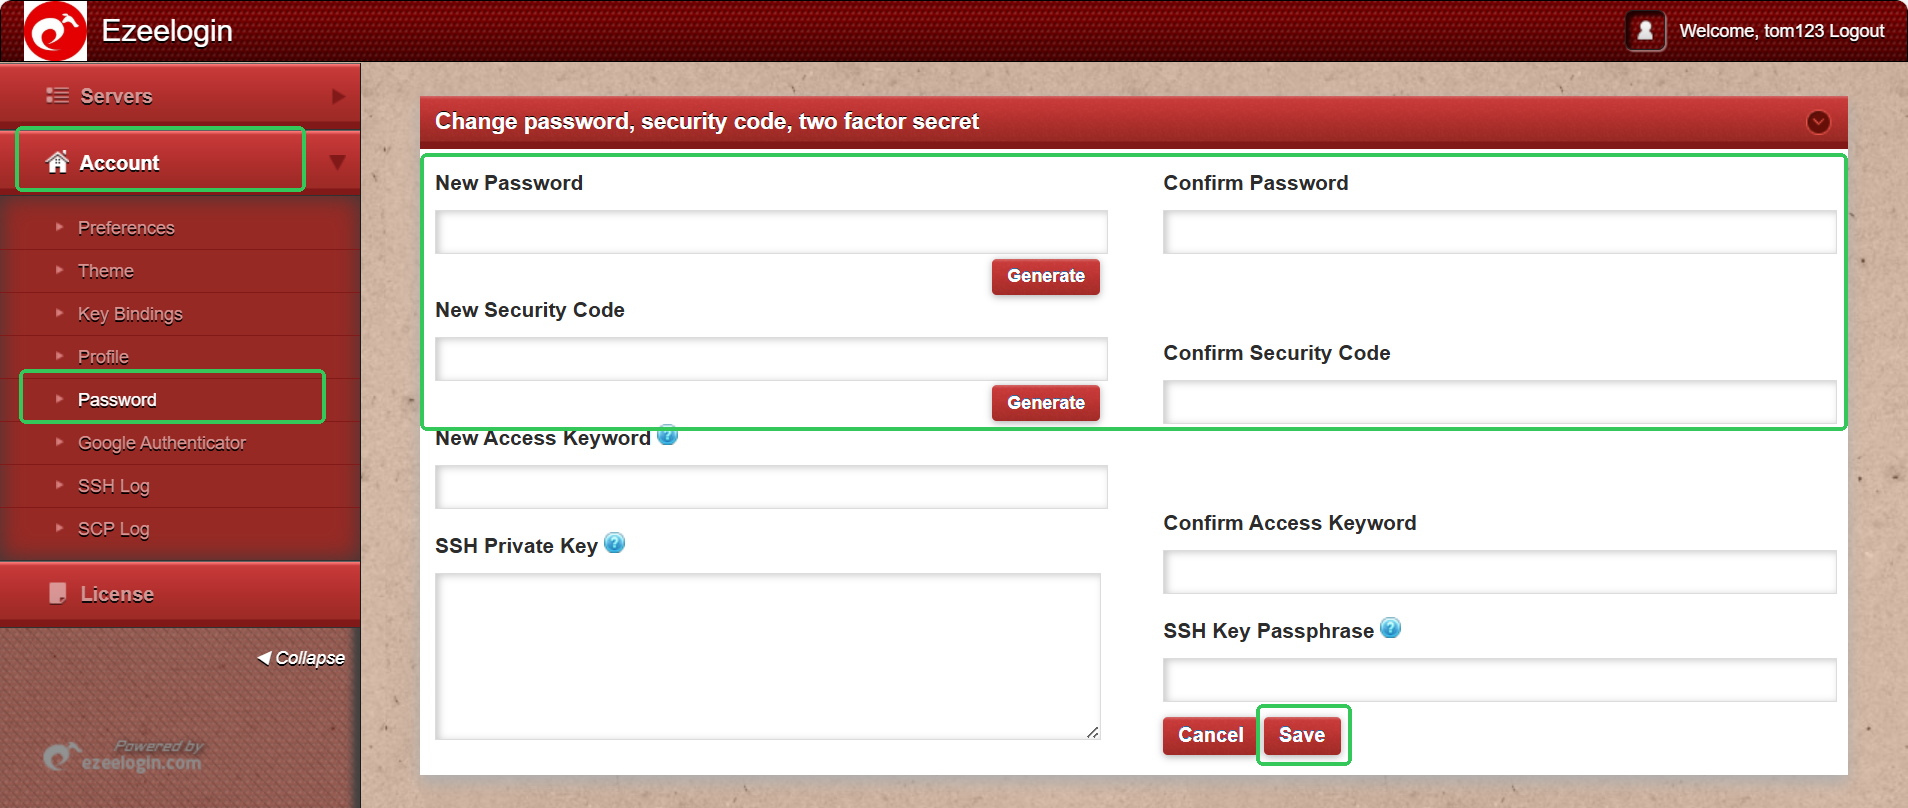
For gateway users who require administrative access, the password must be set manually from the Ezeelogin GUI. Refer below article:
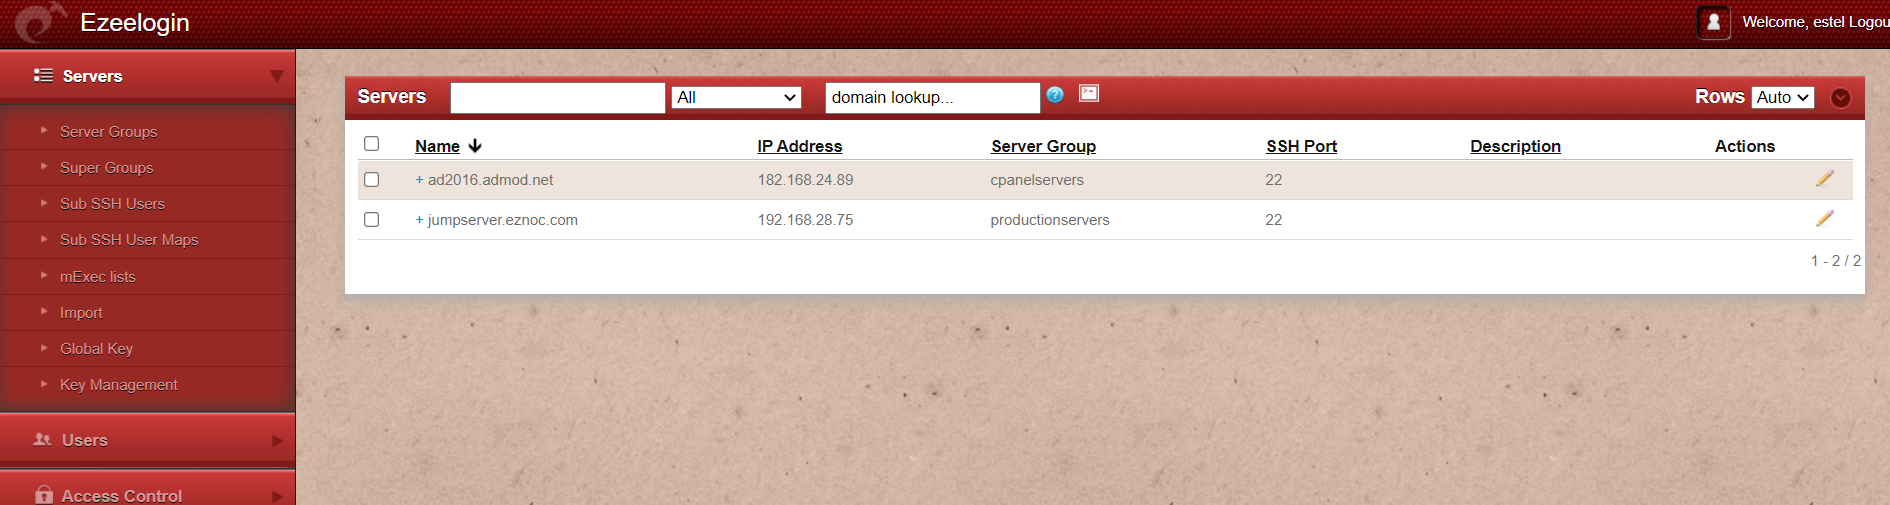
Step 12: You can log in to Ezeelogin shell via Webssh shell or using any SSH client such as Putty or terminal etc.
WebSSH: Click on the 'Open Web SSH Console' icon to SSH via the browser
WebSSH terminal will open like below. Users can navigate the server group with the Up and Down arrow buttons and enter to login into the server.

Native SSH Client: After resetting the password and security code you can SSH to the Ezsh shell (using Terminal or Putty) with the SAML username.

How to map Jumpcloud users to the same user group in Ezeelogin?
Note:
1. If users from the OIDC provider need to be auto-created in the corresponding group from OIDC to the same group in Ezeelogin, the admin user must set the default user group to None. If the same group is not present in Ezeelogin, the user will not be auto-created.

2. If the default user group is set to any group other than None, then all users from the OIDC provider will be auto-created in that same group.
This feature is available from Ezeelogin version 7.46.0. Refer article to upgrade Ezeelogin to the latest version.
Note:
User attributes (such as groups and other mapped fields) are automatically updated in the Ezeelogin GUI when a user authenticates again. If any attribute of an existing SAML user is changed in the identity provider after the user has already logged in, the change will appear in the GUI only after the user logs out and logs back in.
For example, if a user is moved to a different group in the SAML provider (such as JumpCloud), the updated group will be shown in the Ezeelogin GUI after the user logs in again.
This feature is available from Ezeelogin version 7.46.0. Refer article to upgrade Ezeelogin to the latest version.
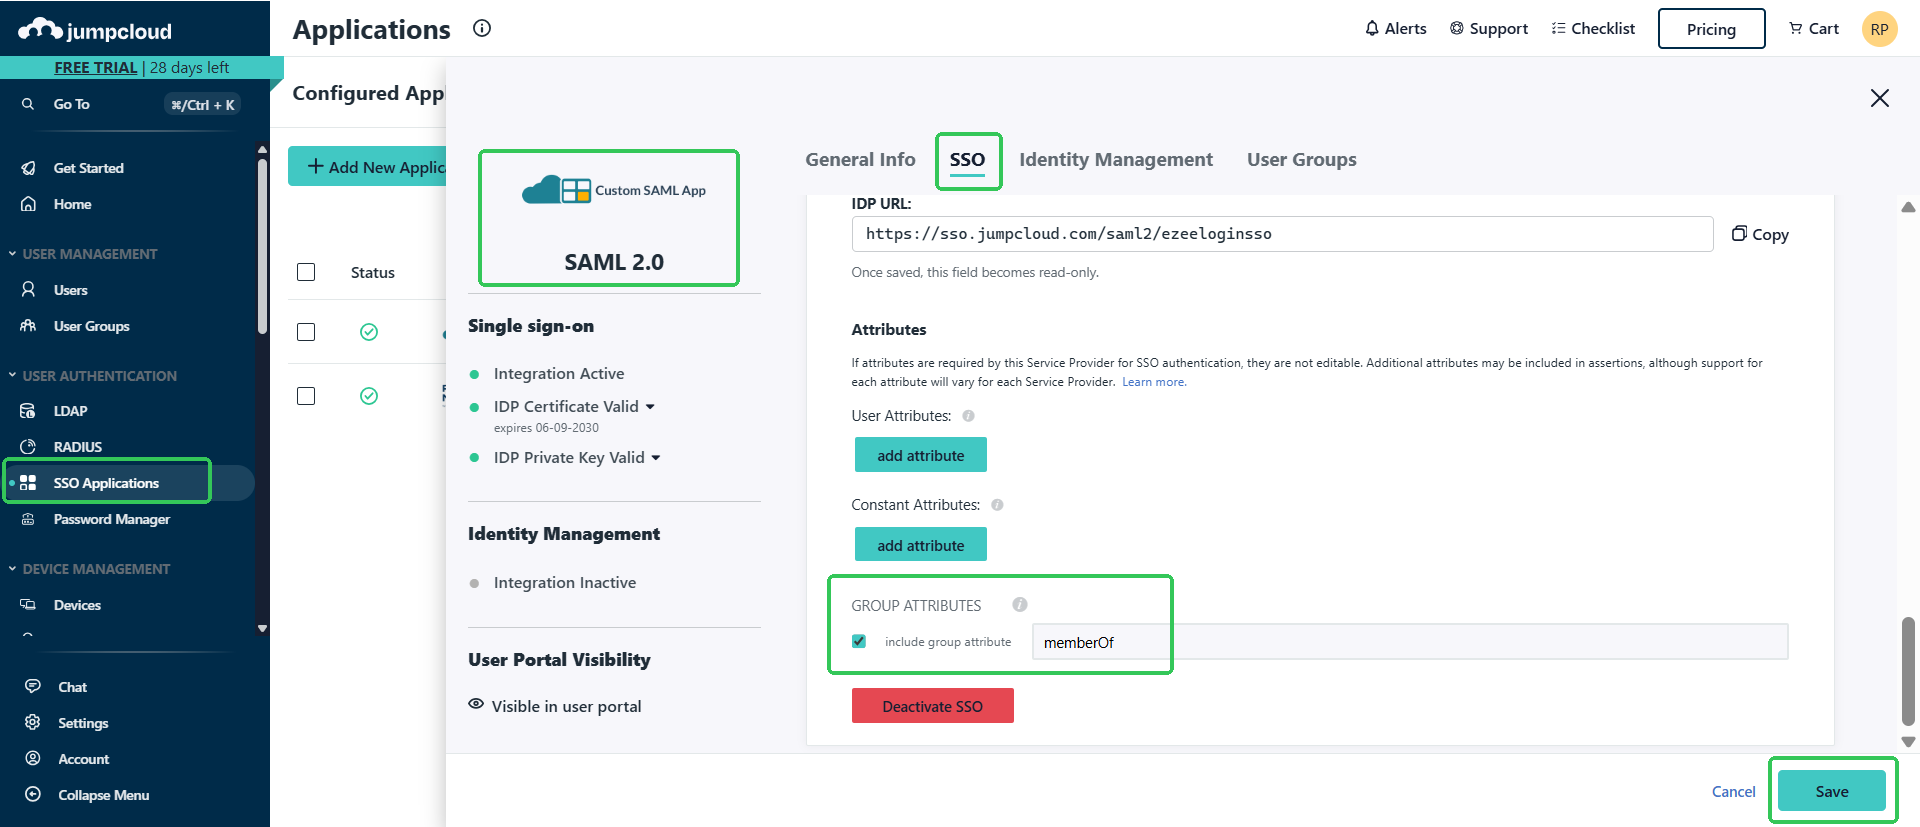
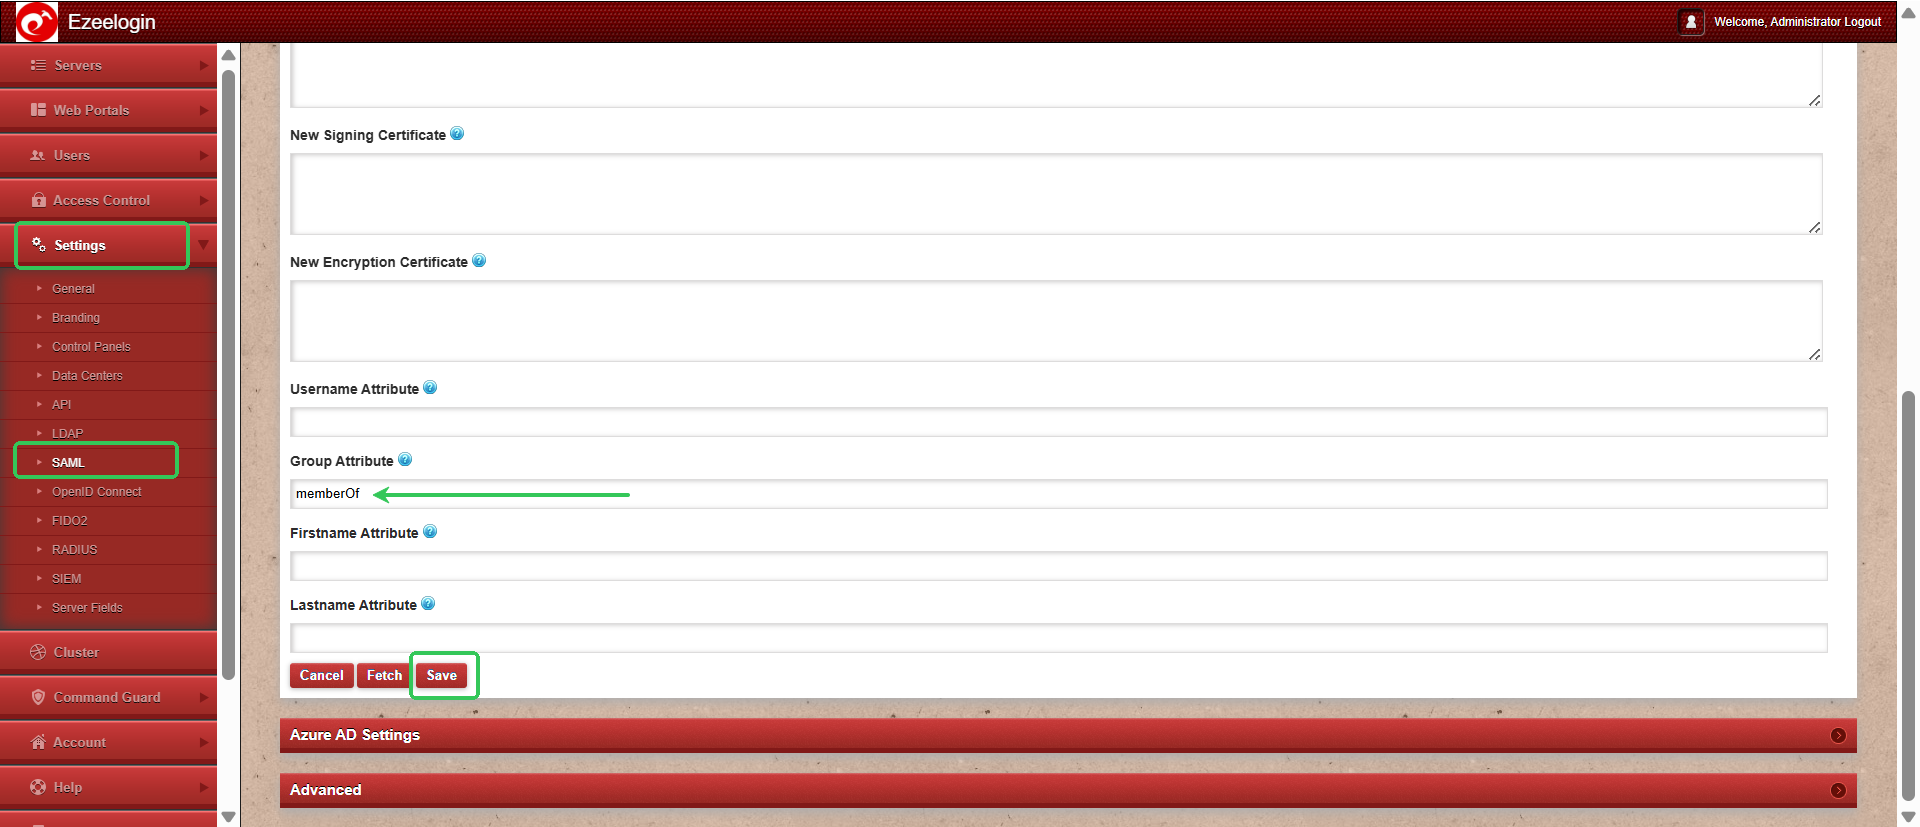
Step 2: Also, mention the same group attribute in Ezeelogin GUI --> under Settings --> SAML --> Group Attribute.
Step 3: Try to login as Jumpcloud user.

We recommend using the web ssh shell when you are using SAML authentication, which is a lot more convenient as you would not have to worry about the SSH password or the security code for the users.
- Add a different email address for each user. By default, Ezeelogin uses email addresses for creating users.
- If you want to add an existing user in Ezeelogin to SSO, Add the user with the exact username, and email address as follows. (Ezeelogin will verify with the email address of the users by default). Make sure to add the email address for the Ezeelogin Administrator user.
- Saml authentication is not supported for slaves if the URL is IP-based. If you want to authenticate slave using saml you have to use the domain name.
Related Articles: