Skip to Content

Setup LDAPS on Windows server

How to configure LDAP over SSL (LDAPS) on Windows server?


Overview: This article explains how to set up LDAP over SSL (LDAPS) to create a secure, encrypted connection between the LDAP server and Ezeelogin.


Steps to secure Active Directory / Configure LDAPS 
1. Install Active Directory Certificate Services (AD CS)
2. Create certificate template
3. Issue certificate template
4. Request new certificate for created certificate template
5. Export the created certificate
6. Configure LDAPS on the gateway server

Detailed Step-by-Step instructions

Step 1: Install Active Directory Certificate Services (AD CS)

Step 1(A):
 On the Windows Server Machine, click on Start -> Server Manager -> Add Roles and Features.

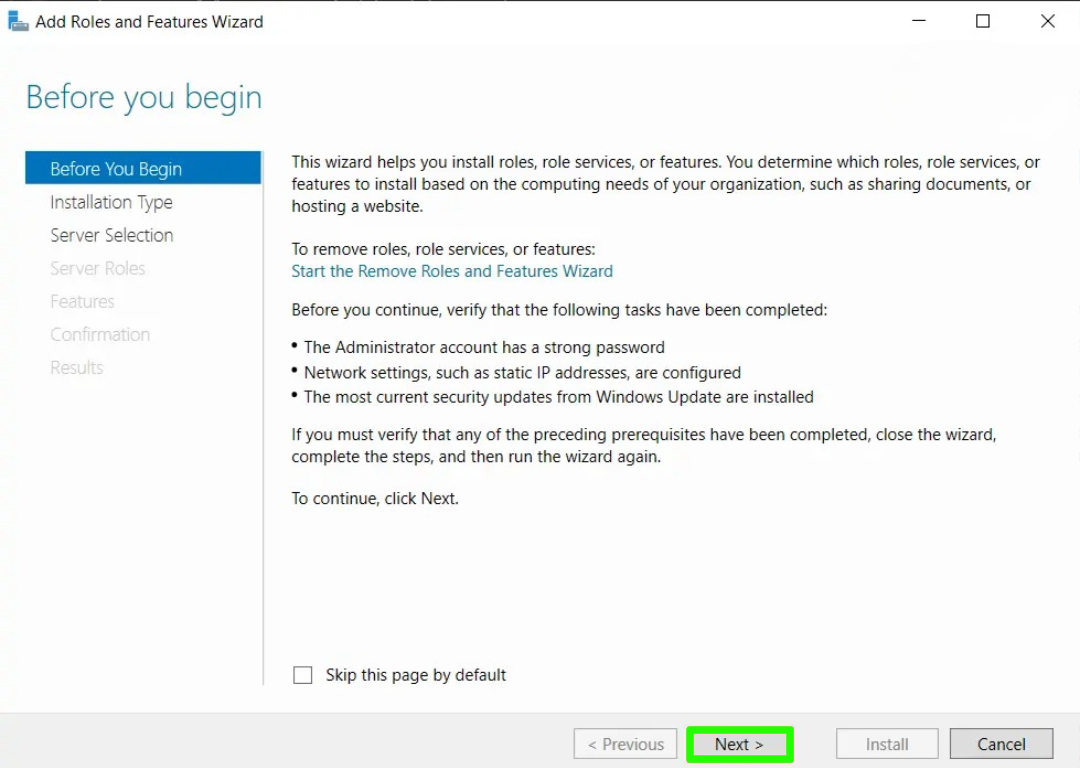
Step 1(B): After selecting Add Roles and Features and Click on Next.

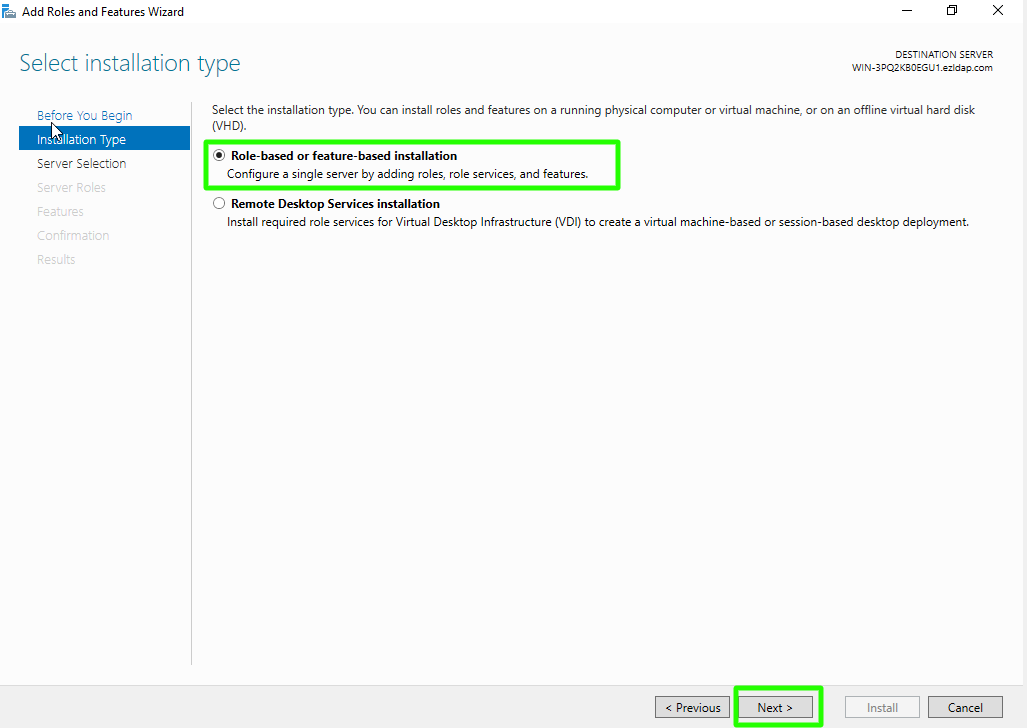
Step 1(C): Choose "Role-based or feature-based installation" option and Click on Next button.

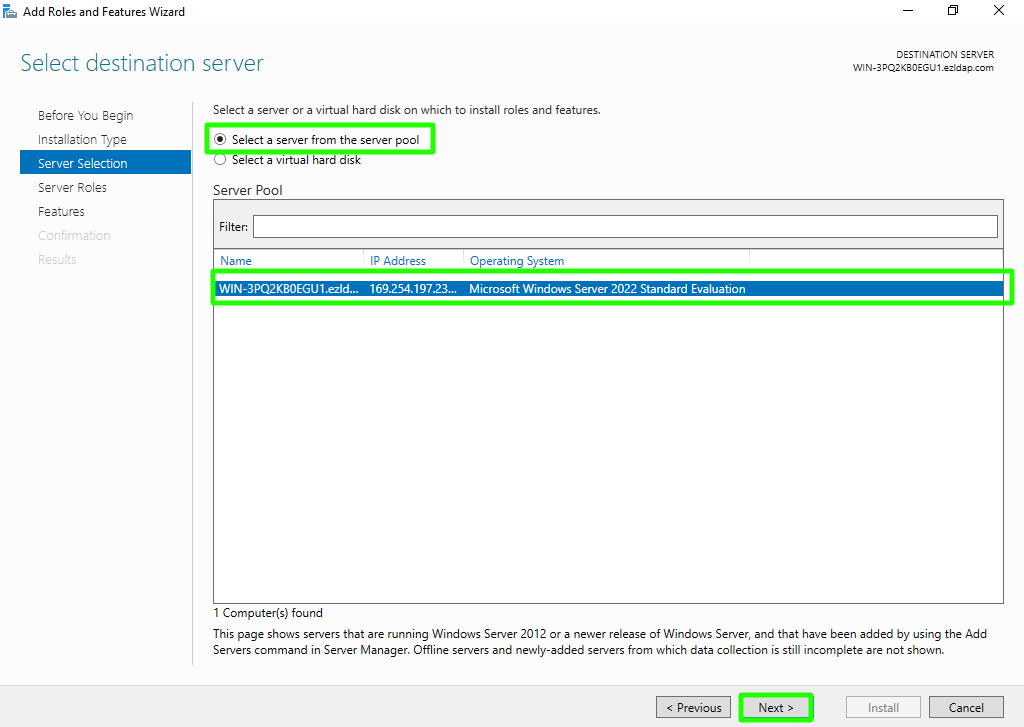
Step 1(D): Choose "Select a server from the server pool" option & select the ldap server from the server pool and click on Next button.

Step 1(E): Select "Active Directory Certificate Services" from the list of roles, then in the next window, click "Add Features" and proceed by clicking Next.

Step 1(F): Choose nothing from the list of features and click on Next button.

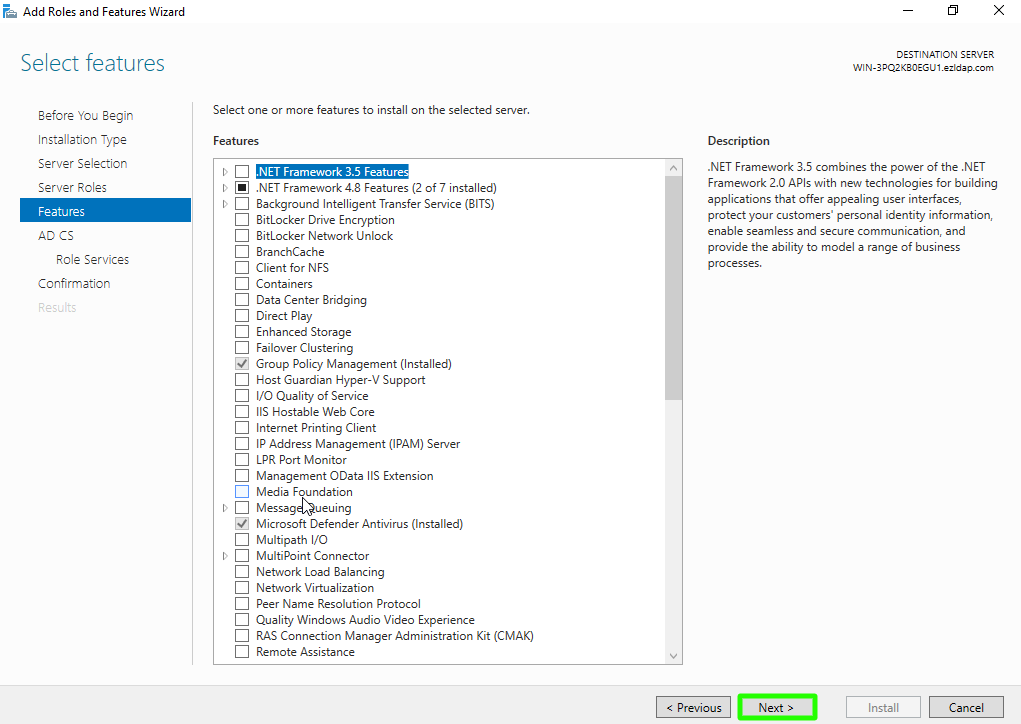
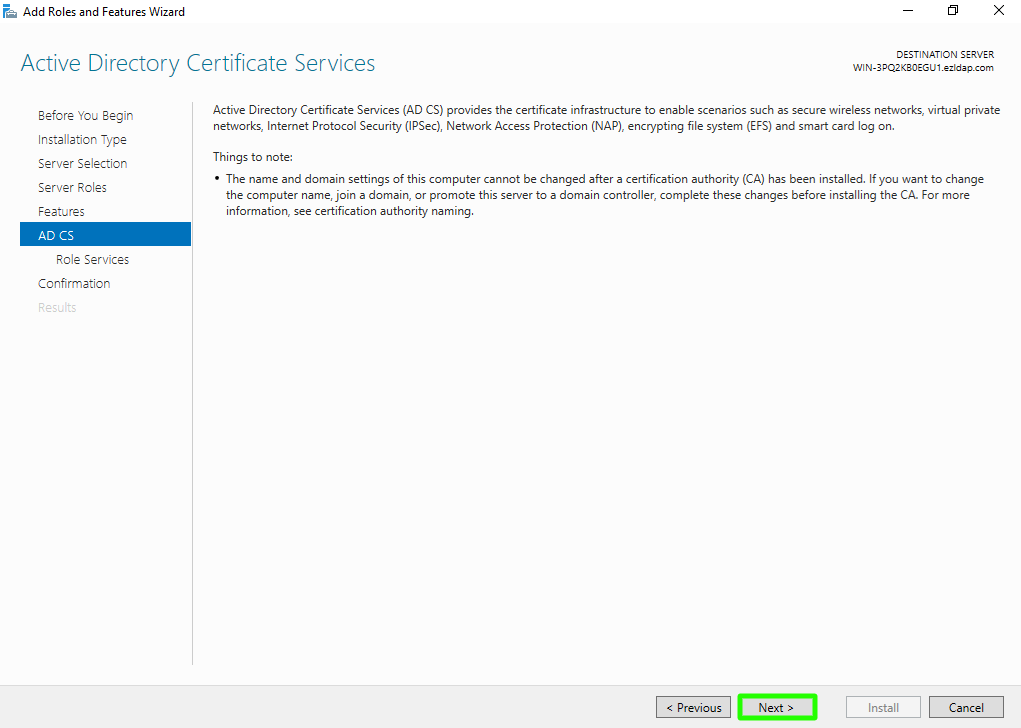
Step 1(G): In Active Directory Certificate Services (AD CS) choose nothing and click on Next button.

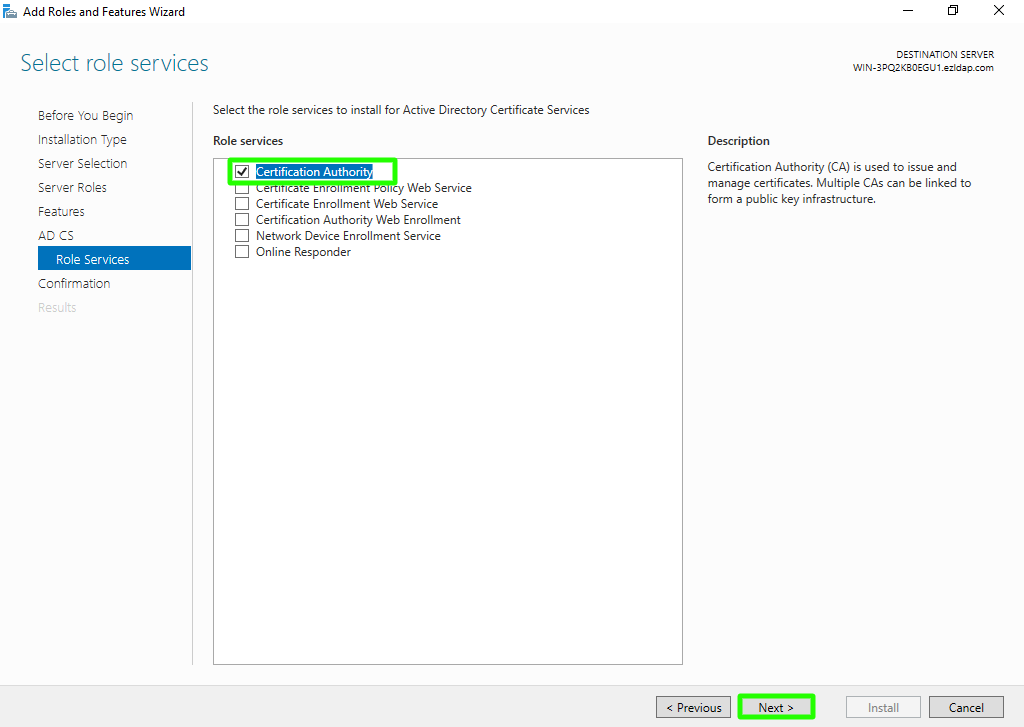
Step 1(H): Enable "Certification Authority" from the list of roles and click on Next button.

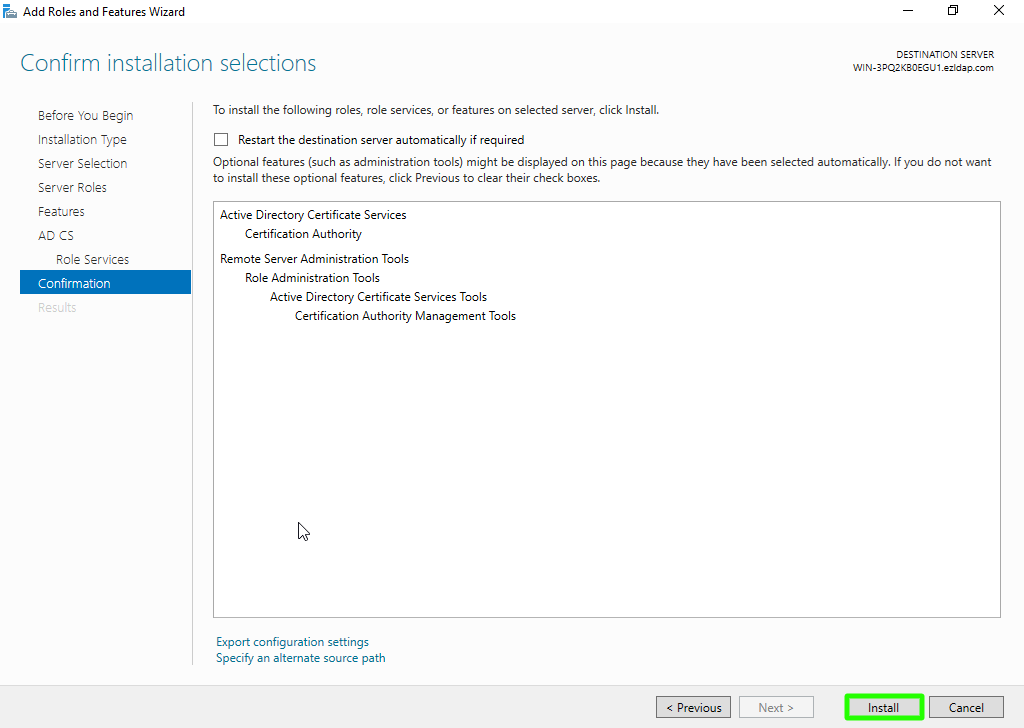
Step 1(I): Click on install button to confirm installation.

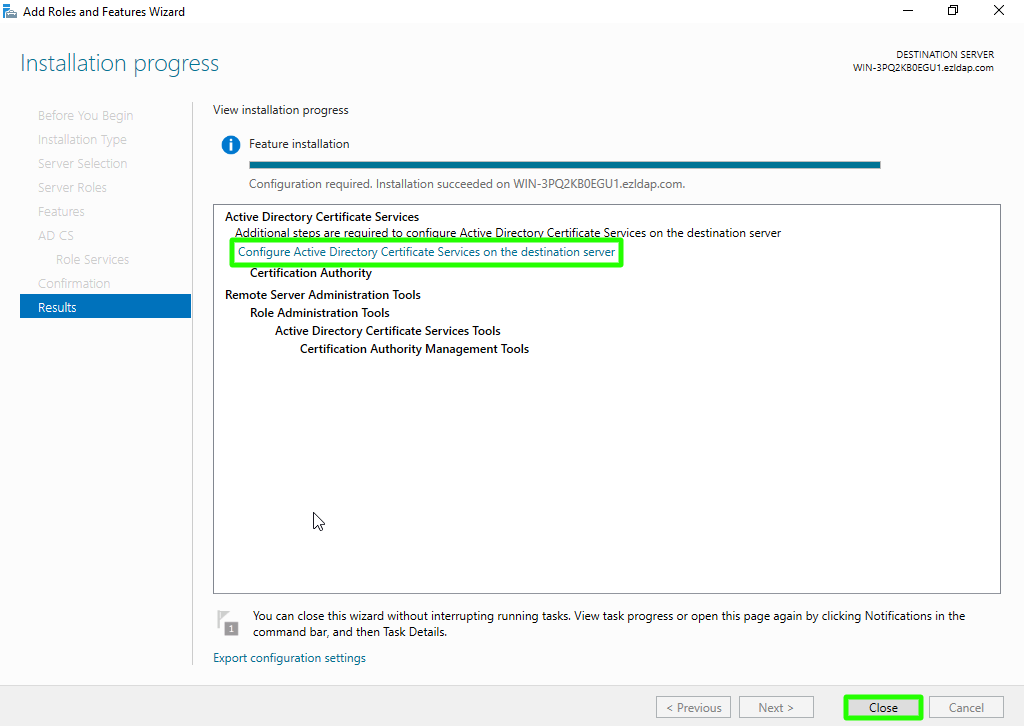
Step 1(J): Wait for the process to complete, then in the next window, click "Configure Active Directory Certificate Services on Destination Server", and finally, click Close.

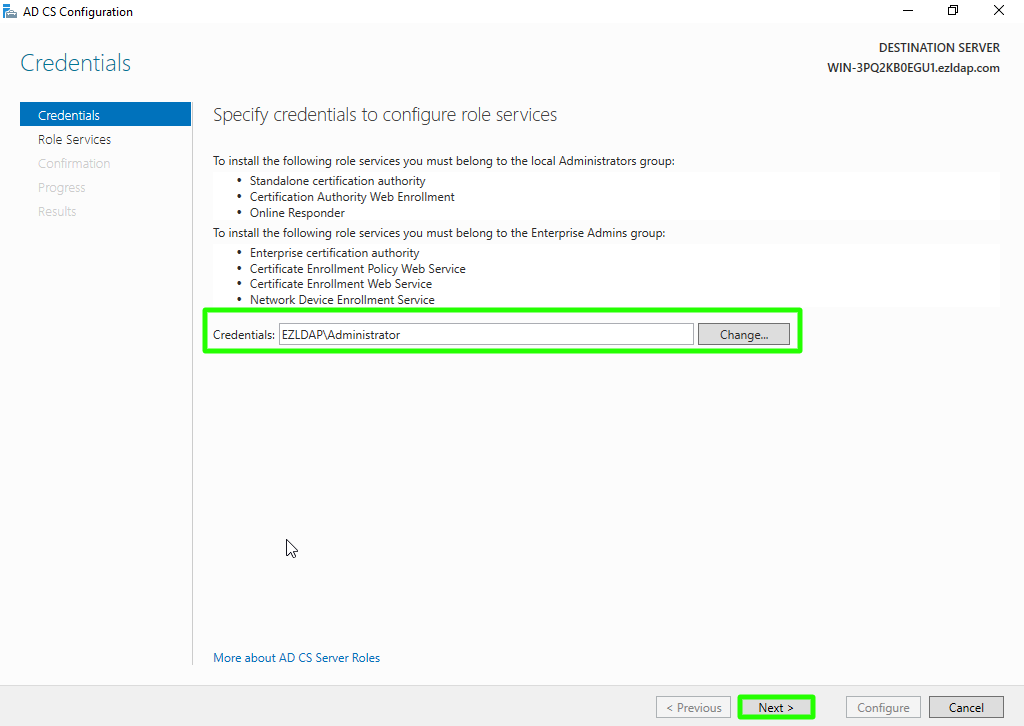
Step 1(K): Use the currently logged on user to configure role services and then click on Next button.

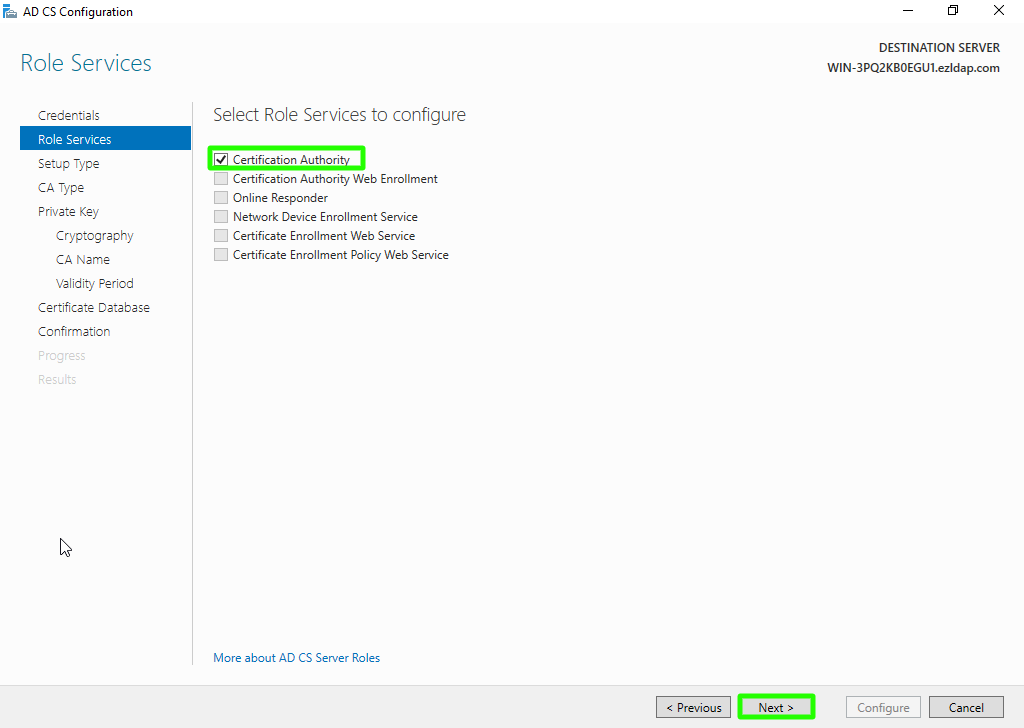
Step 1(L): Enable "Certification Authority" from the list of roles and Click on Next button.

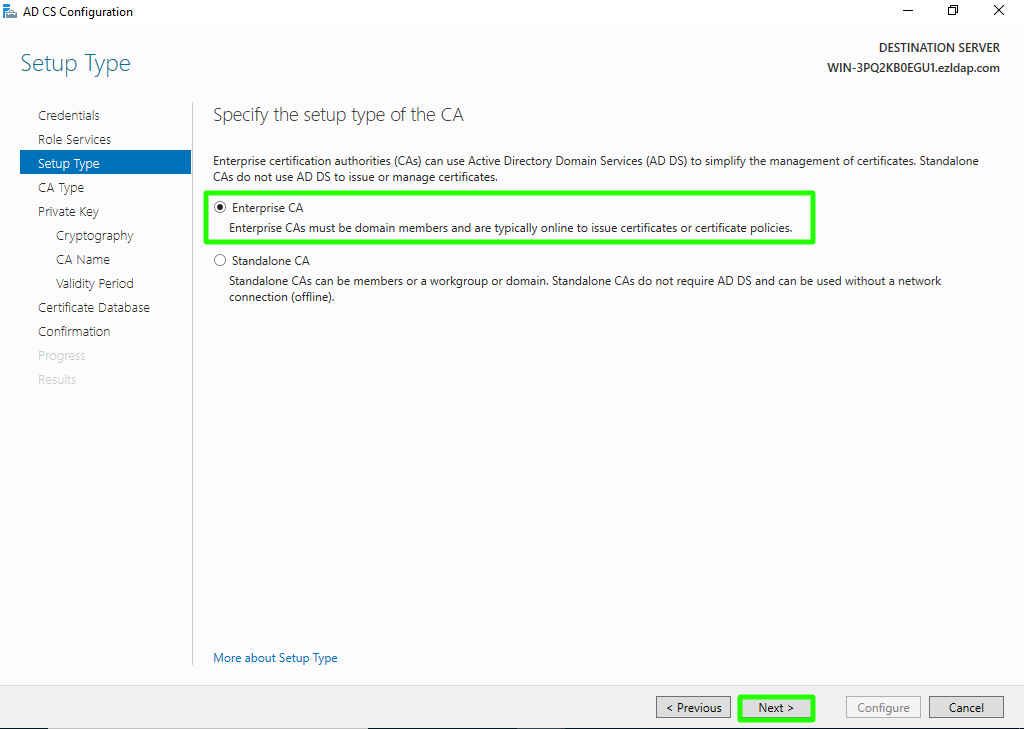
Step 1(M): Choose "Enterprise CA" option and click on Next.

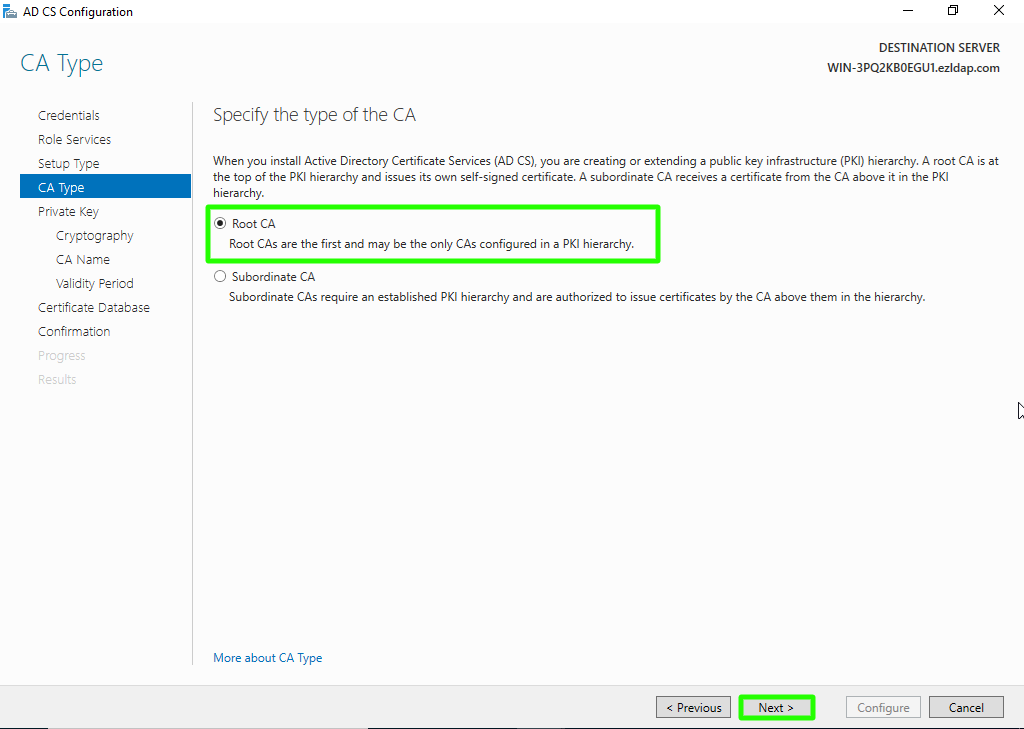
Step 1(N): Choose "Root CA" option and click on Next button.

Step 1(O): Choose "Create a new private key" option and click on Next button.

Step 1(P): Choose "SHA256" as the hash algorithm and click on Next. Recommended to select the most recent hashing algorithm.

Step 1(Q): Click on Next button.

Step 1(R): Set the certificate validity period to the default value of 5 years, then click Next.

Step 1(S): Select the default database location and click on Next.

Step 1(T): Click on Configure button to confirm.


Step 1(U): Once the configuration succeeded and click on Close button.

2. Create certificate template

Step 2(A): Press Windows Key+R, and type certtmpl.msc, and press Enter. 

Step 2(B): Then, select the "Kerberos Authentication" template.

Step 2(C): Right-click on Kerberos Authentication and then select "Duplicate Template".

Step 2(D): The Properties of new template will appear. Configure the setting according to your requirements. Navigate to the "General" tab and enable "publish certificate" in Active Directory option.

Step 2(E): Go to the "Request Handling" tab and enable "Allow private key to be exported" option.

Step 2(F): Navigate to the "Subject Name" tab and enable subject name format a "DNS" Name and click on Apply & OK button.

3. Issue certificate template

Step 3(A): From the start menu, search for and open "Certification Authority". In the console, expand your server, right-click on "Certificate Templates", then go to "New" and select "Certificate Template to Issue".

Step 3(B): Now, select your recently created Certificate Template and click on ok button.

4. Request new certificate for created certificate template

Step 4(A): Navigate to Windows Key+R and type "mmc" and press enter

Step 4(B): Navigate to File and click on "Add/Remove snap-in". 

Step 4(C): Select "Certificates", and click on Add button.

Step 4(D): Select "Computer account" option and click on Next button.

Step 4(E): Select "Local computer" option and click on Finish button and then click on OK button.

Step 4(F): Expand Personal, then right-click on Certificates, go to "All Tasks", and select "Request New Certificate".

Step 4(G): Click on Next button.

Step 4(H): On the next window click on Next button.

Step 4(I): Select your certificate and click on "Enroll" button.

Step 4(J): Click on Finish button.

5. Export the created certificate

 Step 5(A): Right click on recently generated certificate and select All tasks -> Export

Step 5(B): Click on Next button.

Step 5(C): Select "Do not export the private key" option and click on Next button.

Step 5(D): Choose "Base-64 encoded X .509" file format and click on Next.

Step 5(E): Export the certificate to the desired location and click on Next.

Step 5(F): Click on Finish button to complete the certificate export.

Step 5(G): On the next pop up window click on OK button.

6. Configure LDAPS on the gateway server

Step 6(A): Run the following command to install OpenSSL on the gateway server:

root@gateway:# apt-get install openssl      #Ubuntu

root@gateway:# yum install openssl          #RHEL/CentOS

Step 6(B): Copy the generated certificate in step 5(E) to the gateway server. Then, run the following command to convert it to a .pem format:

root@gateway:# openssl x509 -in cert_name.cer -out cert_name.pem

For example:

root@gateway:# openssl x509 -in EZLDAPS.cer -out EZLDAP.pem

Step 6(C): Move the converted .pem file to a secure location, such as  /etc/openldap/

Step 6(D): Edit the ldap.conf file and add the following line to specify the path to your certificate:

root@gateway:# vim /etc/ldap/ldap.conf
TLS_CACERT /etc/openldap/EZLDAPS.pem

Step 6(E): To test the LDAPS connection with a valid certificate, run the following command by replacing the values with the appropriate LDAP server details:

root@gateway:# ldapsearch -H ldaps://<server-ip/domain.com>:636 -x -D "<bind-dn>" -W -b "<base-dn>"

For Example:

root@gateway:# ldapsearch -H ldaps://192.168.56.108:636 -x -D "cn=Administrator,cn=Users,dc=ezldap,dc=com" -W -b "dc=ezldap,dc=com"

Step 6(F): Run ldapsearch from the terminal with "LDAPTLS_REQCERT=never" if using a self-signed certificate.

root@gateway:# LDAPTLS_REQCERT=never ldapsearch -H ldaps://<server-ip/domain.com>:636 -x -D "<bind-dn>" -W -b "<base-dn>"

For Example:

root@gateway:# LDAPTLS_REQCERT=never ldapsearch -H ldaps://192.168.56.108:636 -x -D "cn=Administrator,cn=Users,dc=ezldap,dc=com" -W -b "dc=ezldap,dc=com"