How to copy a file to a remote server or group of servers behind the ssh jumphost? Parallel Copy - How to do it?
1. Transfer / copy files from user desktop to remote servers via the gateway server (backend)
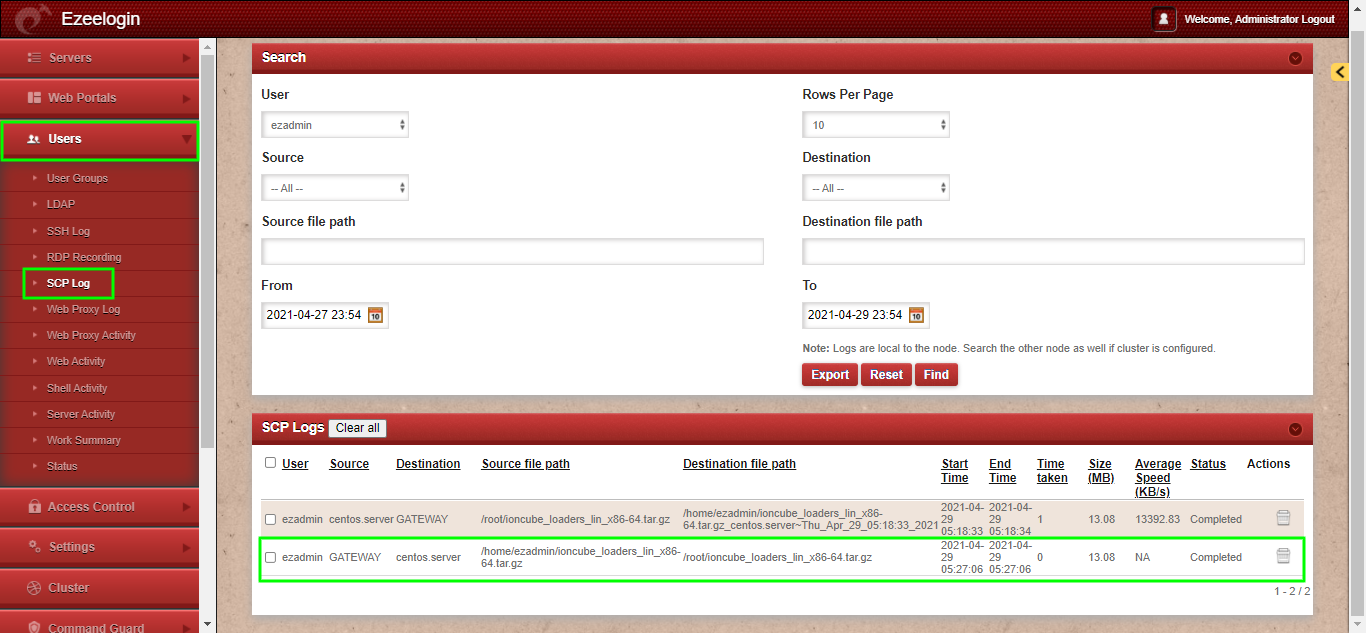
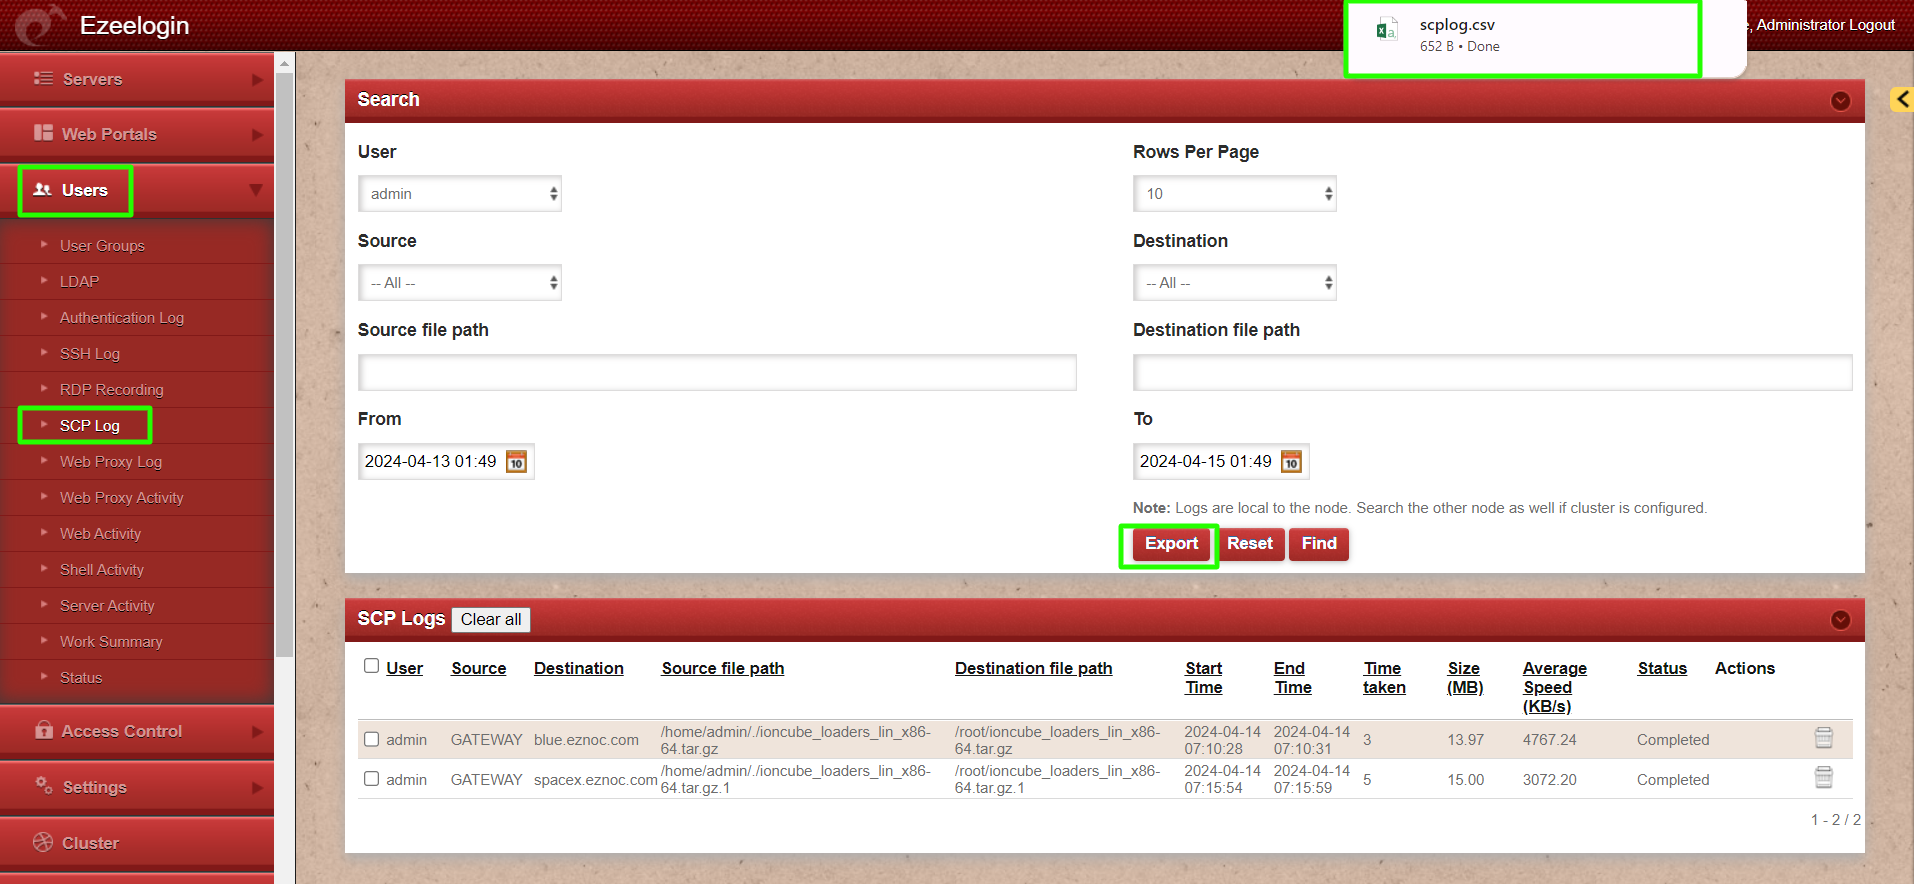
Overview: This article explains transferring files between a desktop and remote servers via gateway server. It covers copying files to the Ezeelogin jumphost server, using ezsh shell for secure file transfers to individual servers or groups, and exporting SCP logs in .csv format.
Step 1: Copy the file to the Gateway server first. Refer how to copy a file from desktop to ssh jumphost
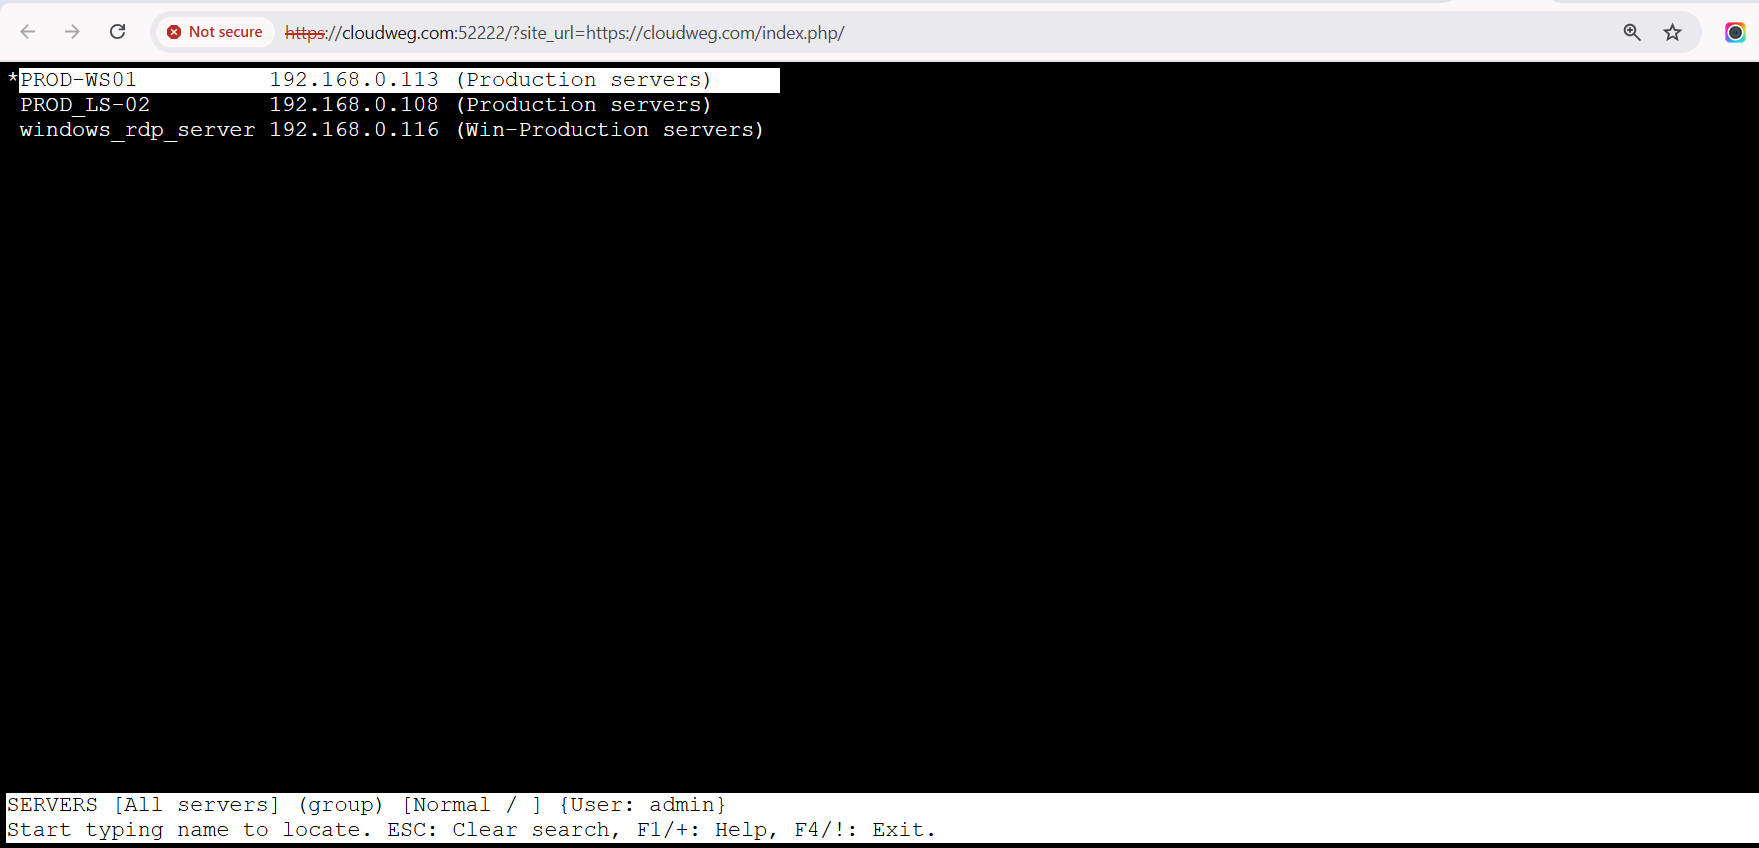
Step 2: Login into ezsh shell and select the remote server to which the file has to be transferred or the server group to which file has to be transferred.
In the example below, we will be transferring file to remote server PROD-WS01, hence selected as shown. After selecting the server to which the files has to be transferred, press 'f9' or '%' to get the secure copy menu.
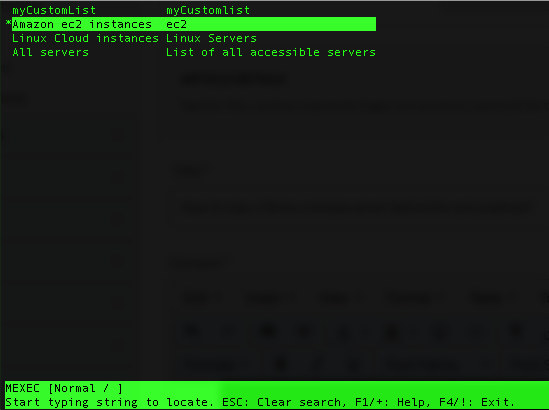
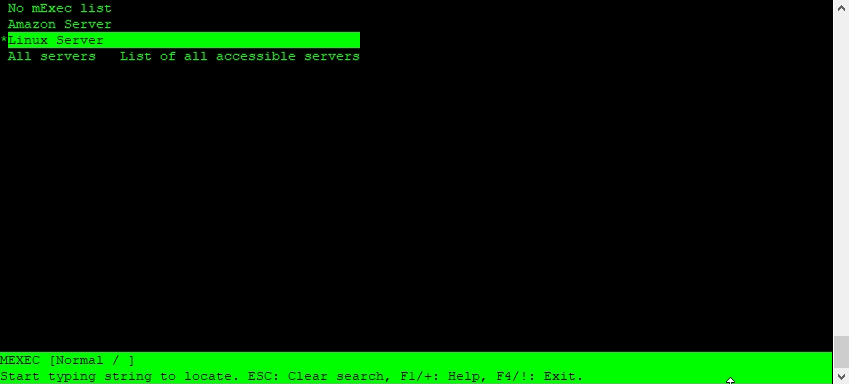
In order to transfer the file to a group of servers or a custom list of servers , press 'f7' or '*' to get to the MEXEC menu, then navigate to the server group or mExec lists(myCustomList) to which the files needs to be transferred and then press 'f9 'or '%' to get to the secure copy menu.
In the example below, we have chosen the Amazon ec2 instances server group.
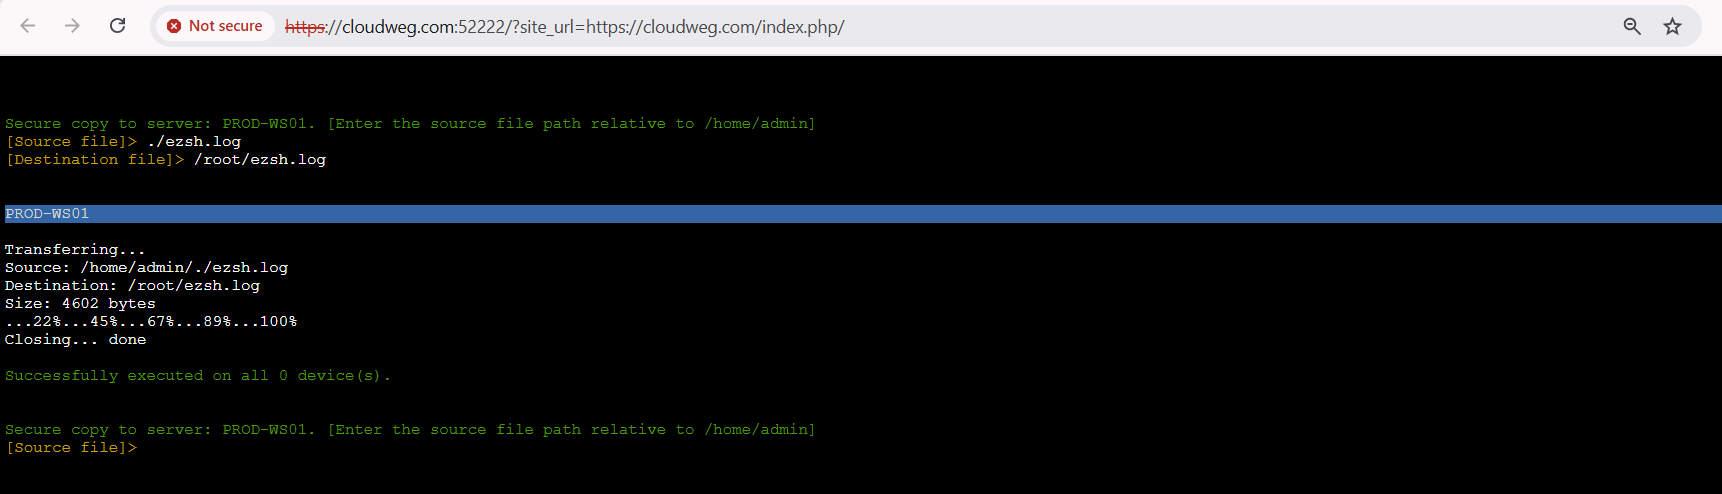
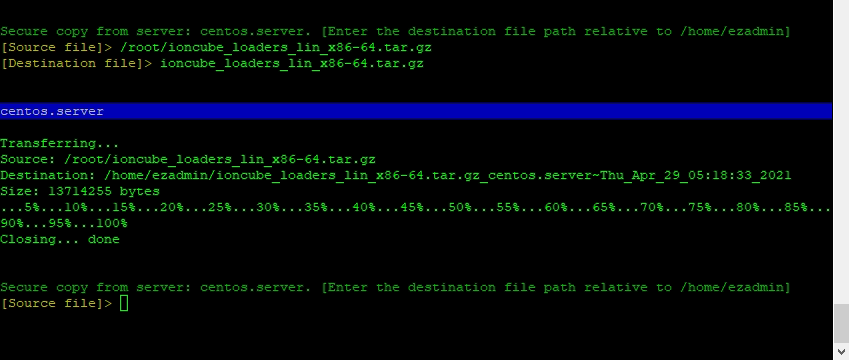
Step 1. Press 'f9' or '%' to open up the Secure Copy in ezsh shell. In Source file, enter the relative path to the file that needs to be transferred. In the example, we have selected ioncube_loaders_lin_x86-64.tar.gz as the file to be copied to remote server fatboy.eznoc.com. In the Destination file, enter the absolute path including the complete file name as shown below.
Note: Pressing the 'tab' key would list the different files that is the home directory of the user available for transfer
Note: folders or directory cannot be transferred as such. They have to compressed into a file such a .zip file or .tar file or tar.gz etc to transfer.
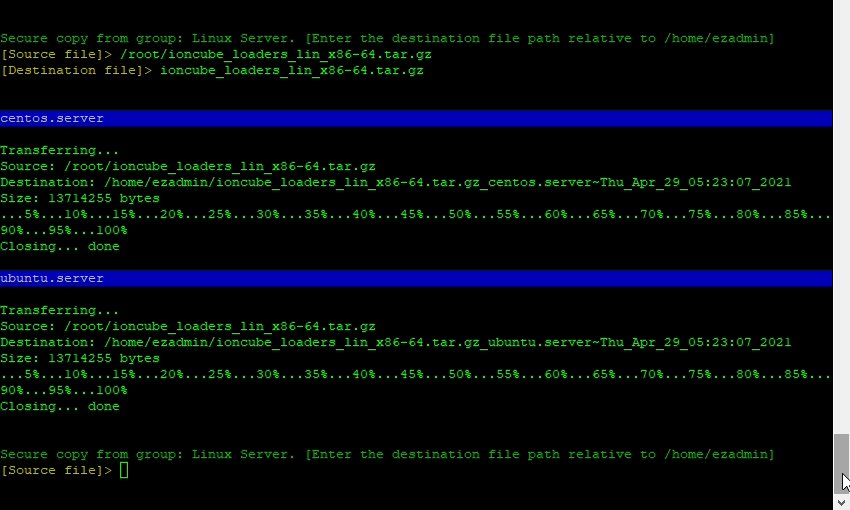
When doing a transfer of file to the server group, the output is as shown below. As you can see the files were copied to remote servers 'messi.eznoc.com' and 'martian.eznoc.com' which were the members in the server group 'PRODUCTION SERVERS-01'. 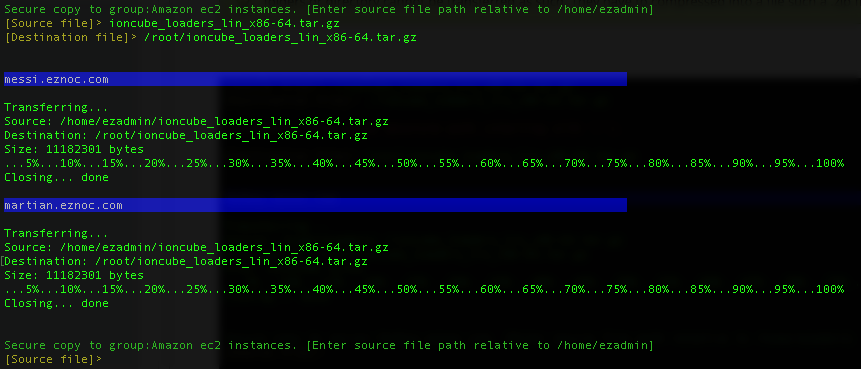
Note: You can exit from the shell after secure copy by typing the command ' exit '
2. Transfer / Copy files from the remote server to Ezeelogin gateway

Note: Files in the remote server (group) should have same name in order to transfer from group to gateway server.
Note:
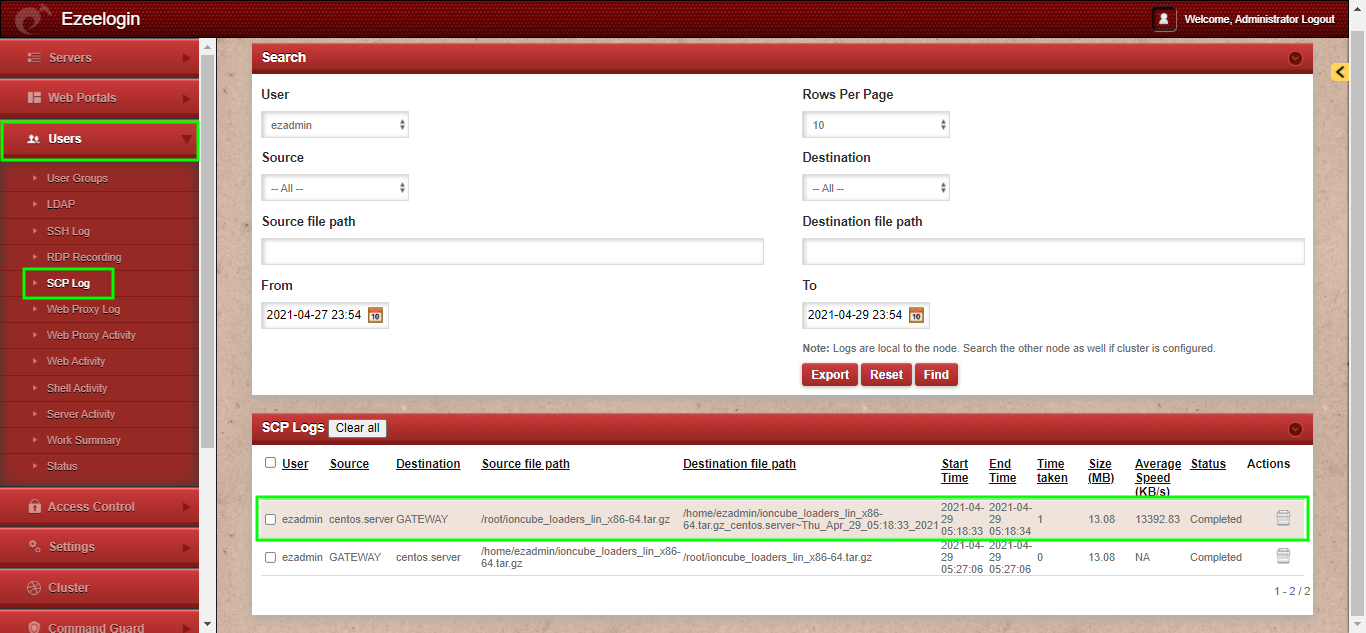
The transferred file will be saved in filename_remote.server_timestamp format.
In the above example it will be ioncube_loaders_lin_x86-64.tar.gz_centos.server~Thu_Apr_29_05:18:33_2021
Here ioncube_loaders_lin_x86-64.tar.gz is the filename , centos.server is the remote server and Thu_Apr_29_05:18:33_2021 is the timestamp.
Related Articles:
Transfer file from desktop machine to remote server via the Ezeelogin web interface (GUI)
How to copy or delete a file in jump server users home directory?
How to transfer Ezeelogin SSH session logs recorded to a remote server ?
How to copy files from desktop to Gateway servers using WinSCP