Create users in Ezeelogin with the same user group in Azure AD
How to auto-create the Azure SSO user to the same group in Ezeelogin?
Overview: This article explains how to auto-create Azure SSO users in Ezeelogin and assign them to matching Azure groups using SAML configuration and Microsoft Graph API.
This feature is available from Ezeelogin version 7.36.0.
Refer article to upgrade Ezeelogin to the latest version.
Note:
User attributes (such as groups and other mapped fields) are automatically updated in the Ezeelogin GUI when a user authenticates again. If any attribute of an existing SAML user is modified in the identity provider after the user has already logged in, the updated values will be reflected in the GUI only after the user logs out and logs in again.
For example, if a user is moved from one group to another in the SAML provider (such as Microsoft Azure), the change will automatically be updated in the Ezeelogin GUI after the user successfully re-logs in.
This feature is available from Ezeelogin version 7.46.0. Refer article to upgrade Ezeelogin to the latest version.
Note:
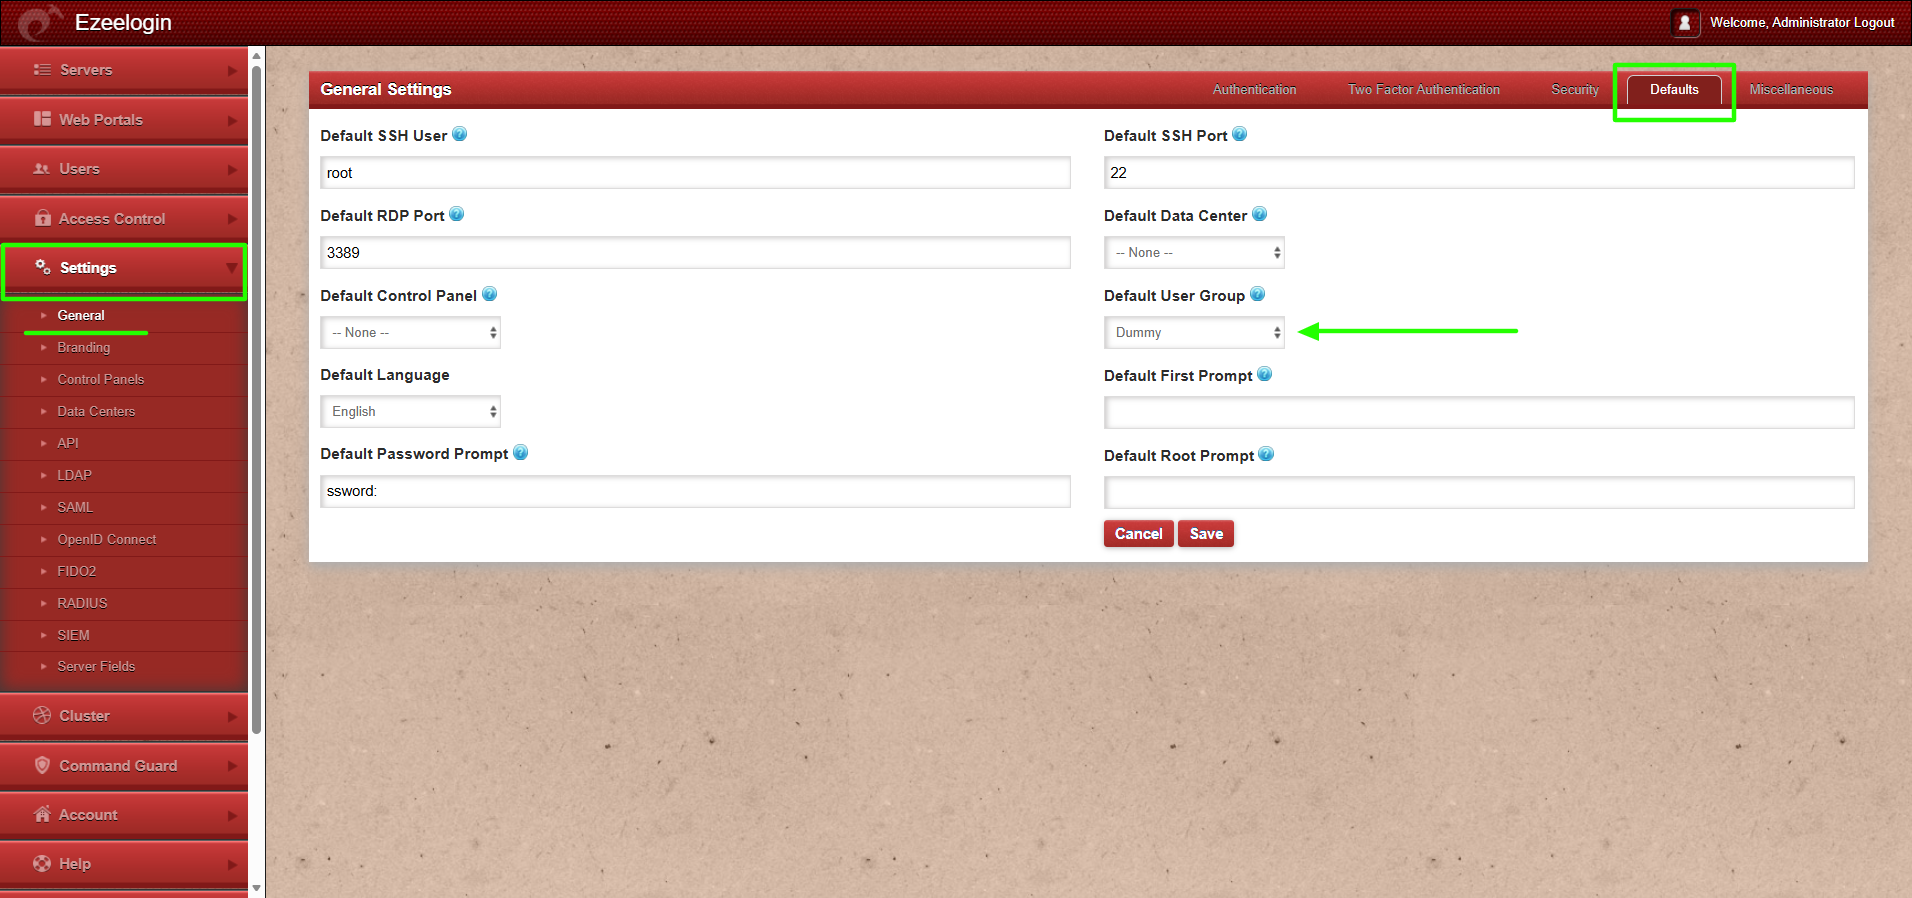
1. If users from the OIDC provider need to be auto-created in the corresponding group from OIDC to the same group in Ezeelogin, the admin user must set the default user group to None. If the same group is not present in Ezeelogin, the user will not be auto-created.

2. If the default user group is set to any group other than None, then all users from the OIDC provider will be auto-created in that same group.
This feature is available from Ezeelogin version 7.46.0. Refer article to upgrade Ezeelogin to the latest version.
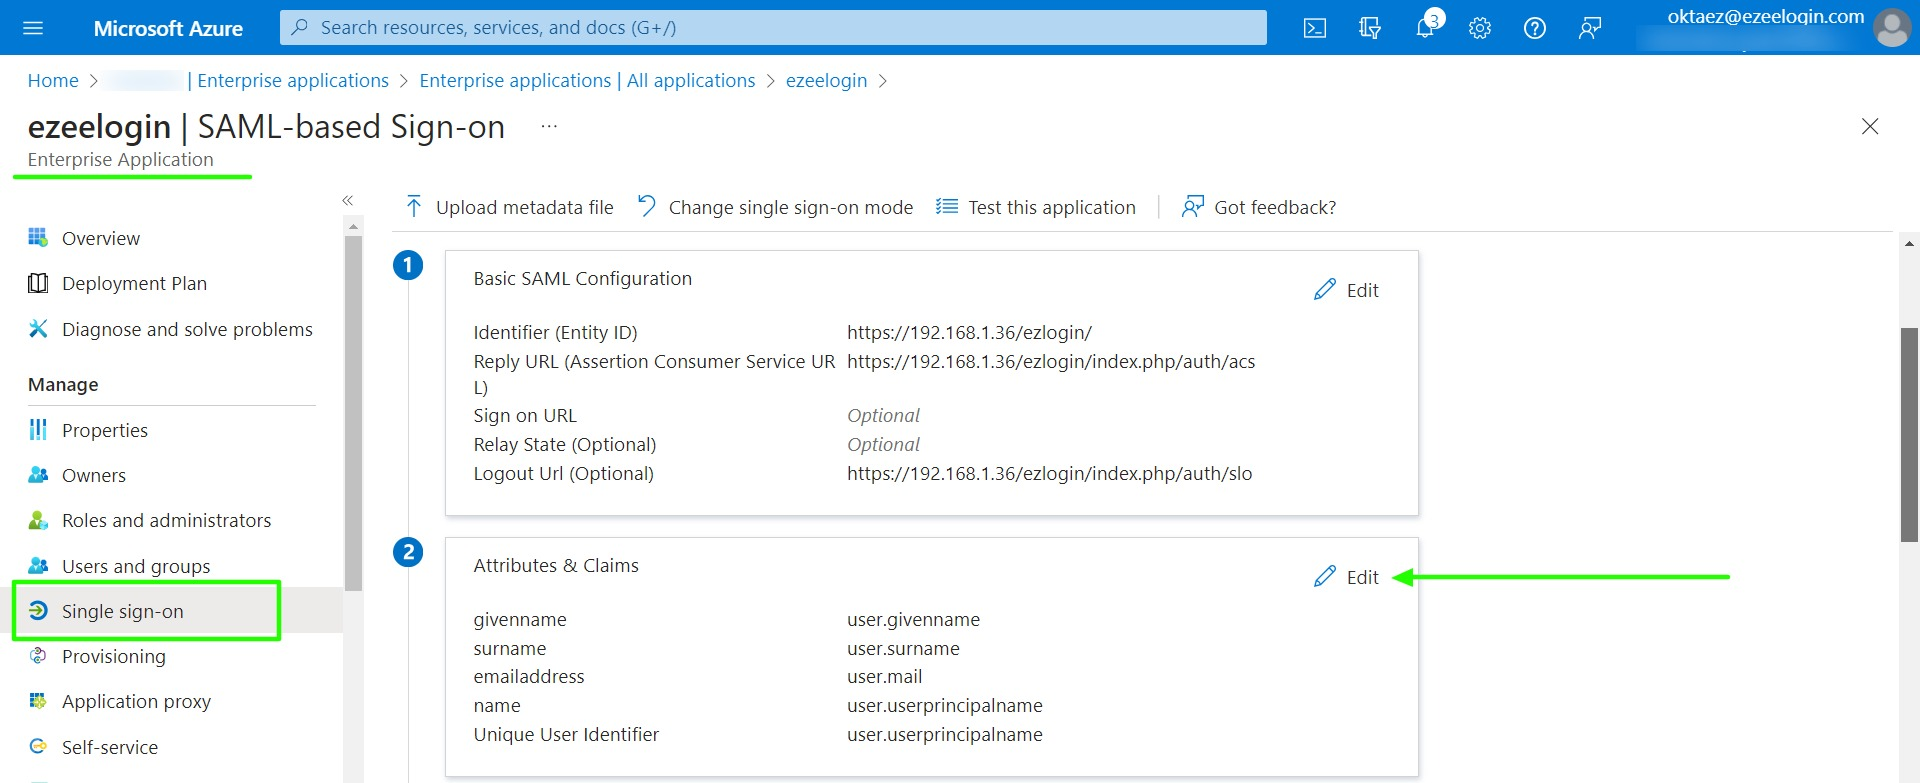
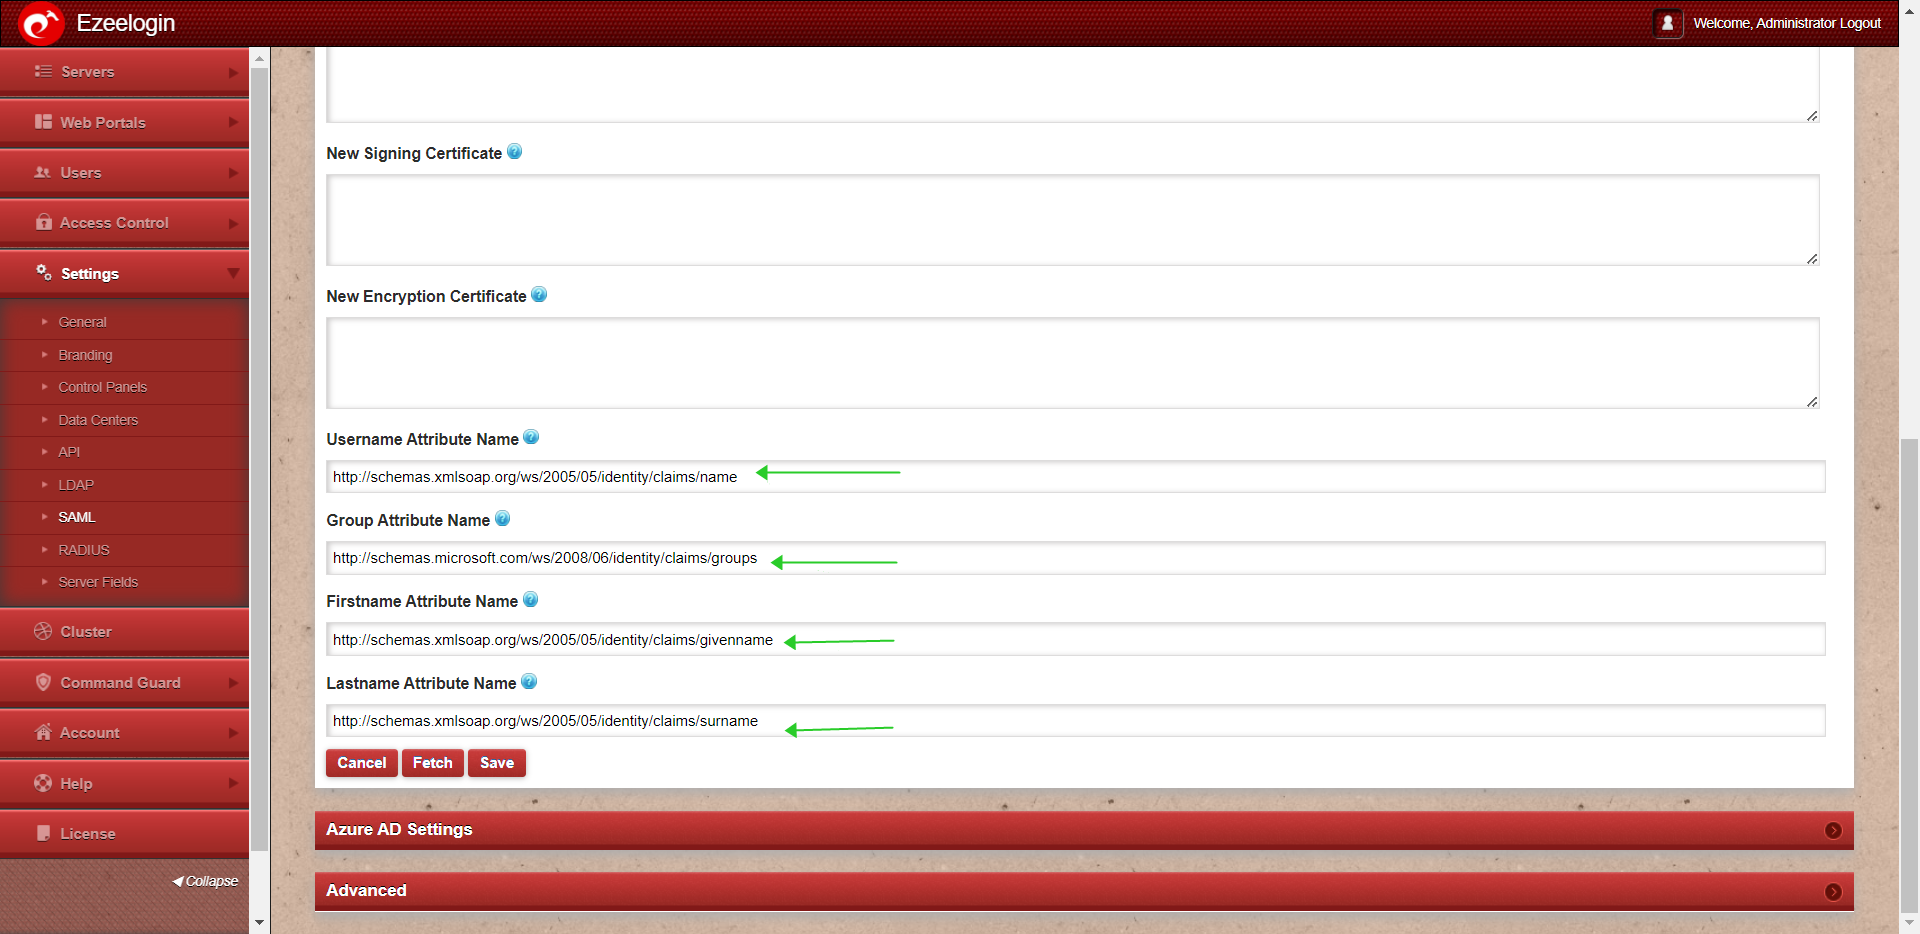
Step 1: Login to Azure and in enterprise application click on Single sign-on -> Attributes & Claims Edit -> Copy Claim names and paste them into the advanced SAML setting in Ezeelogin.
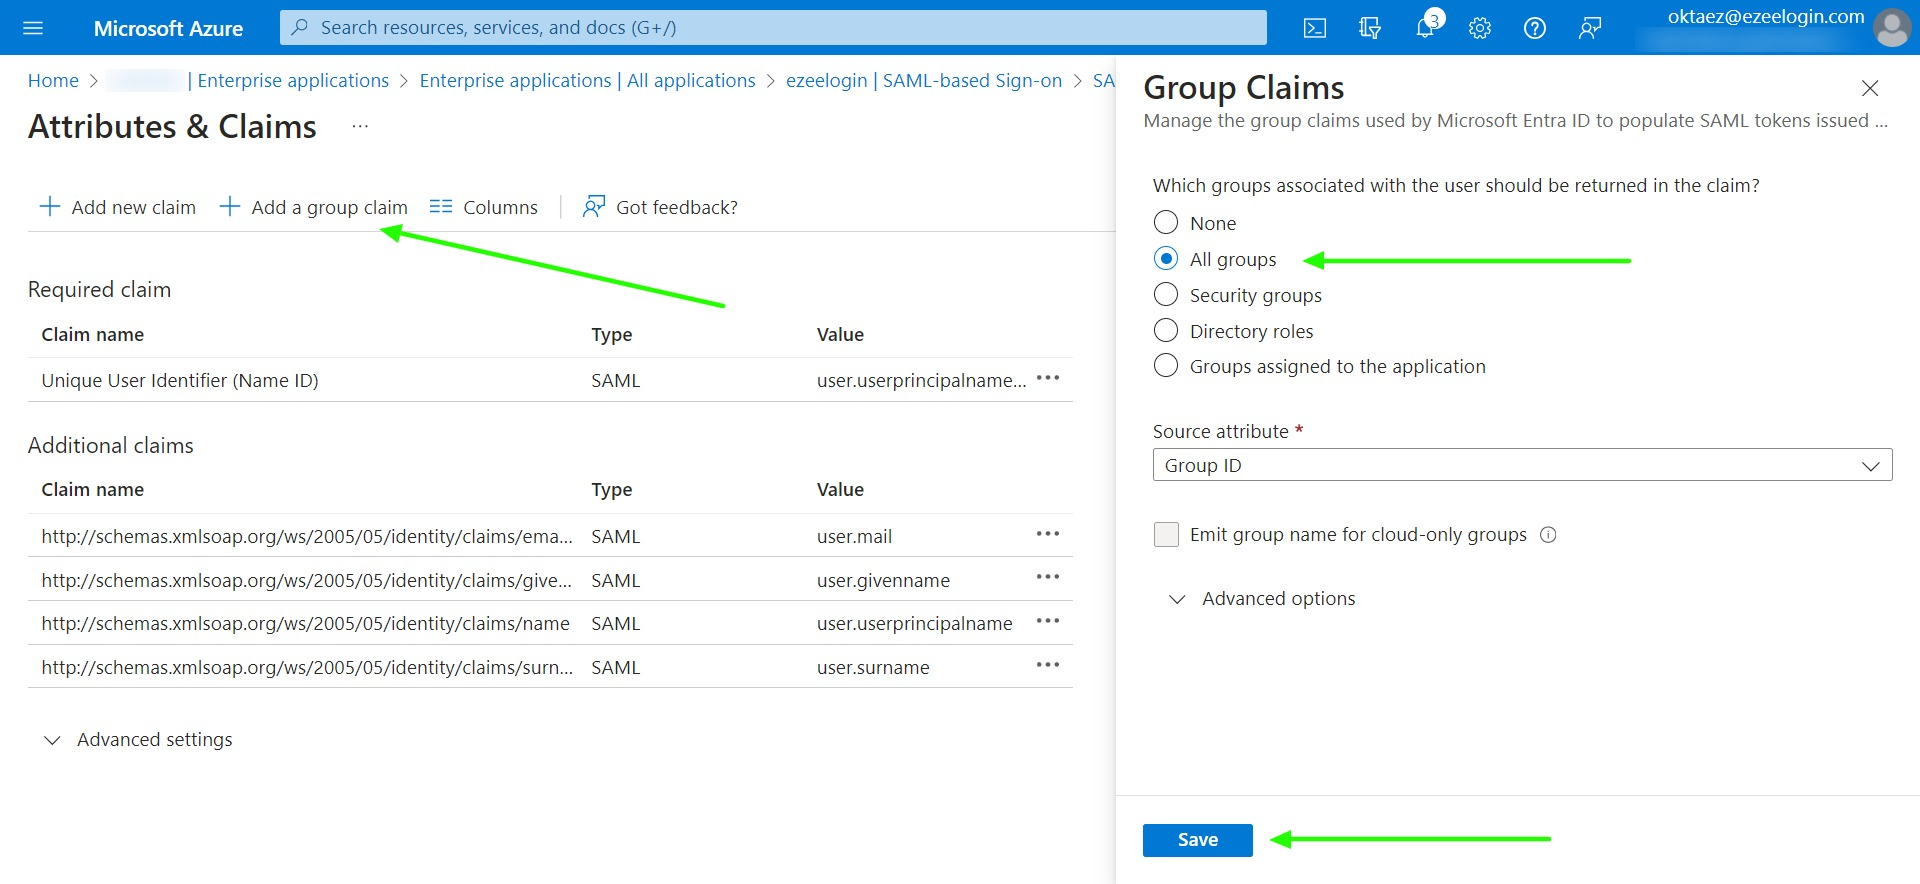
Step 2: Click on Add a group claim -> select All groups -> Save.
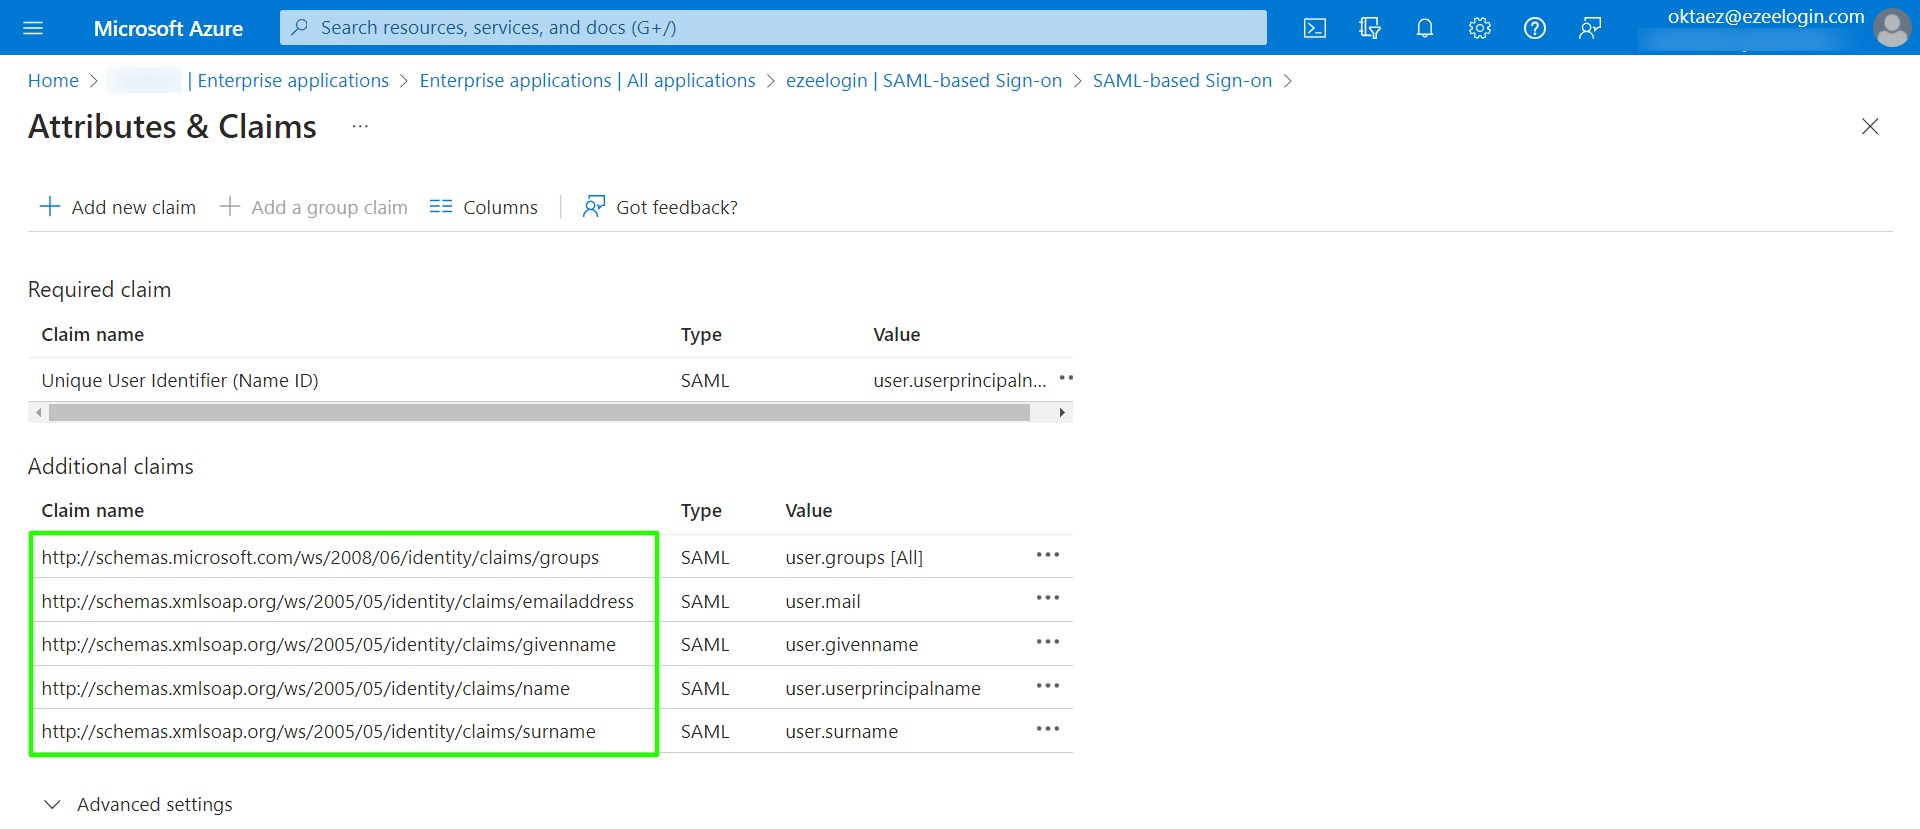
Step 3: Copy the Claim names and paste them into the SAML setting of Ezeelogin.
Please review the attributes listed below if you encounter the following error while attempting to log in as a SAML user:
Could not get username from SAML response
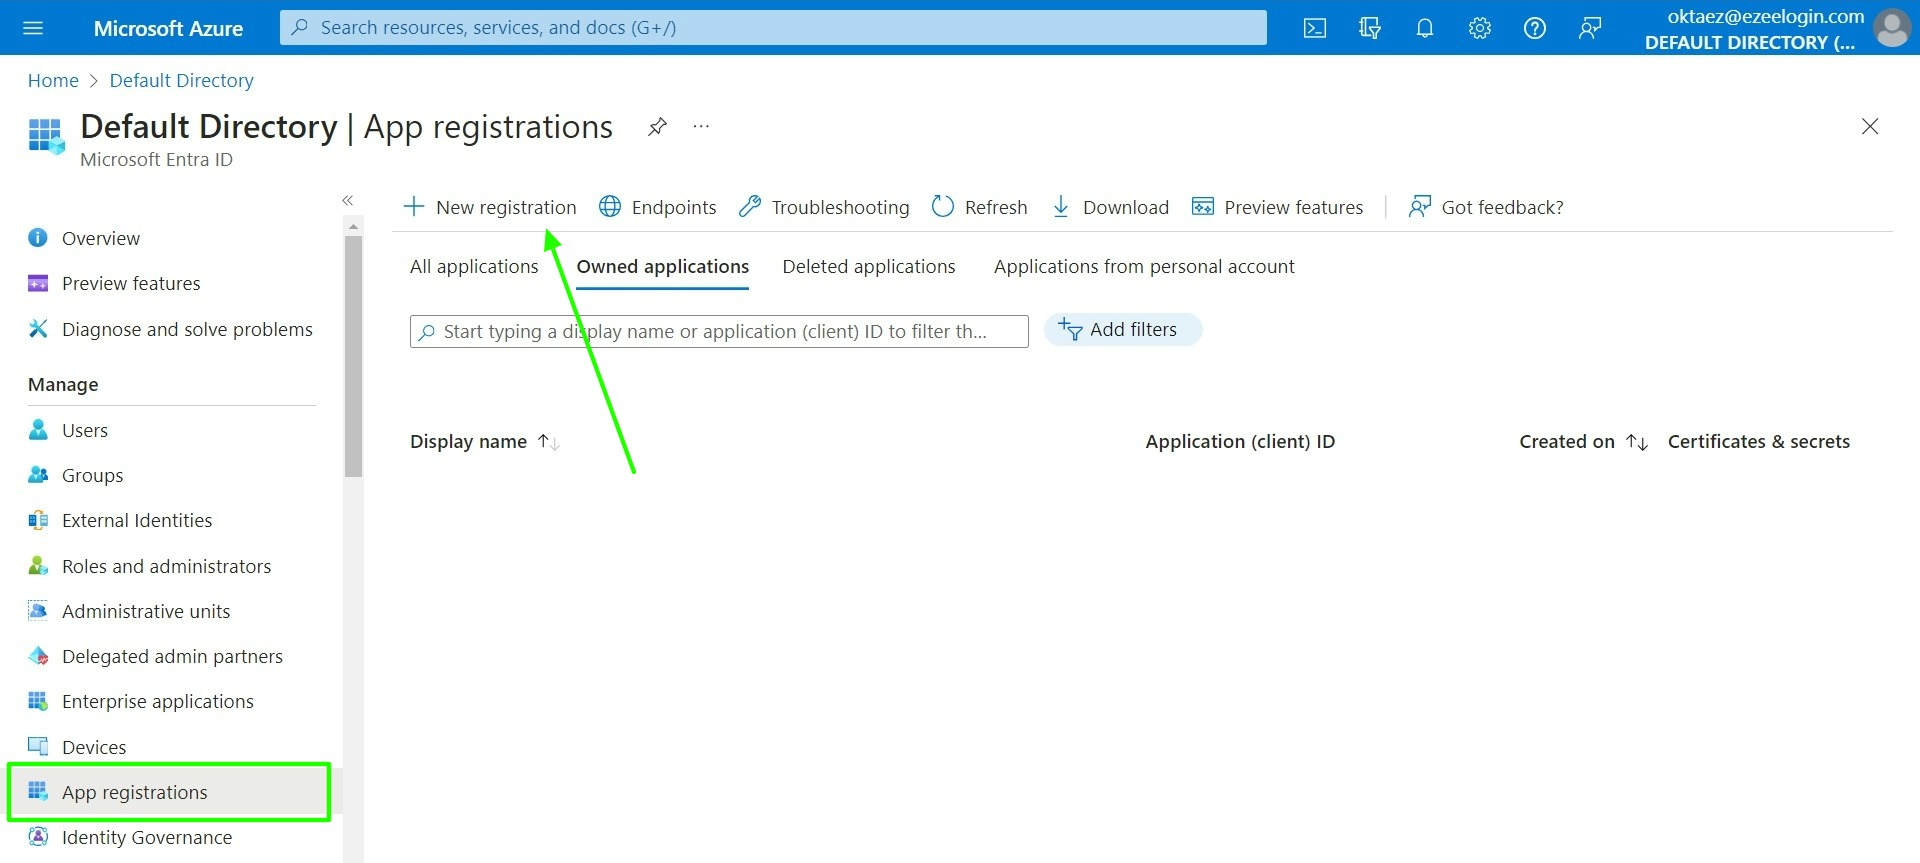
Step 4: Create a new app registration in Azure Microsoft Entra ID.
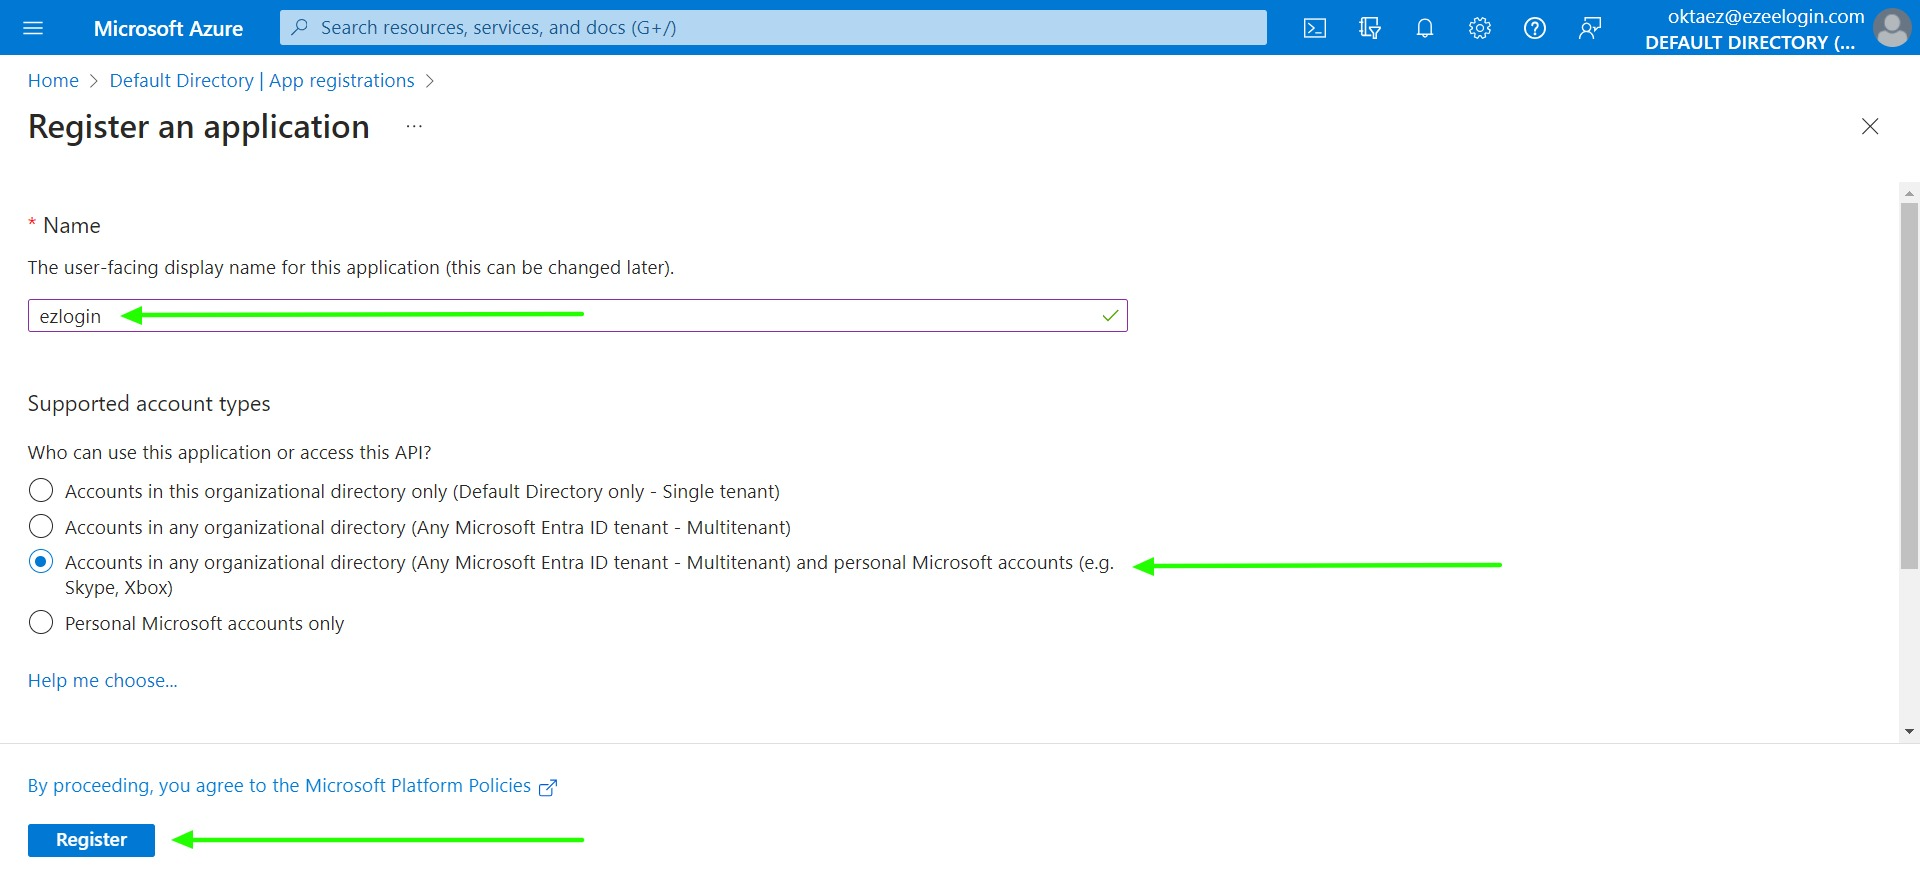
Step 5: Register the application with a name and select Accounts in any organizational directory.
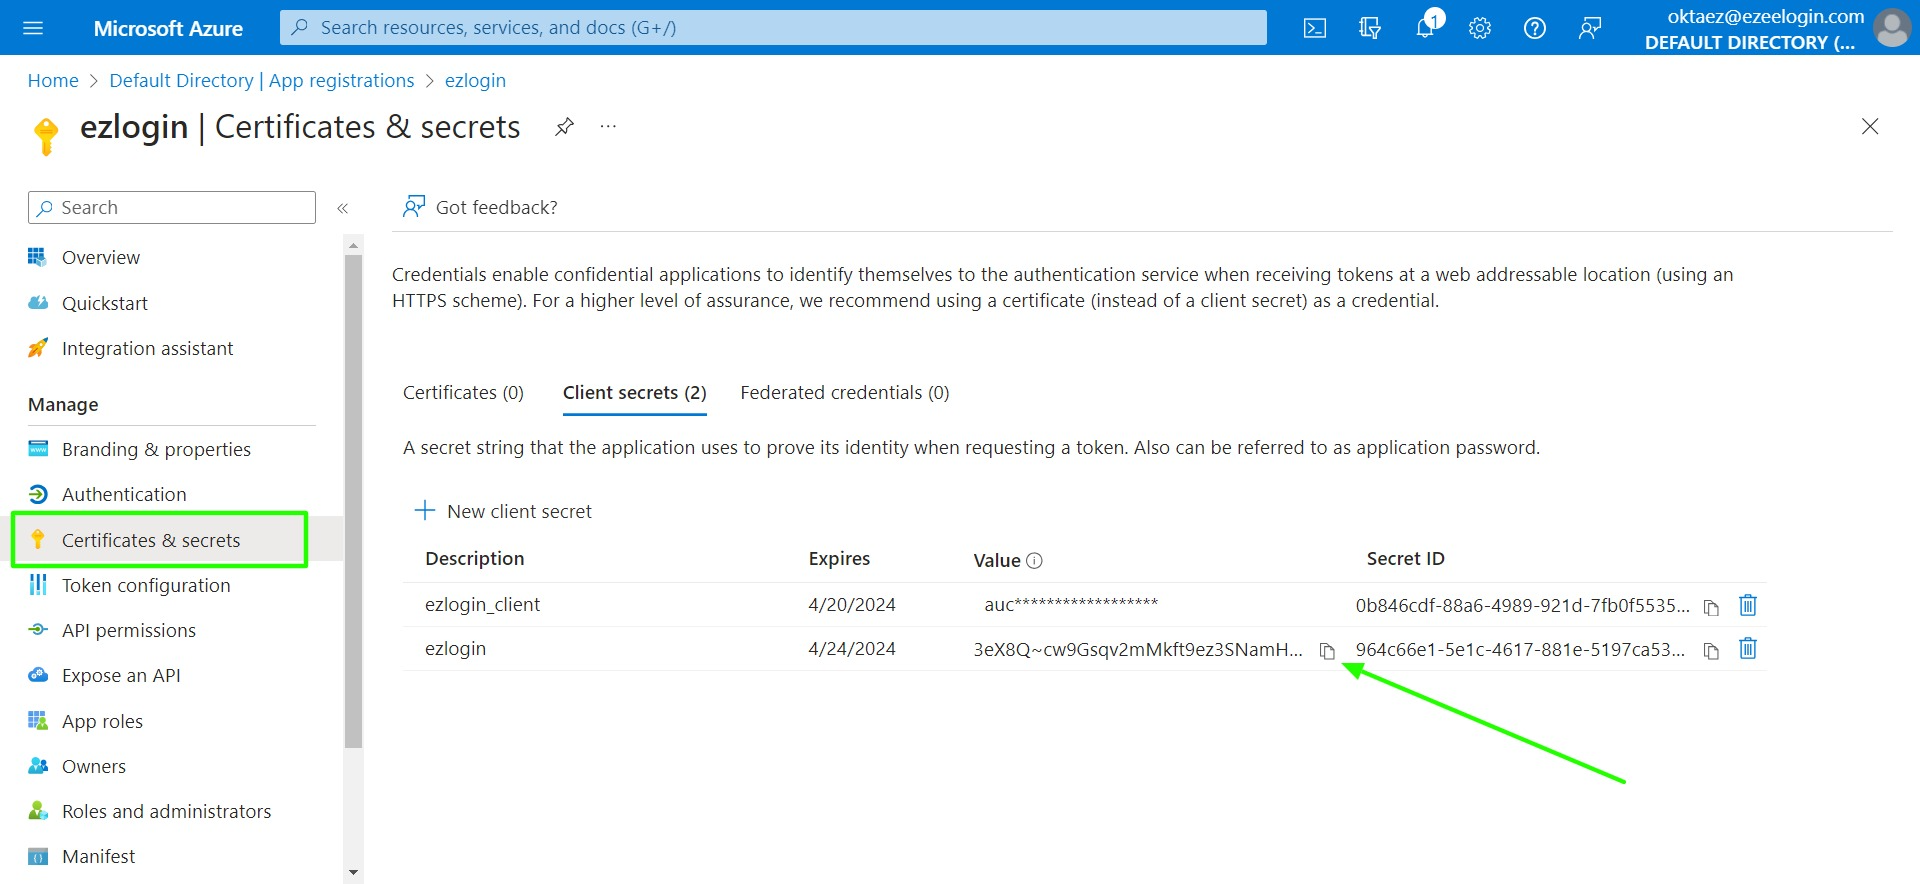
Step 6: Click on the application created, certificate & secrets, and create a new client secret.

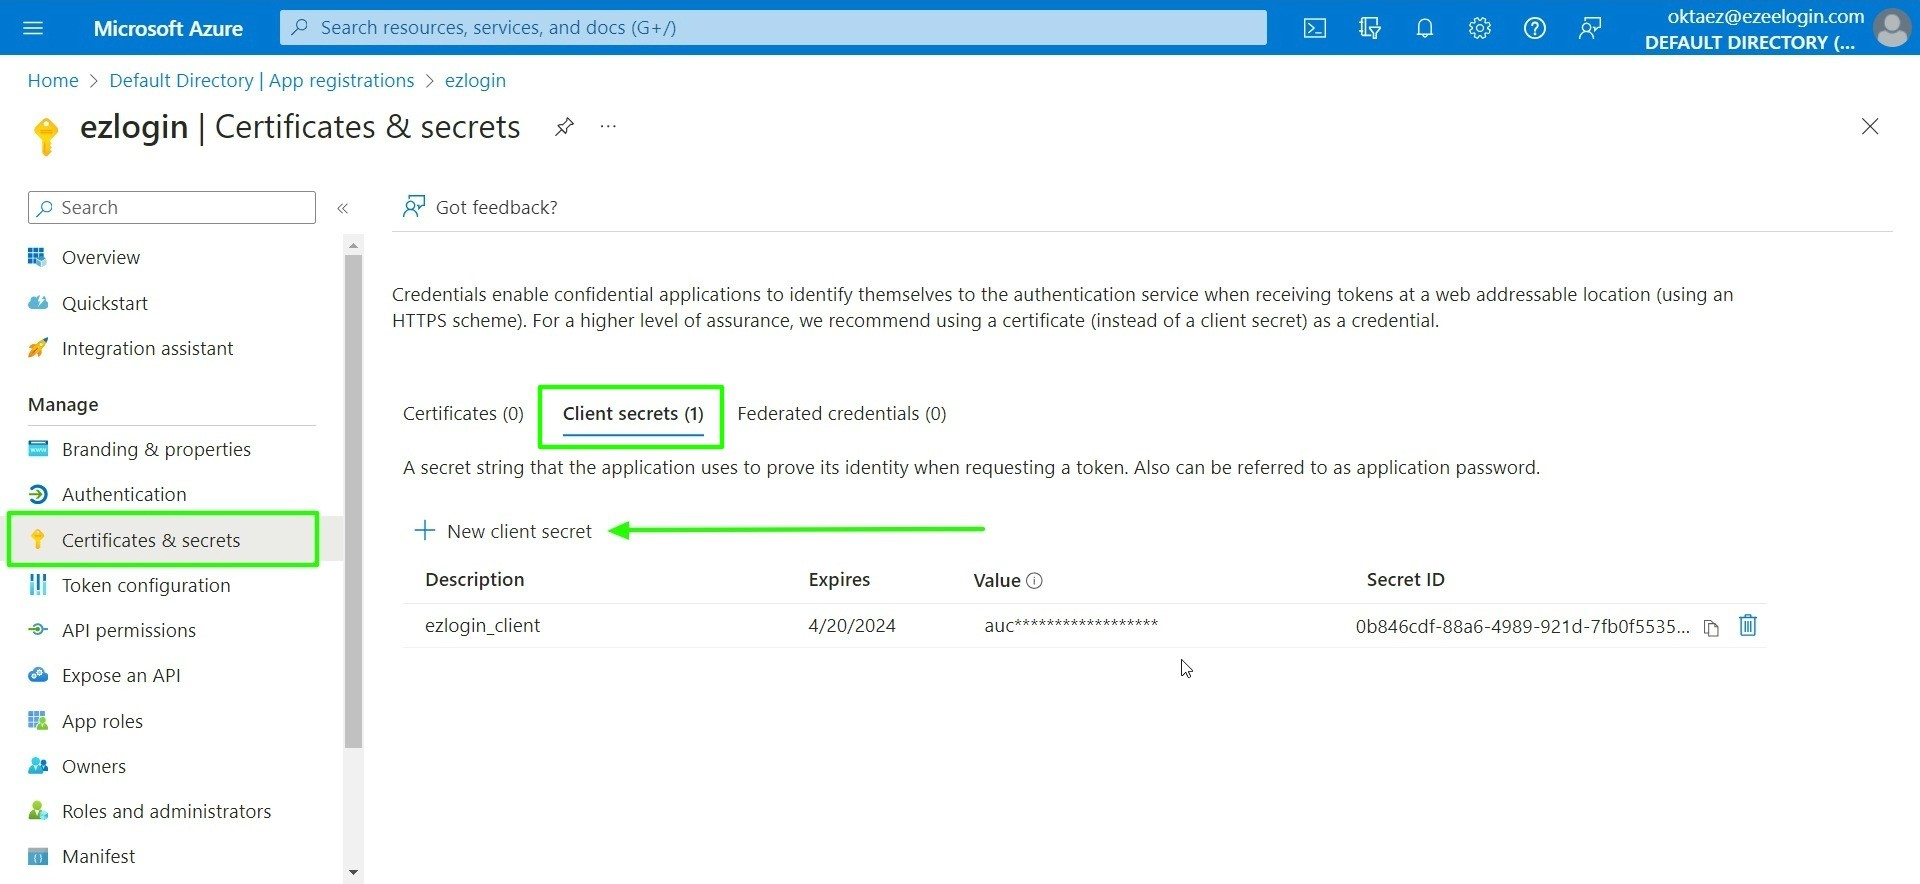
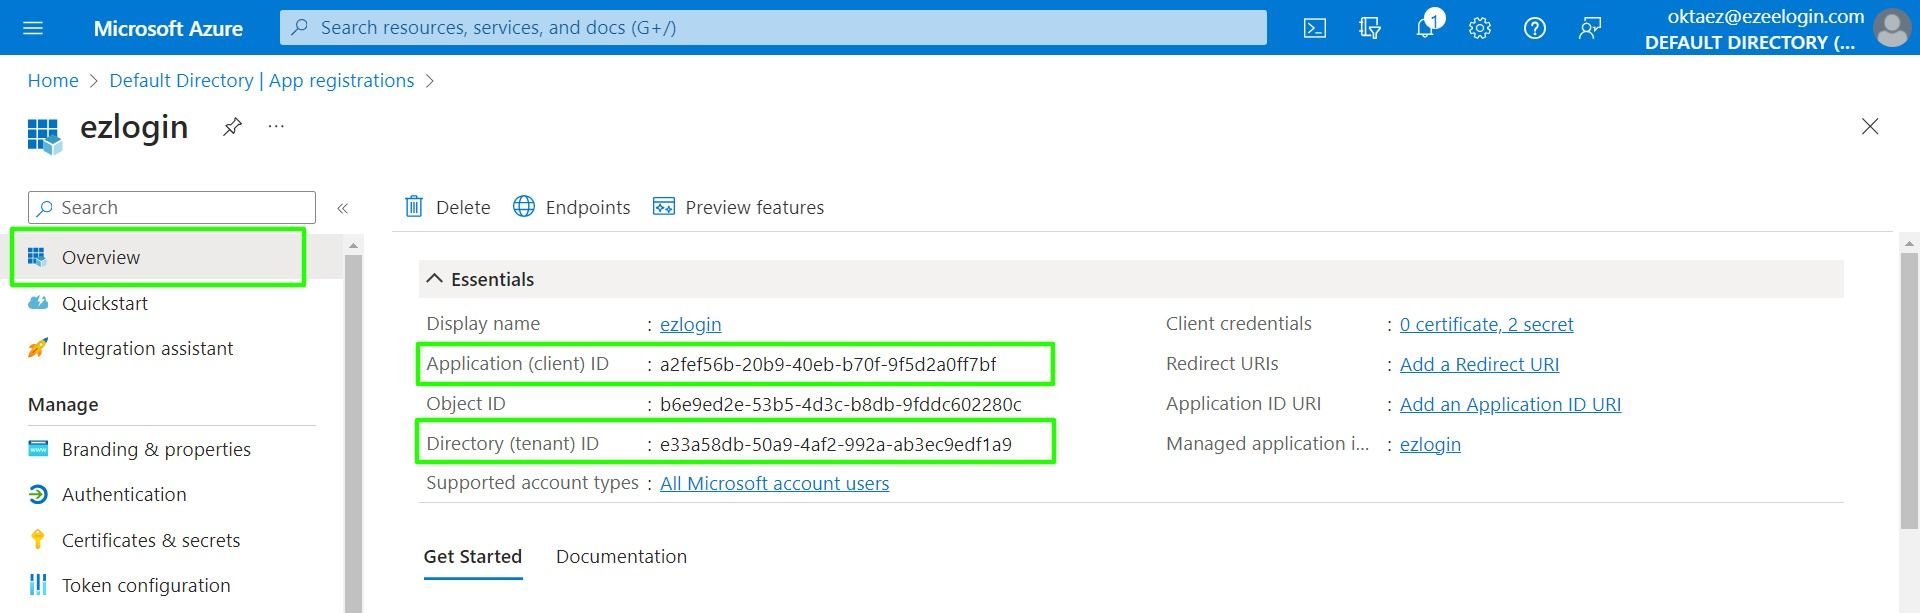
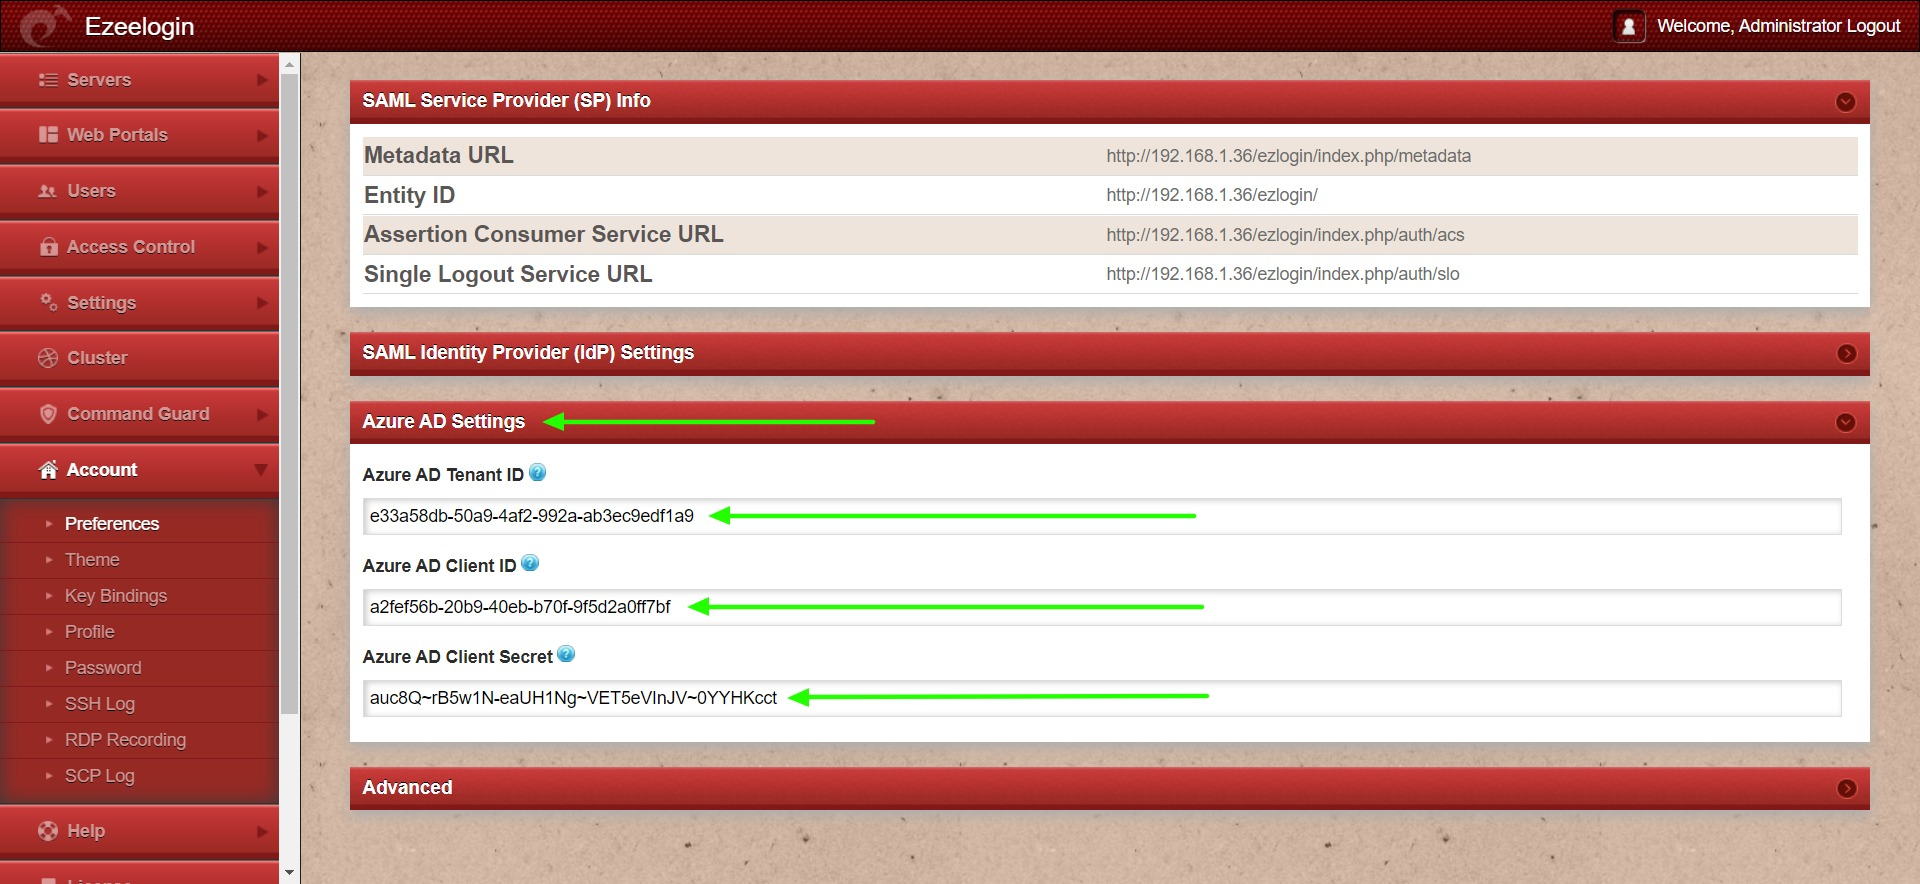
Step 7: Copy the new secret value, client ID, and tenant ID, then paste them into Ezeelogin SAML Azure AD Settings.
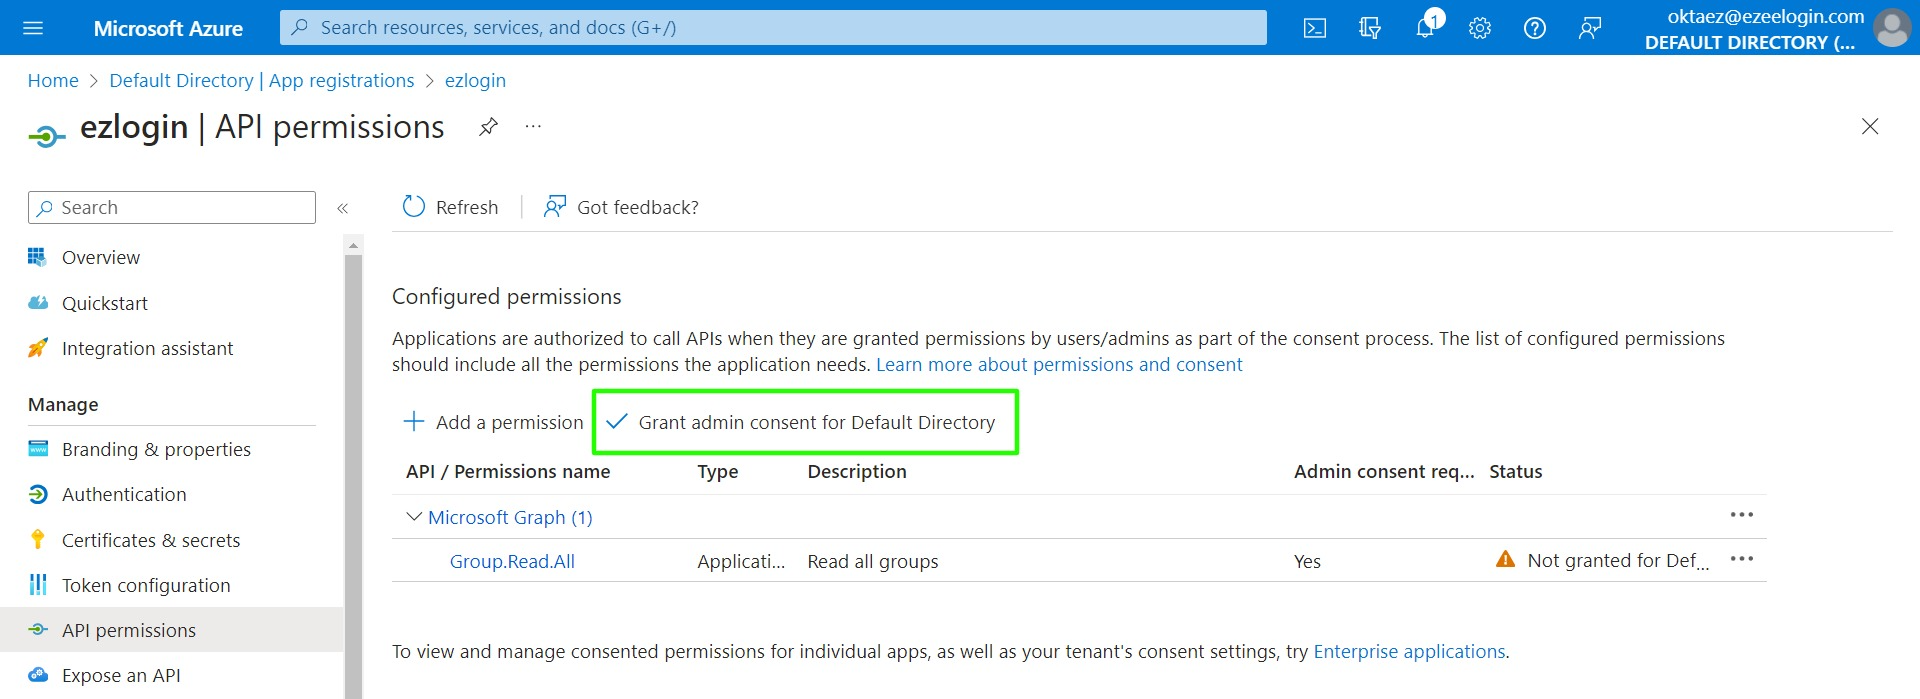
Step 8: Click on application permission -> add a permission -> Microsoft graph -> application permission -> enable Group.Read.All.
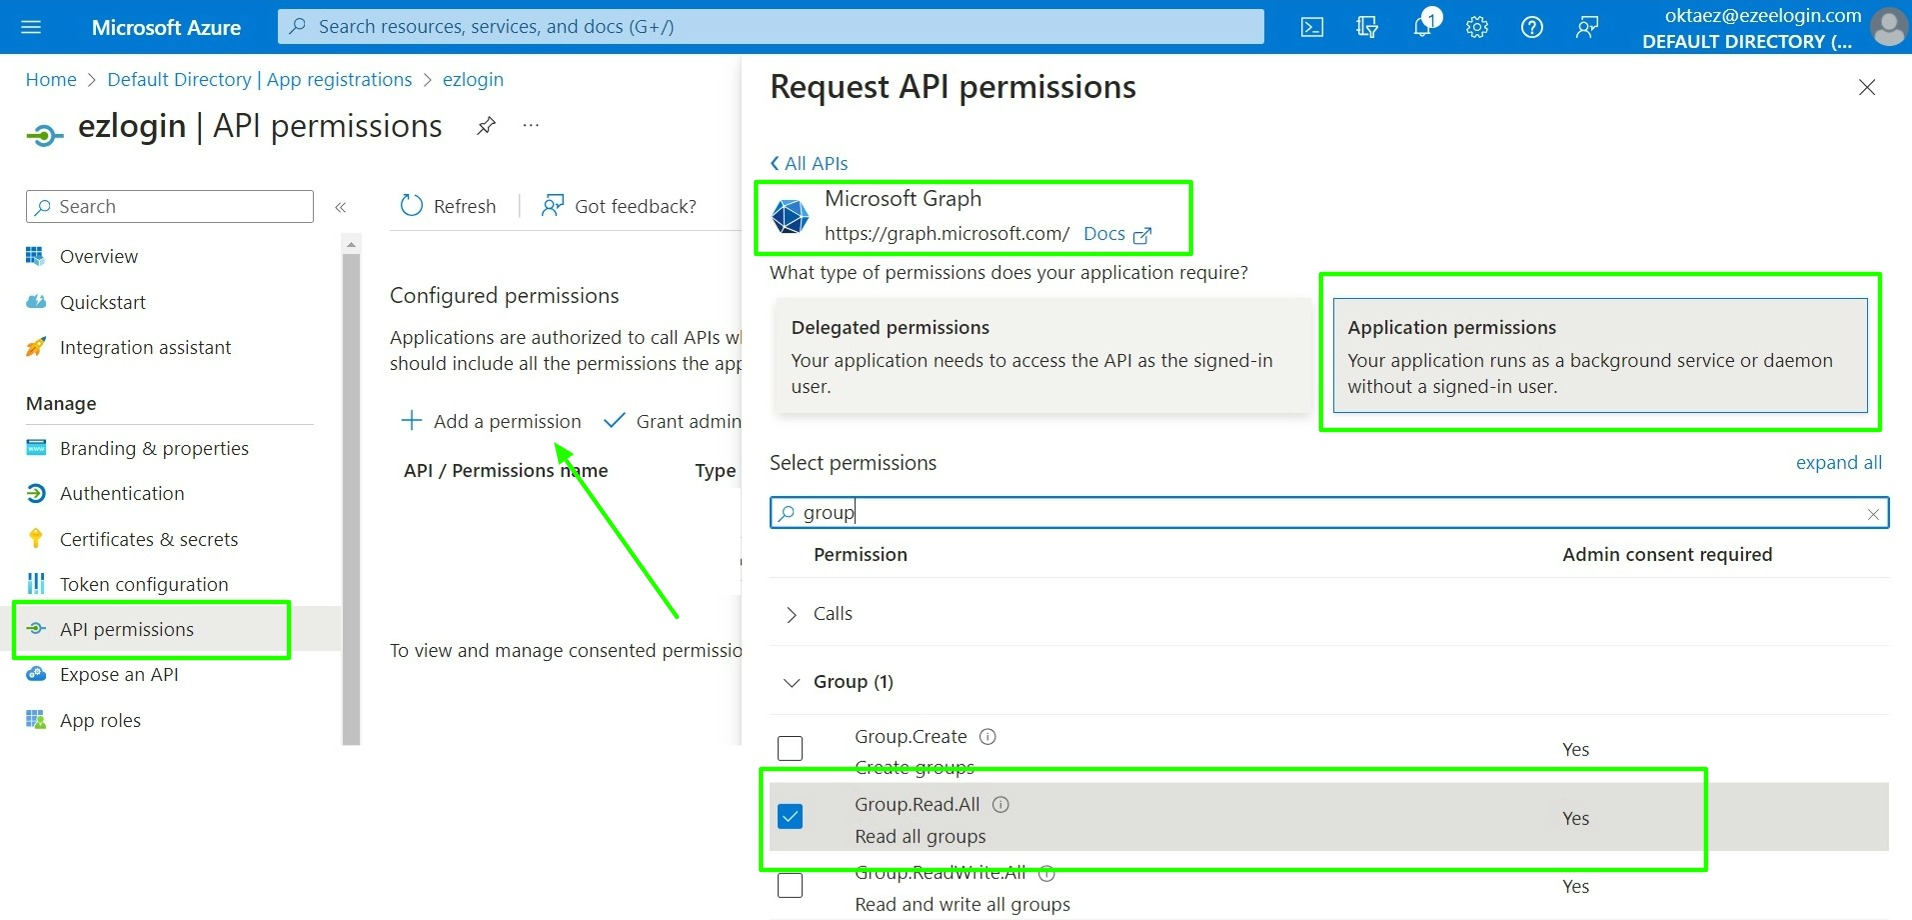
Step 9: Click on grant admin consent for default directory.
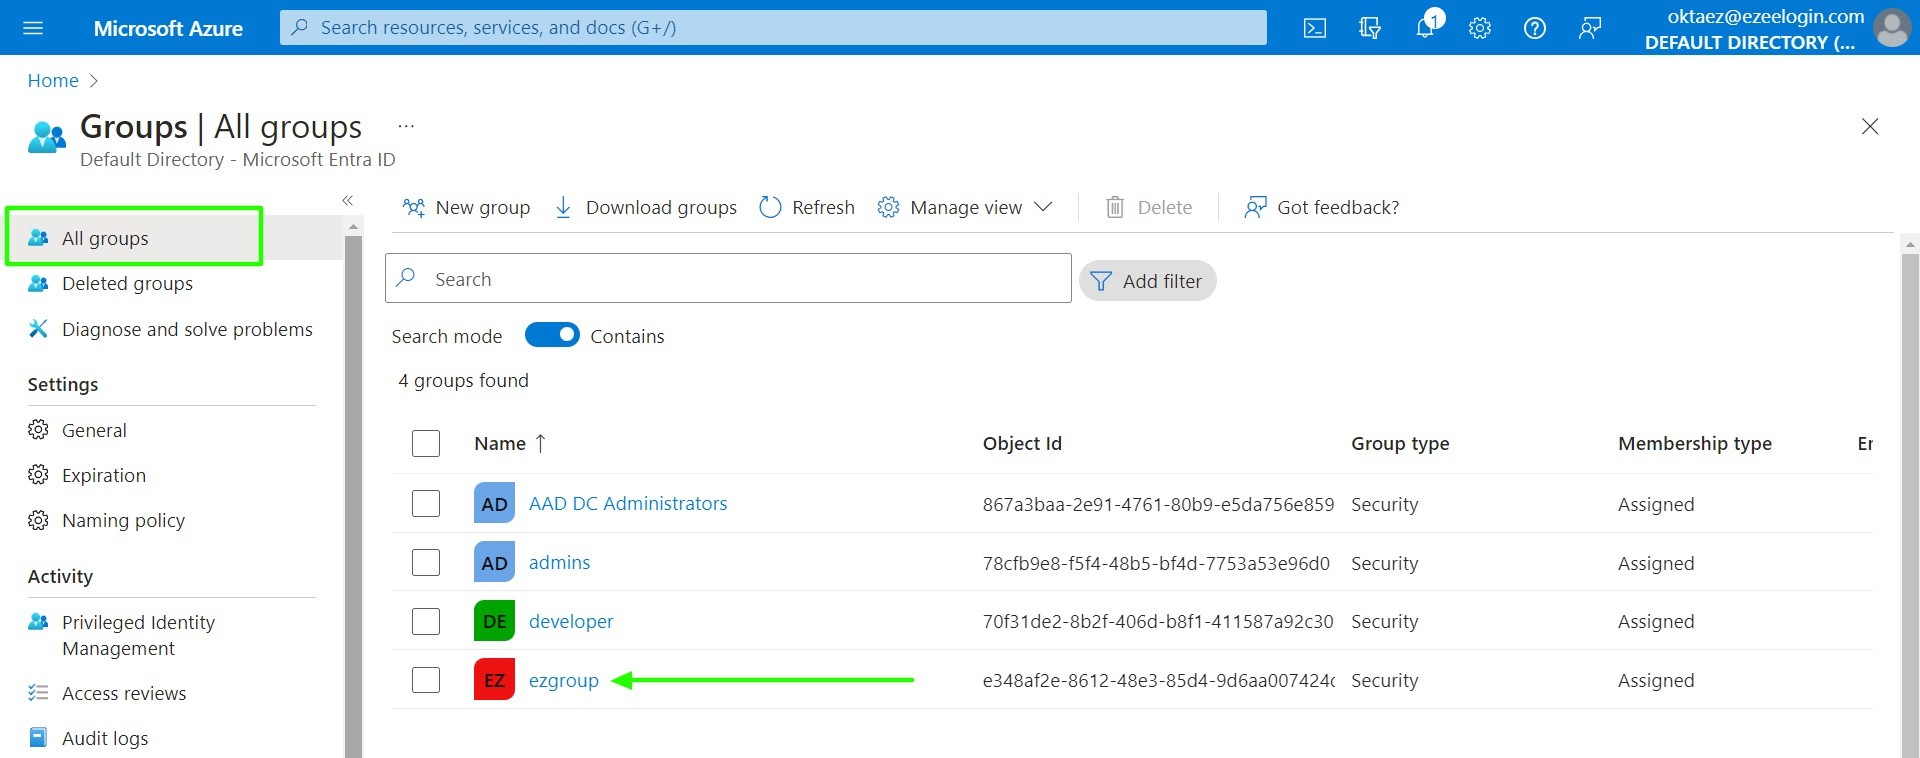
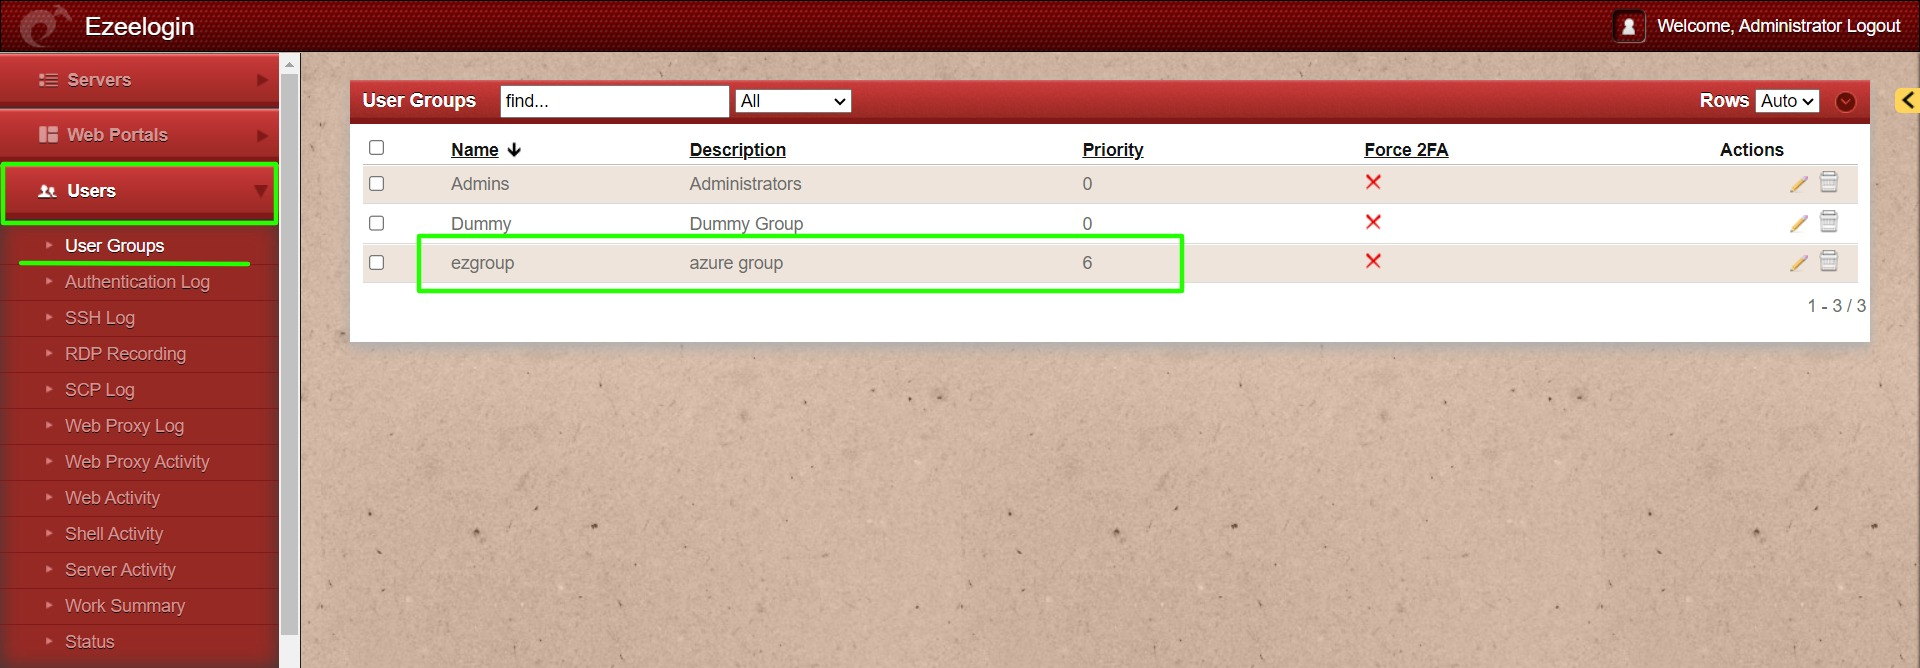
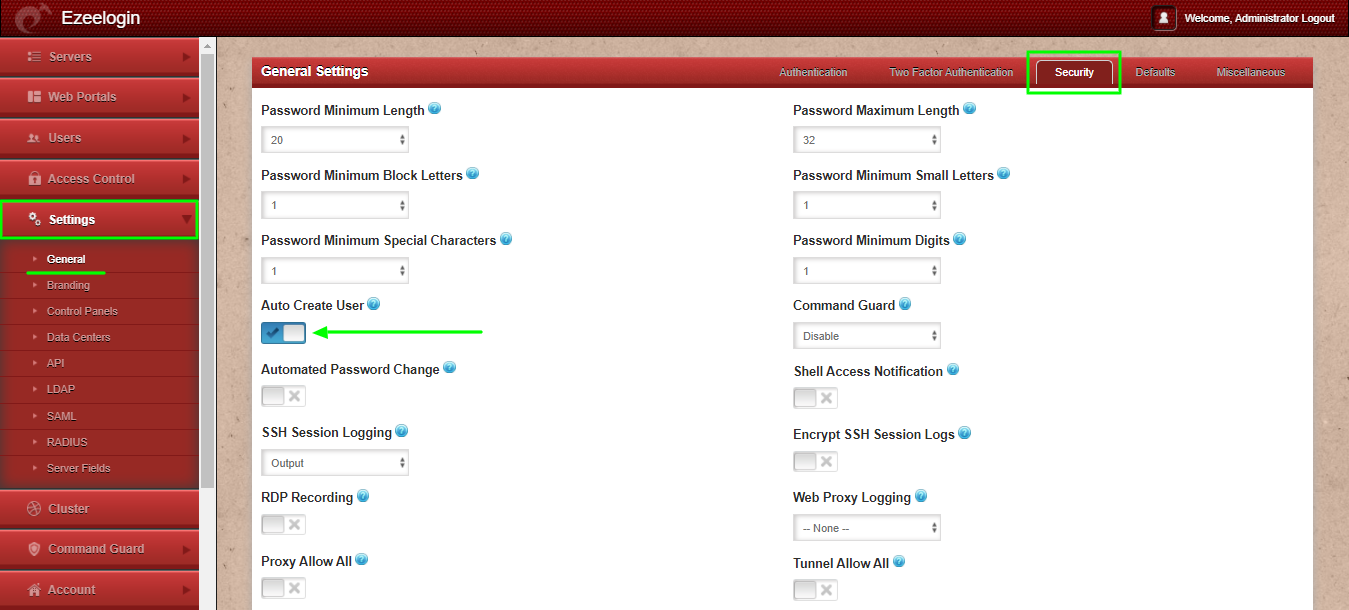
Step10: Create the user group in Ezeelogin with the exact same group name that exists in Azure and set a higher priority for auto-creation for that group.
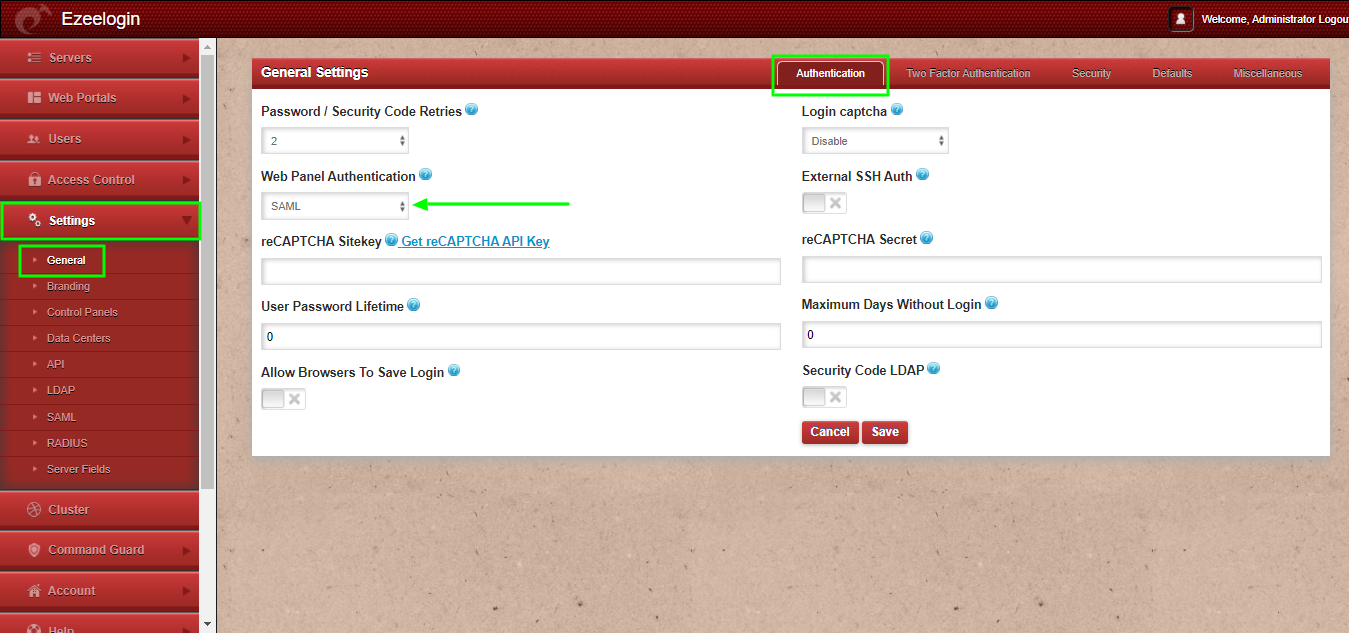
Step 11: Change Web panel Authentication to SAML from Ezeelogin GUI -> Settings -> General -> Authentication.
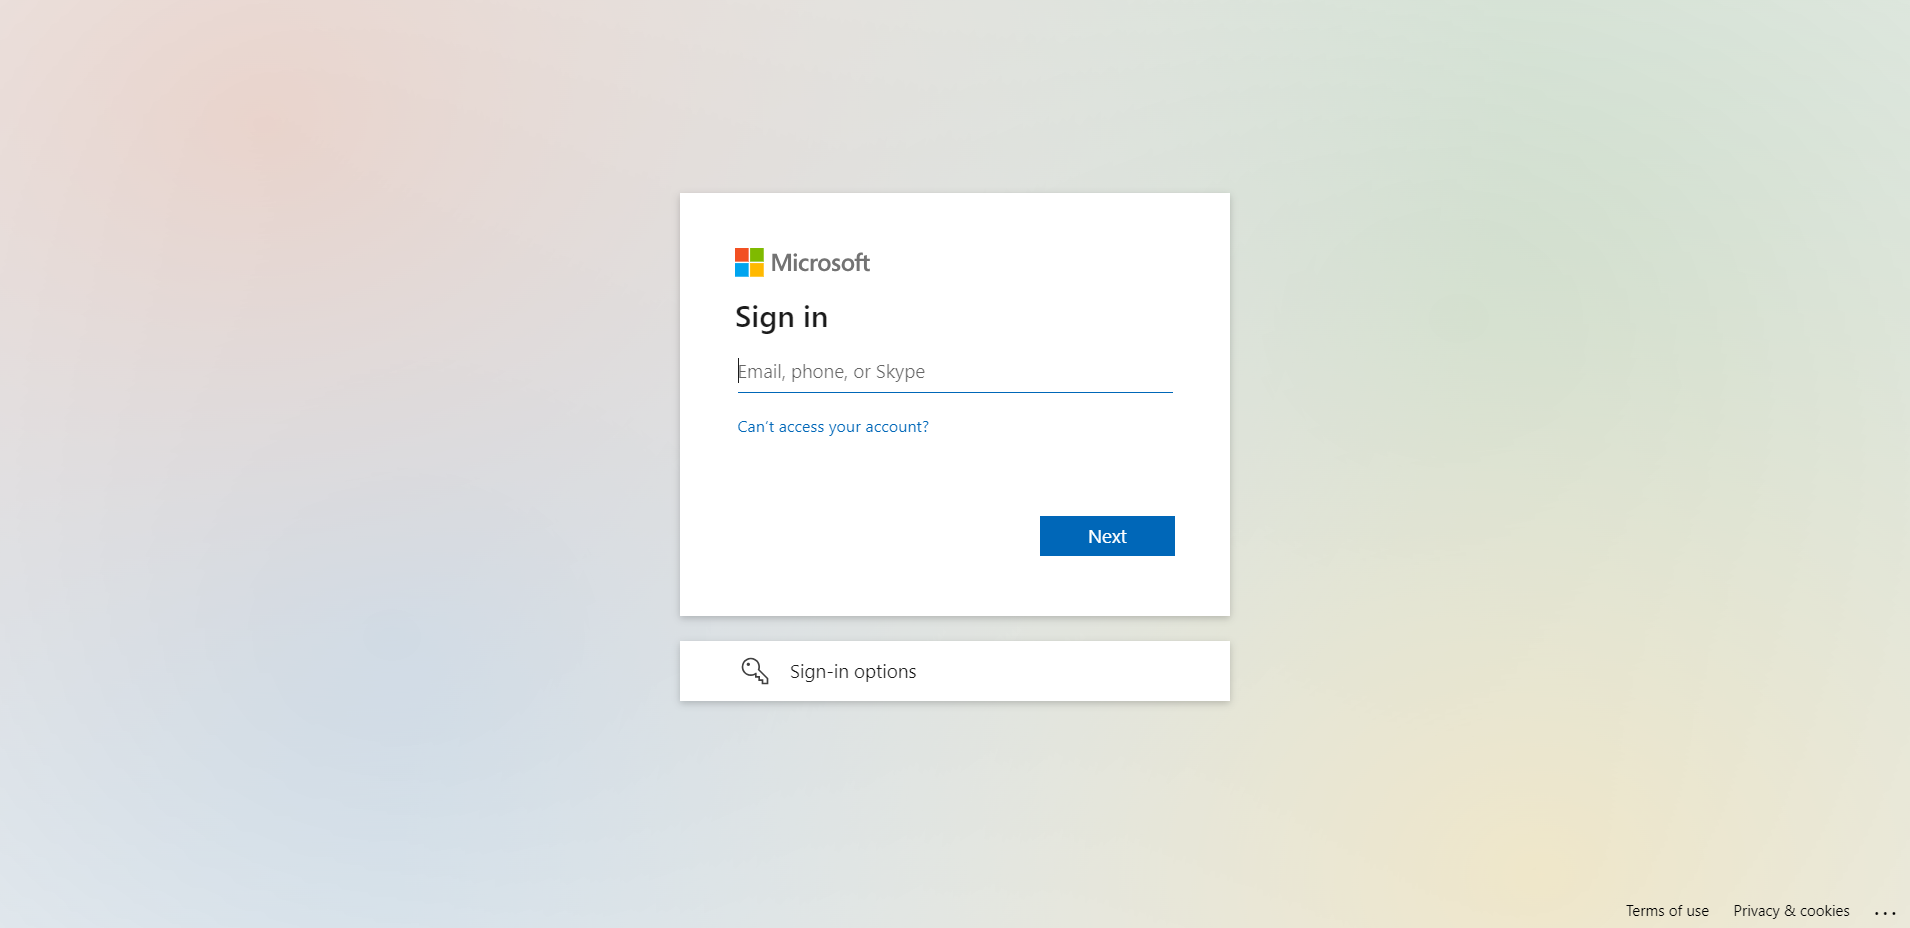
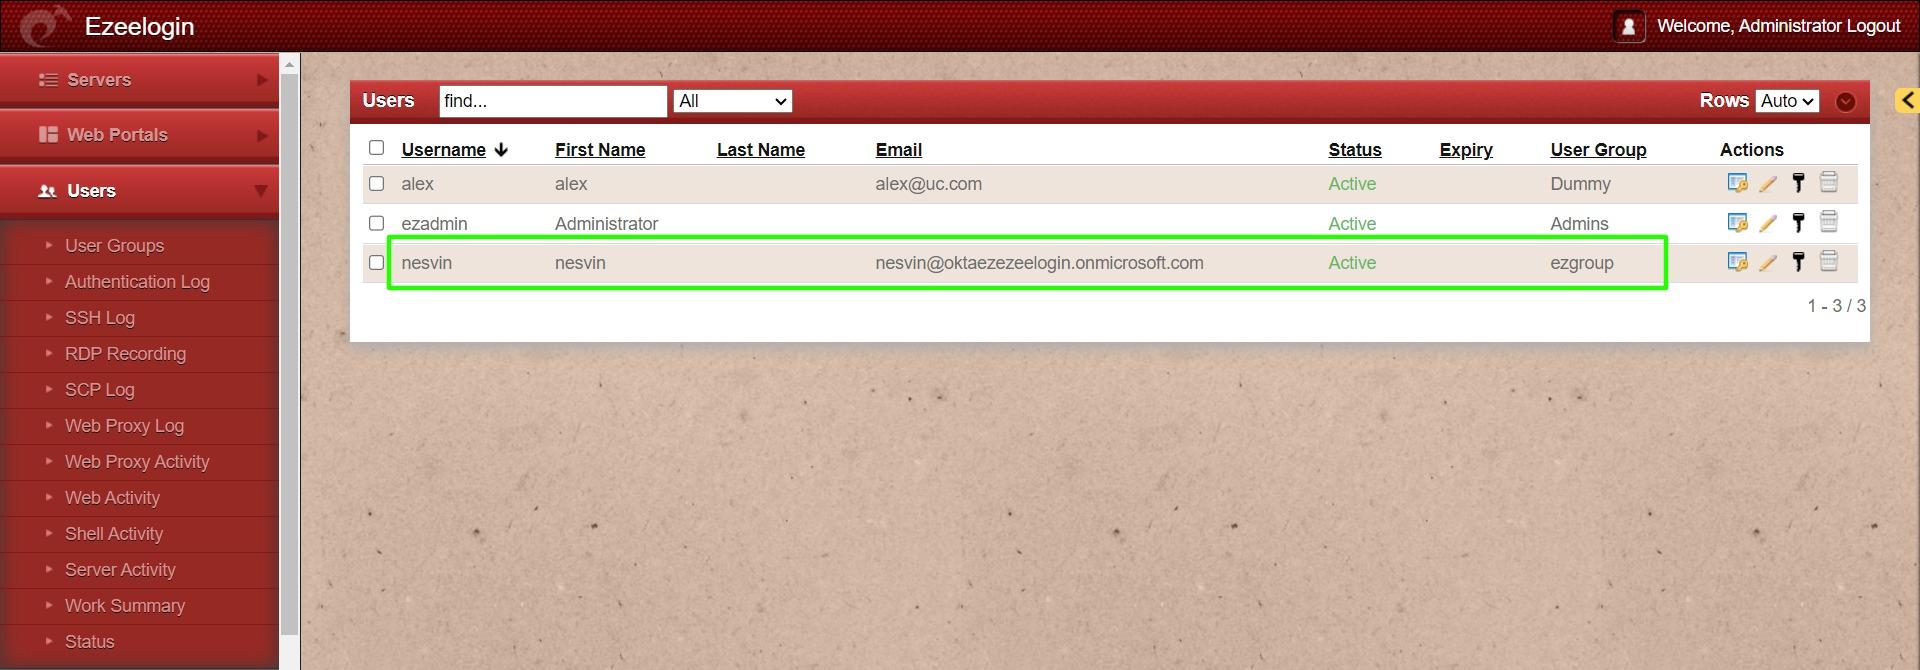
Step 13: Relogin to Ezeelogin GUI with Azure user credentials and the user will be auto-created to the same group in Azure.
Related Article:
Integrate Microsoft Azure SSO and with Ezeelogin