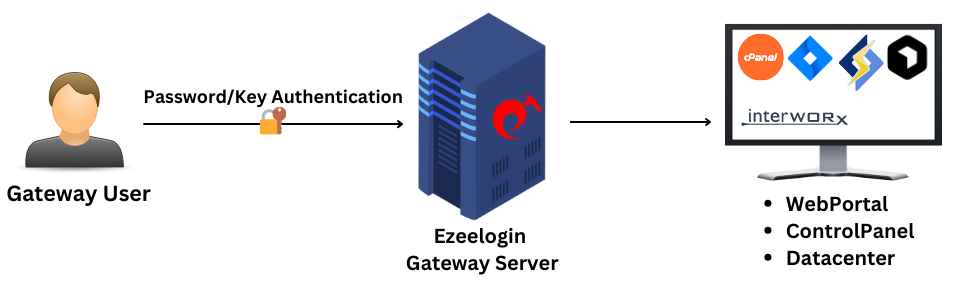
Adding WebPortal or control panel or datacenter for autologin
How to add a Web portal or Control Panel and Export/Import Web portals in Ezeelogin?
Overview: This article provides step-by-step instructions for adding web portals or control panels for autologin, as well as exporting and importing web portals in Ezeelogin.
1. How do you add a web portal?
Step 1(A): Login to Ezeelogin GUI > Click on Web Portals tab > Add new Web Portal.

Step 1(B): Paste the login URL and then click on Fetch details. The details of the web portal will automatically get fetched. Fill in the remaining fields like Extra Variables, Username, and Password, and click on save.
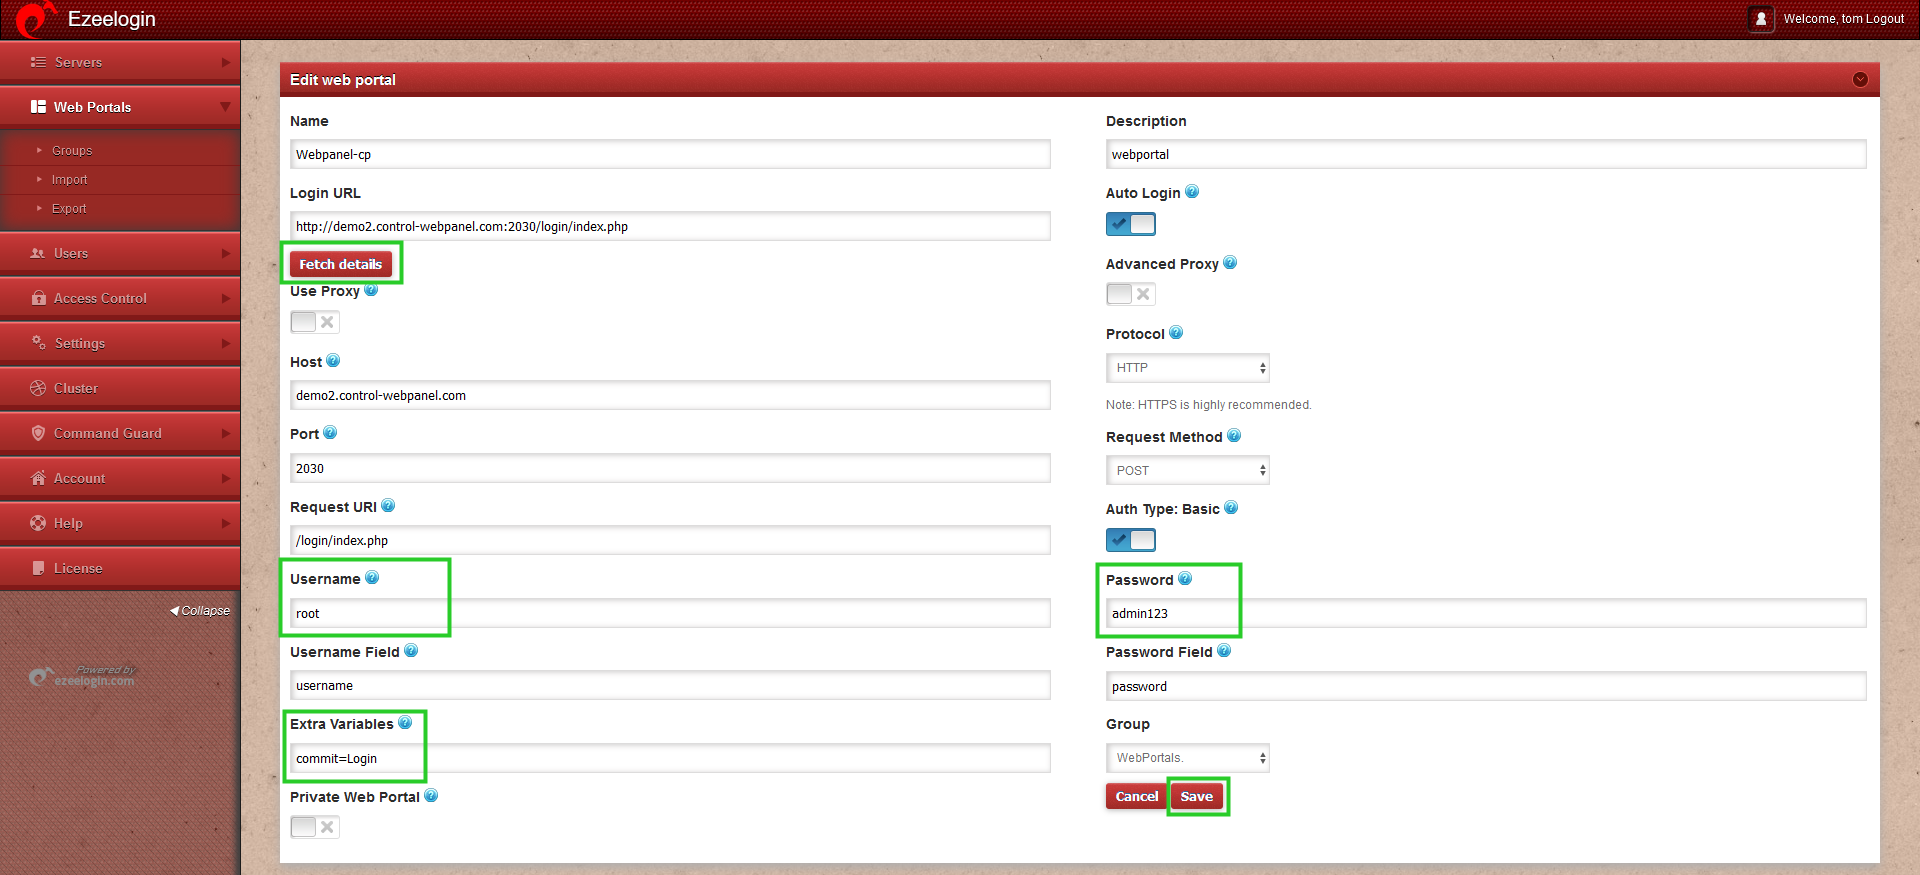
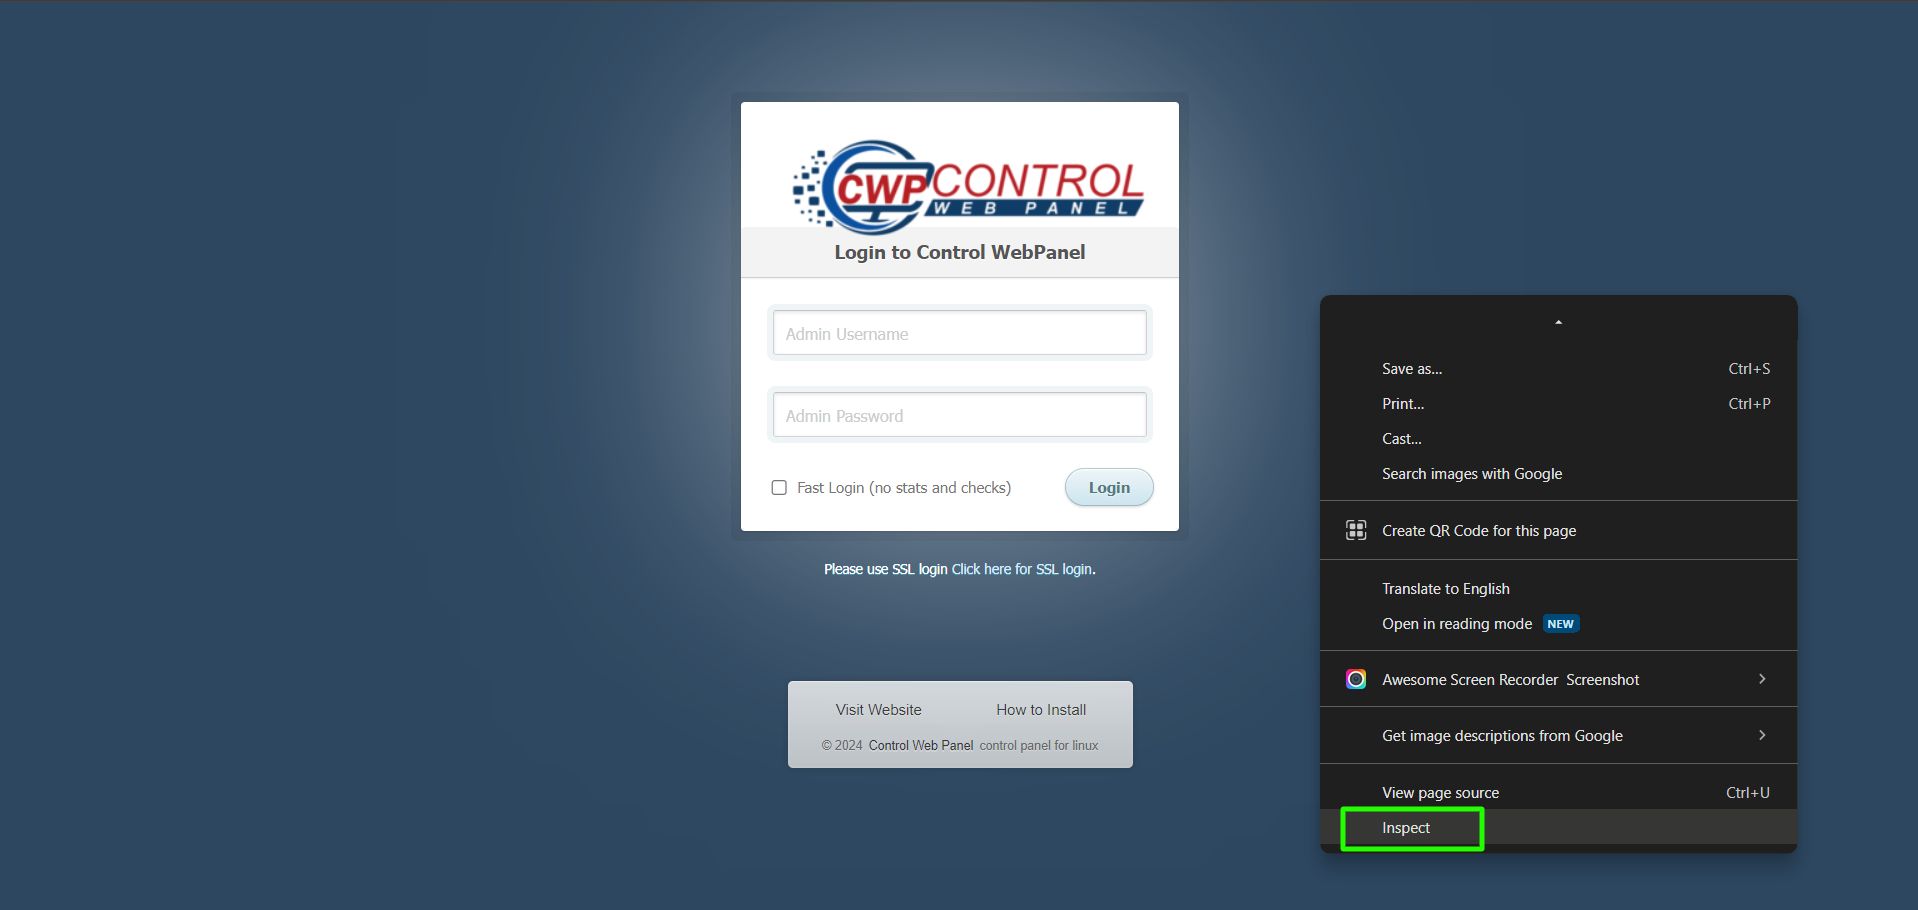
Step 1(C): If the details are not fetched automatically enter the details manually. To get the details open the login page of the web portal you are adding right-click on the page. From the menu, choose "Inspect". This will open the Chrome DevTools.
Step 1(D): Open the Network tab in the Developer Tools.
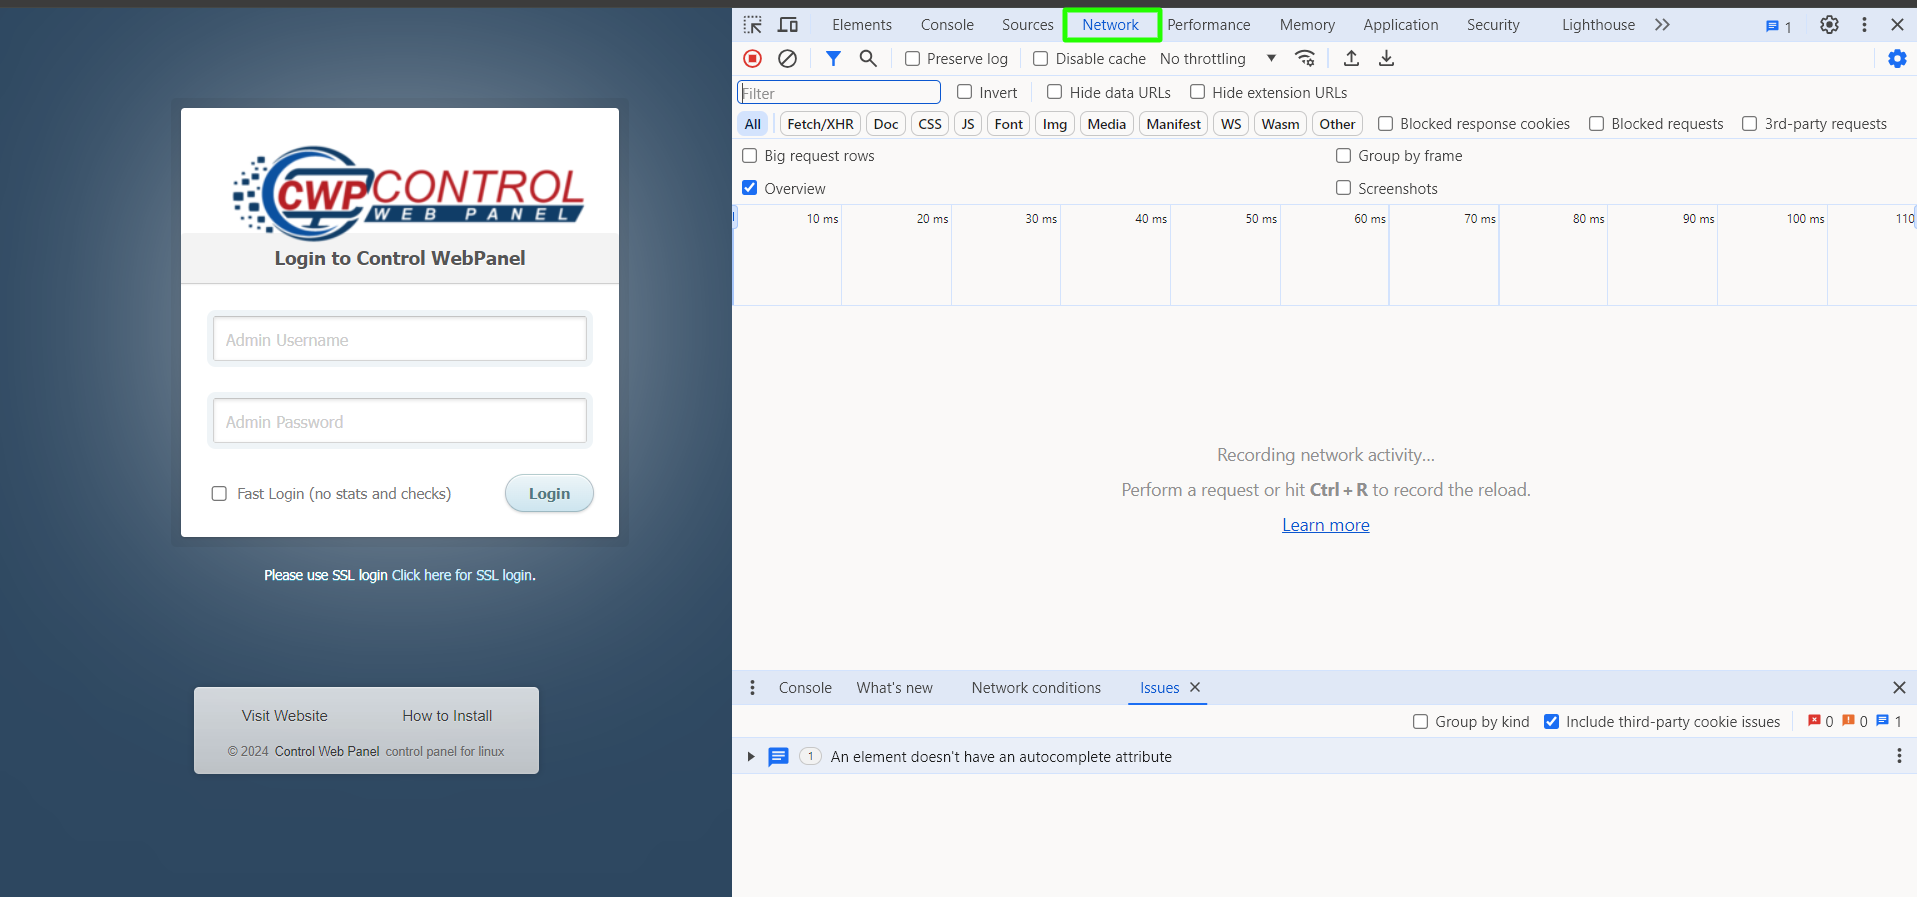
Step 1(E): Enter any random username and password in the respective form fields and click on Login.

Step 1(F): Wait till the process is complete (e.g. login failed message if you entered a random username and password).
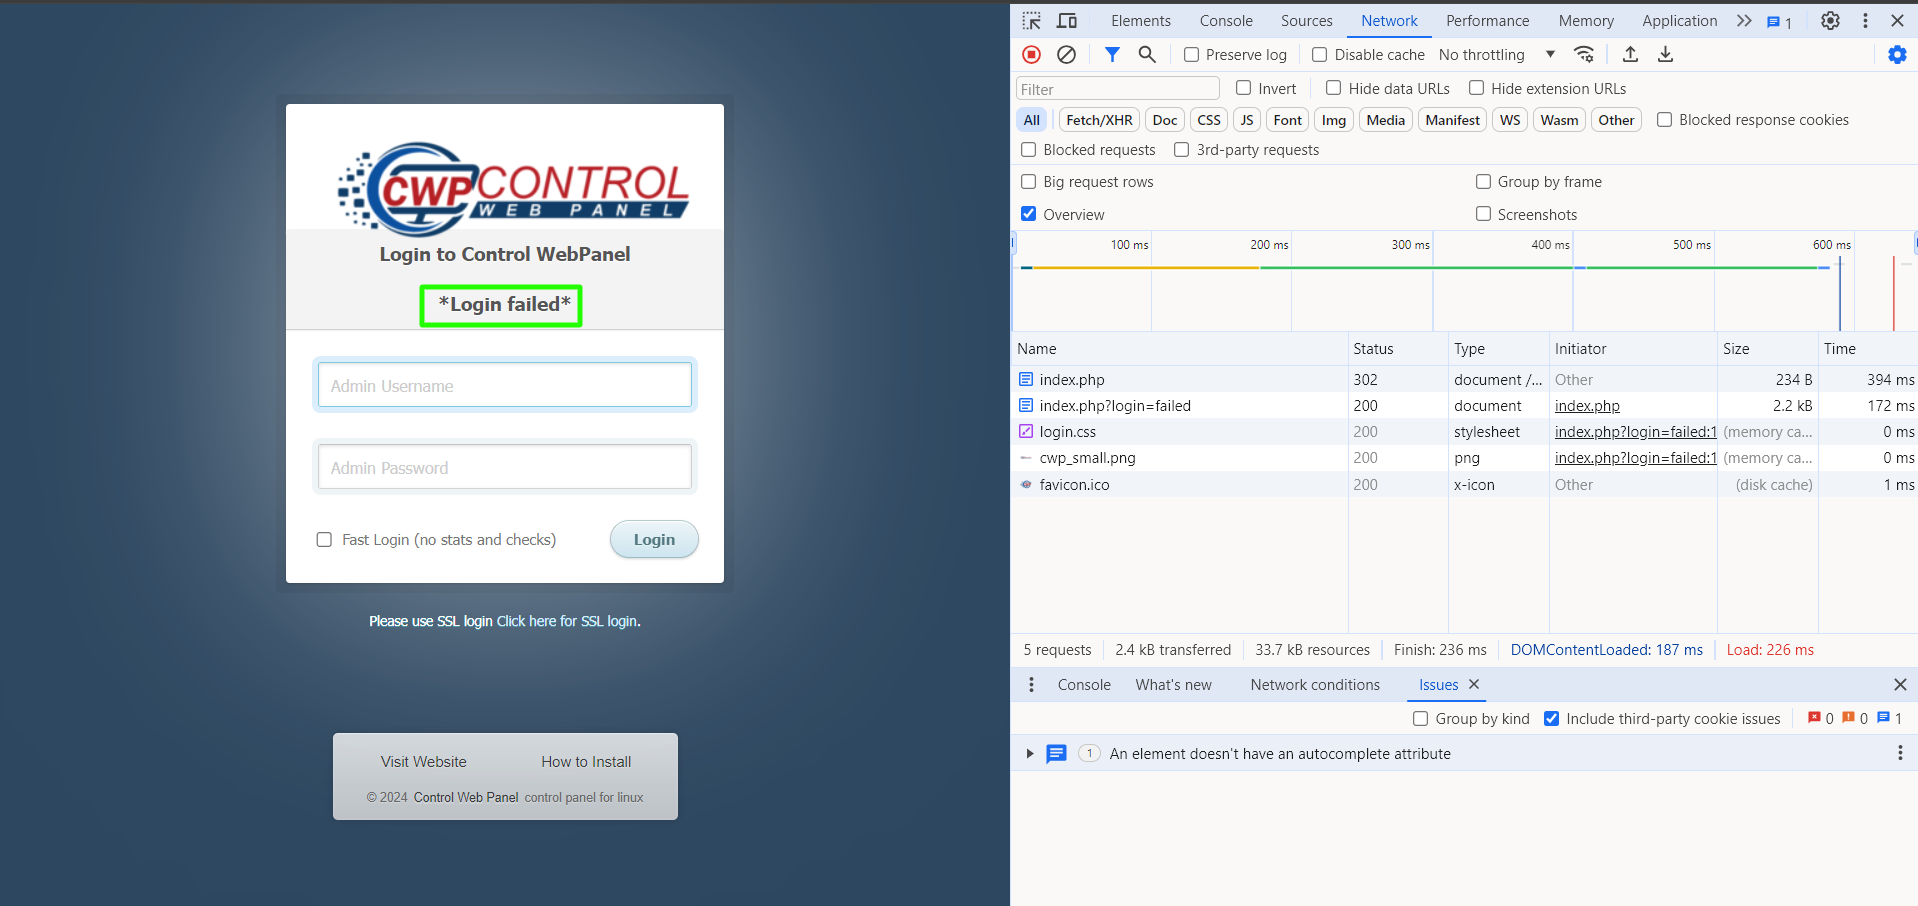
Step 1(G): Select the first one(index.php) in the name list and open the Header tab.
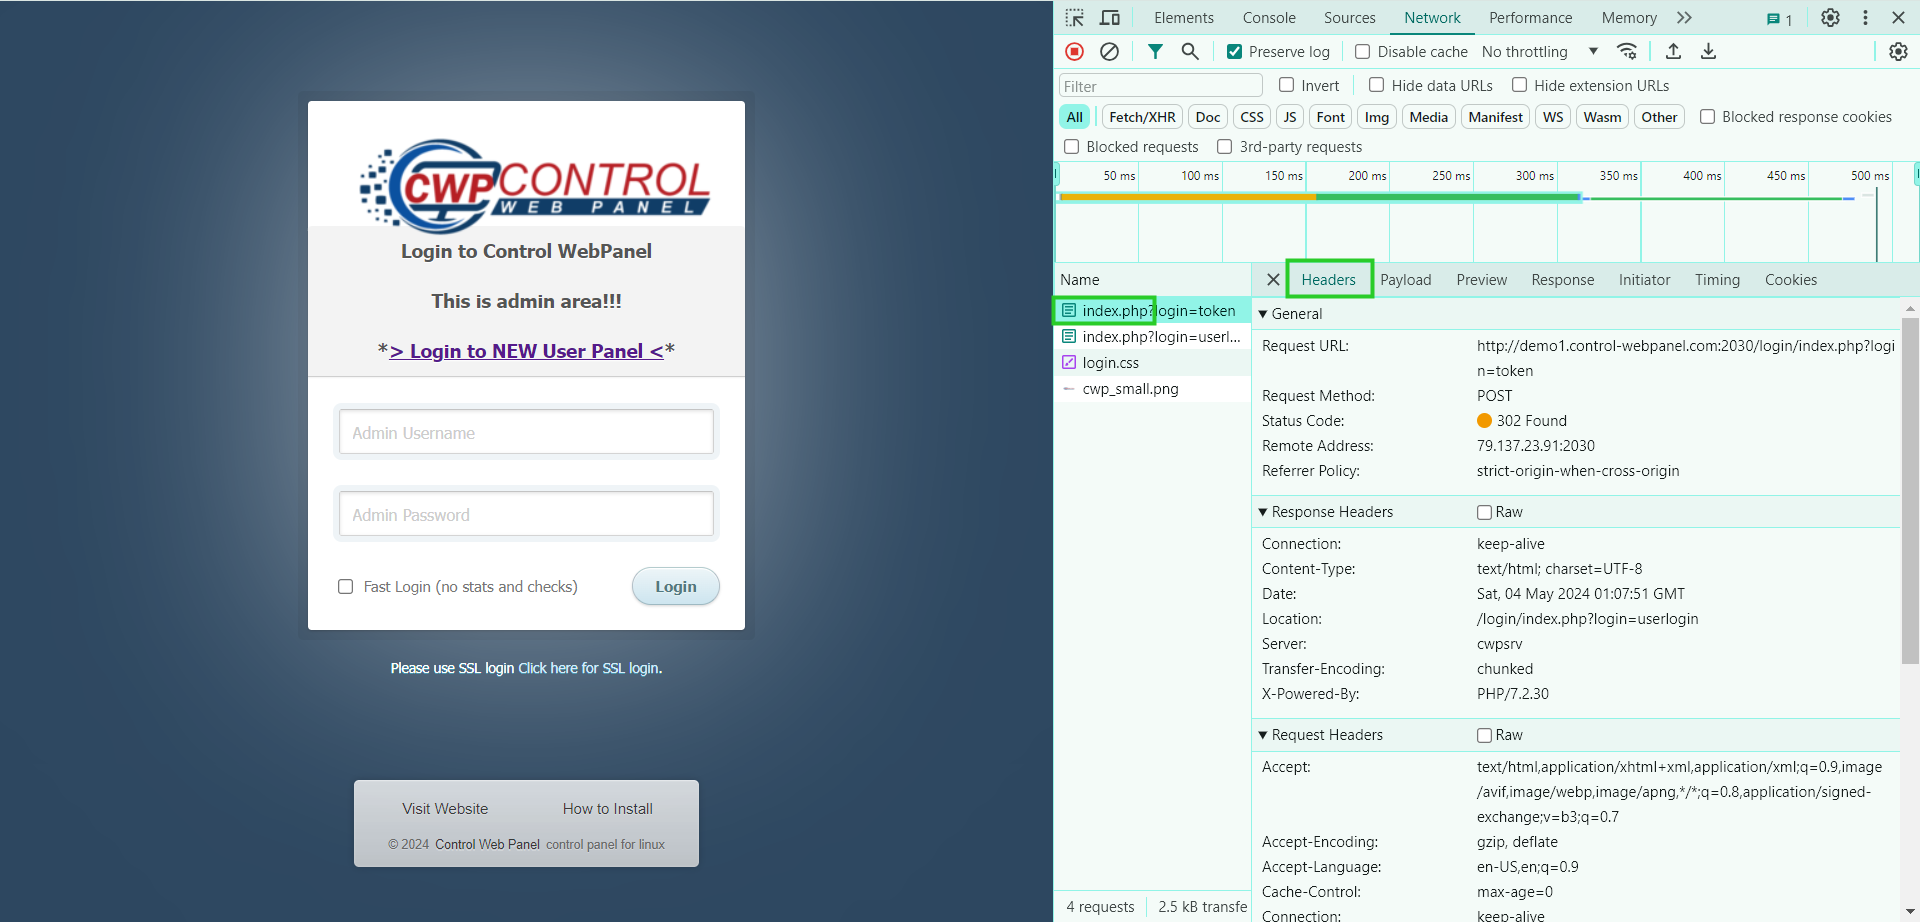
Step 1(H): You can find the Request URL from the general section of the "headers tab". It will contain the protocol (HTTPS or HTTP), hostname or IP, and port (if not the default for protocol), followed by the request URI

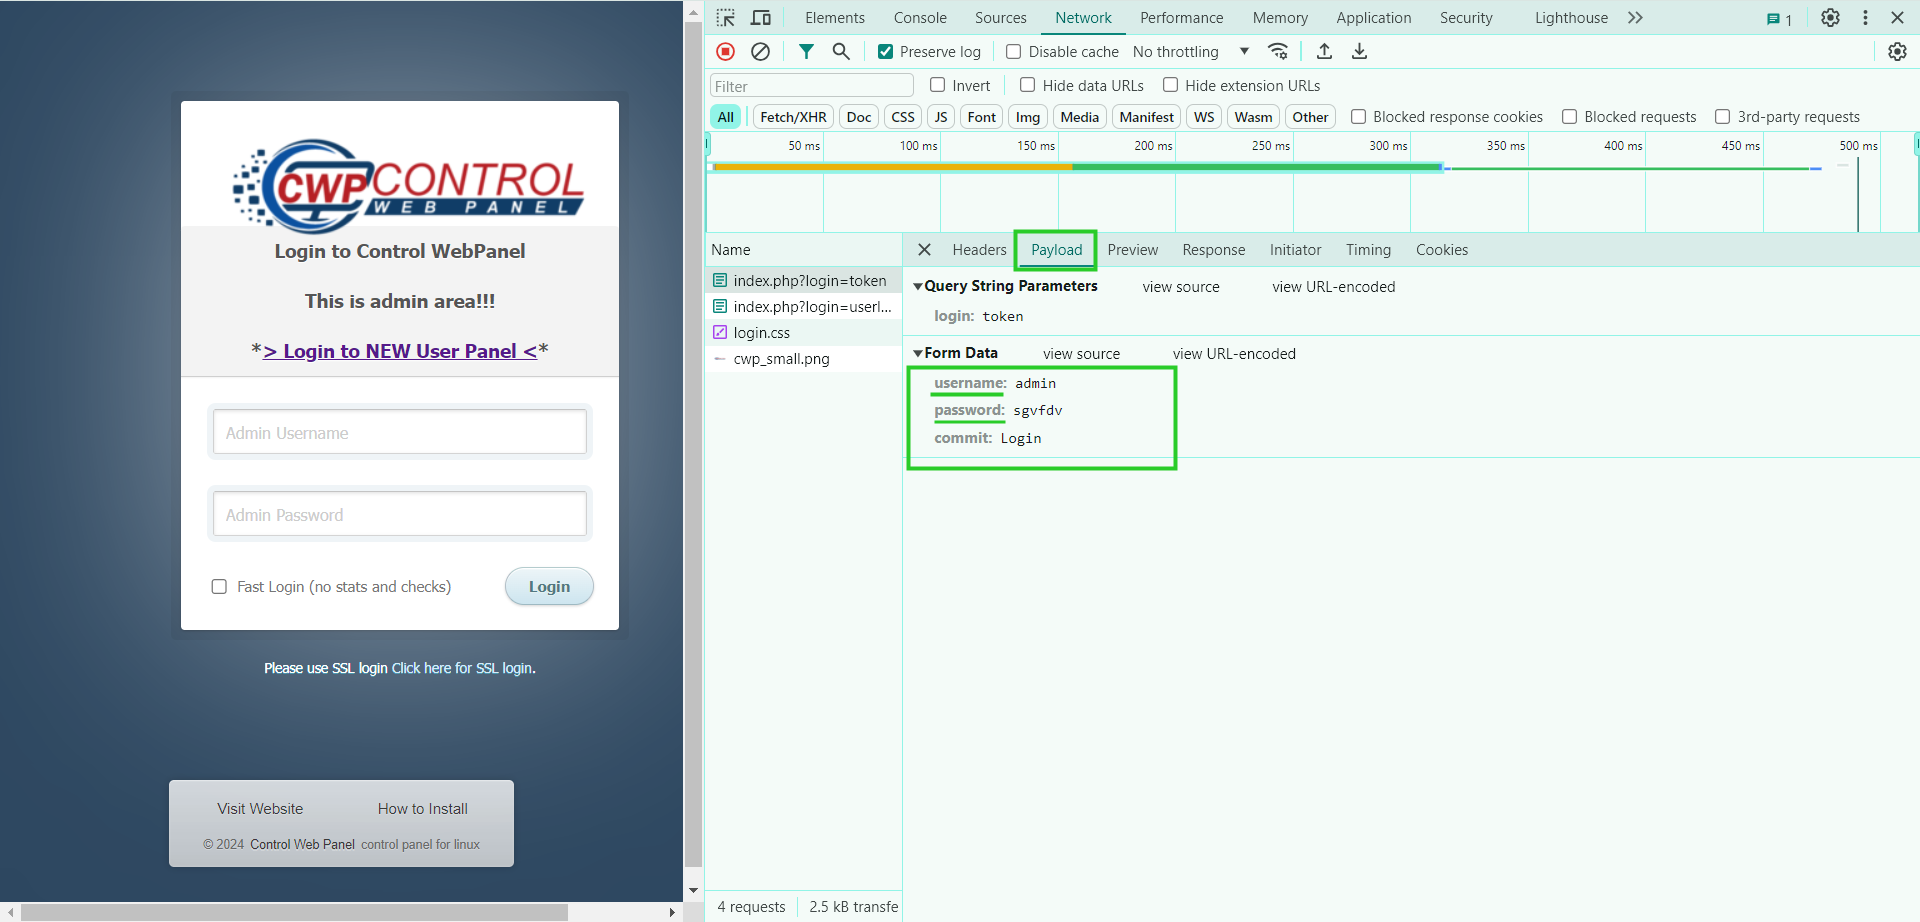
Step (I): Scroll the header or payload tab and you can find username and password field names. Check the values of parameters for the random string you entered for the username and password fields in the login form to identify the parameter names.
Step 1(J): The remaining parameters should go into the extra variables field (commit=Login)while adding the web portal. If there are some random value parameters, they may be ignored. When there are more than two extra parameters, they can be added in extra variables but joining them with & like: param1=value1¶m2=value2
It may not work in all cases such as when the login is javascript-based or when it uses certain dynamic security tokens.
The screenshot below refers to an example of a JSON-based web portal.
.png)
Step 1(K): After saving try to log in to the web portal.

2. How do you add a control panel?
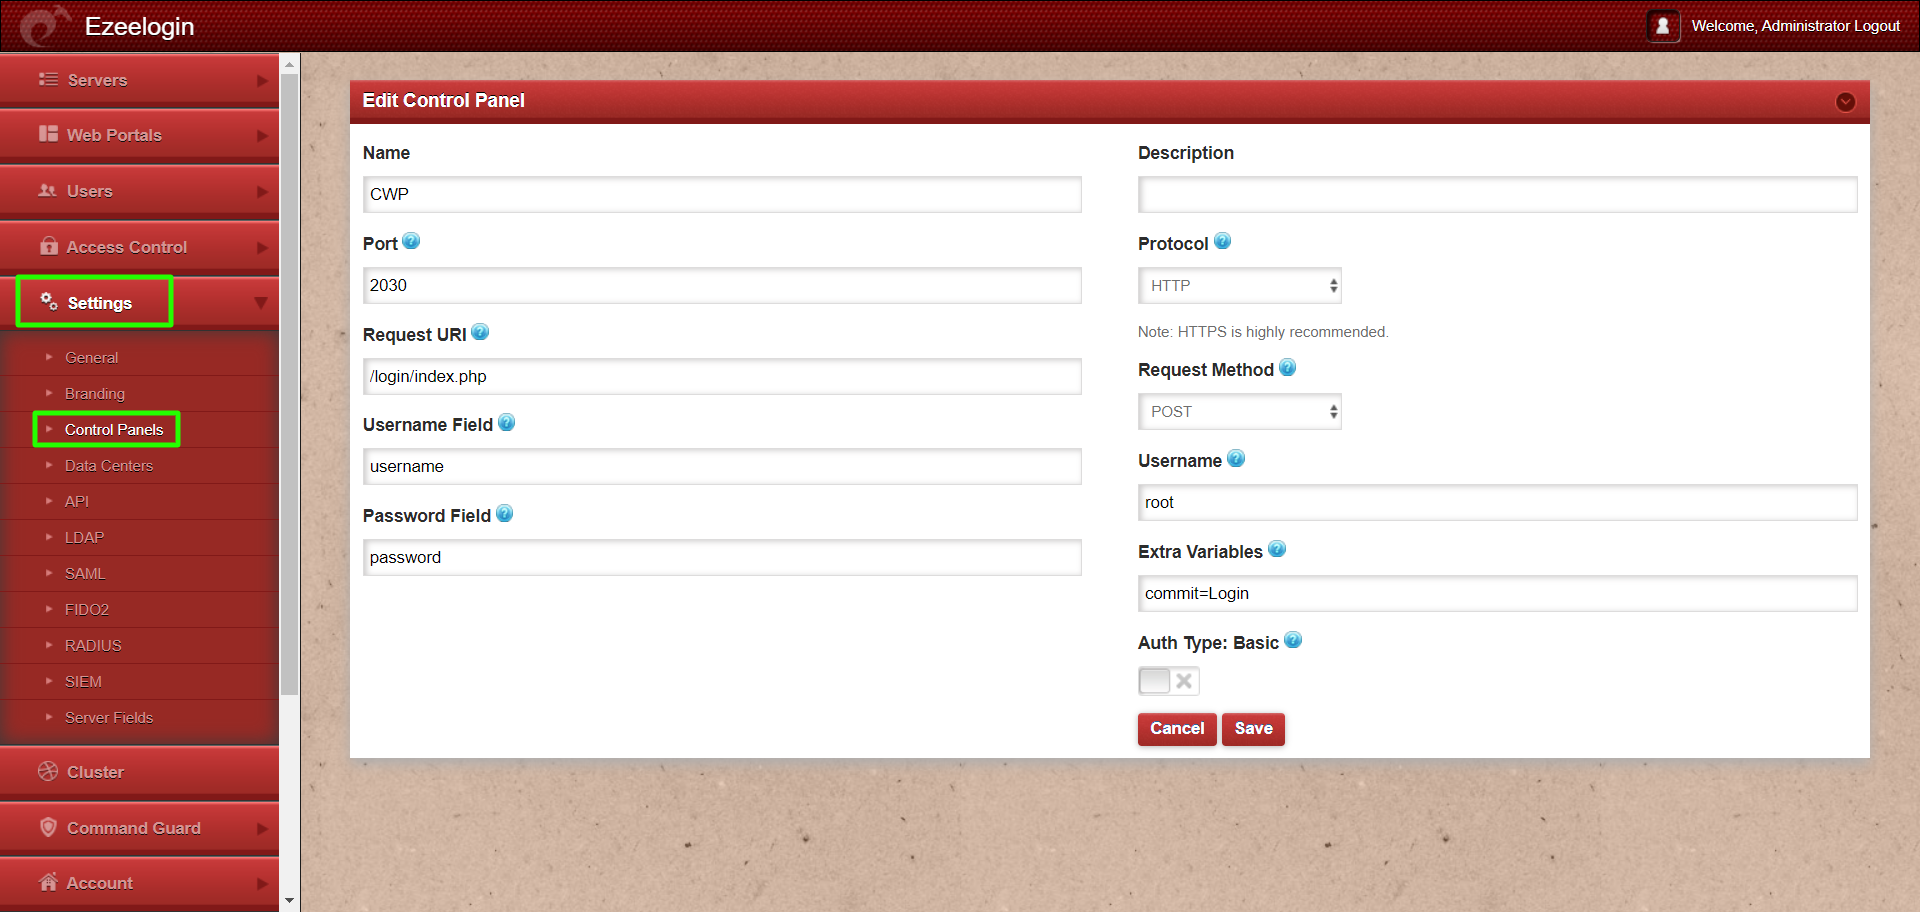
Step 2(A): Login to Ezeelogin GUI -> Settings -> Control Panel. You can use the screenshot below as an example to add a Control panel.
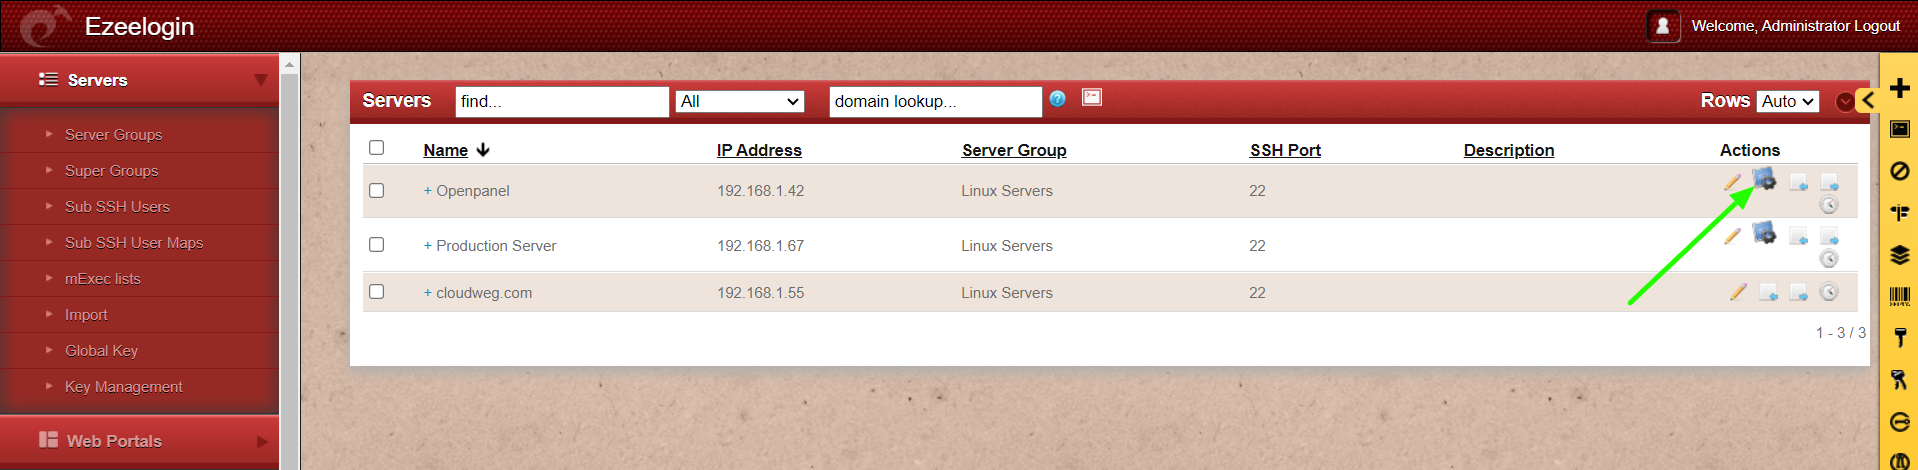
Step 2(B): Go to the Servers tab and select the control panel from the drop-down menu.
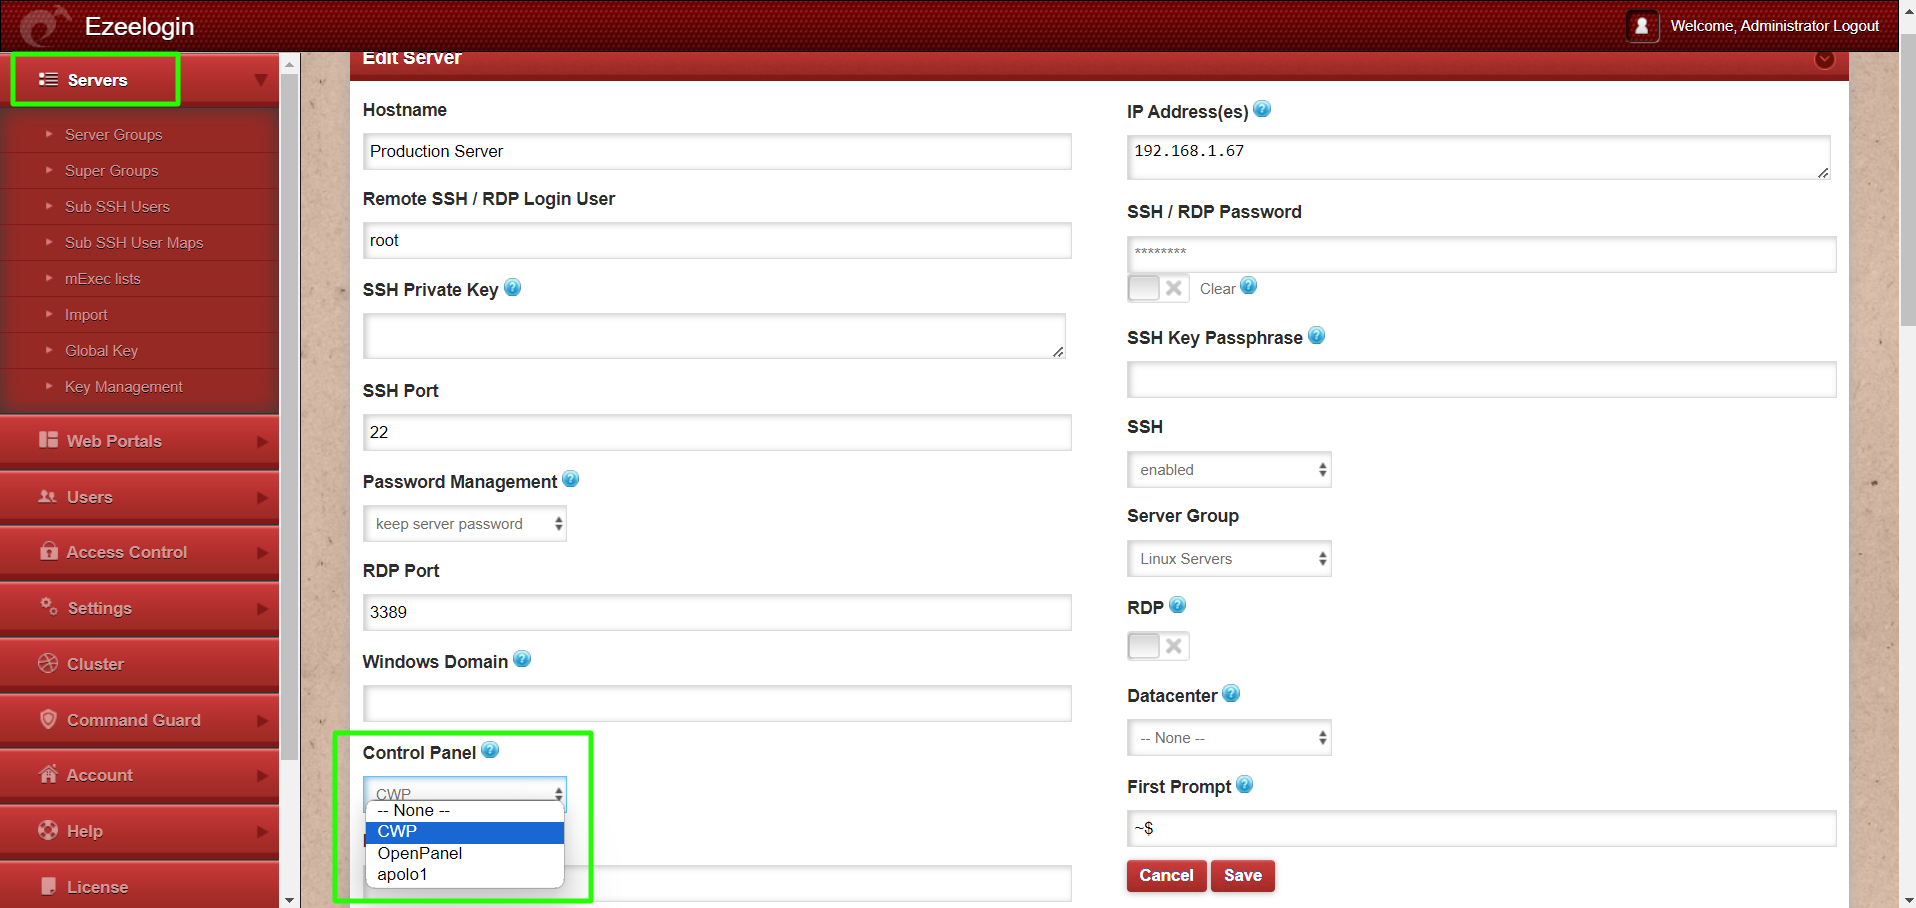
Step 2(C): After saving try to log in to the control panel.
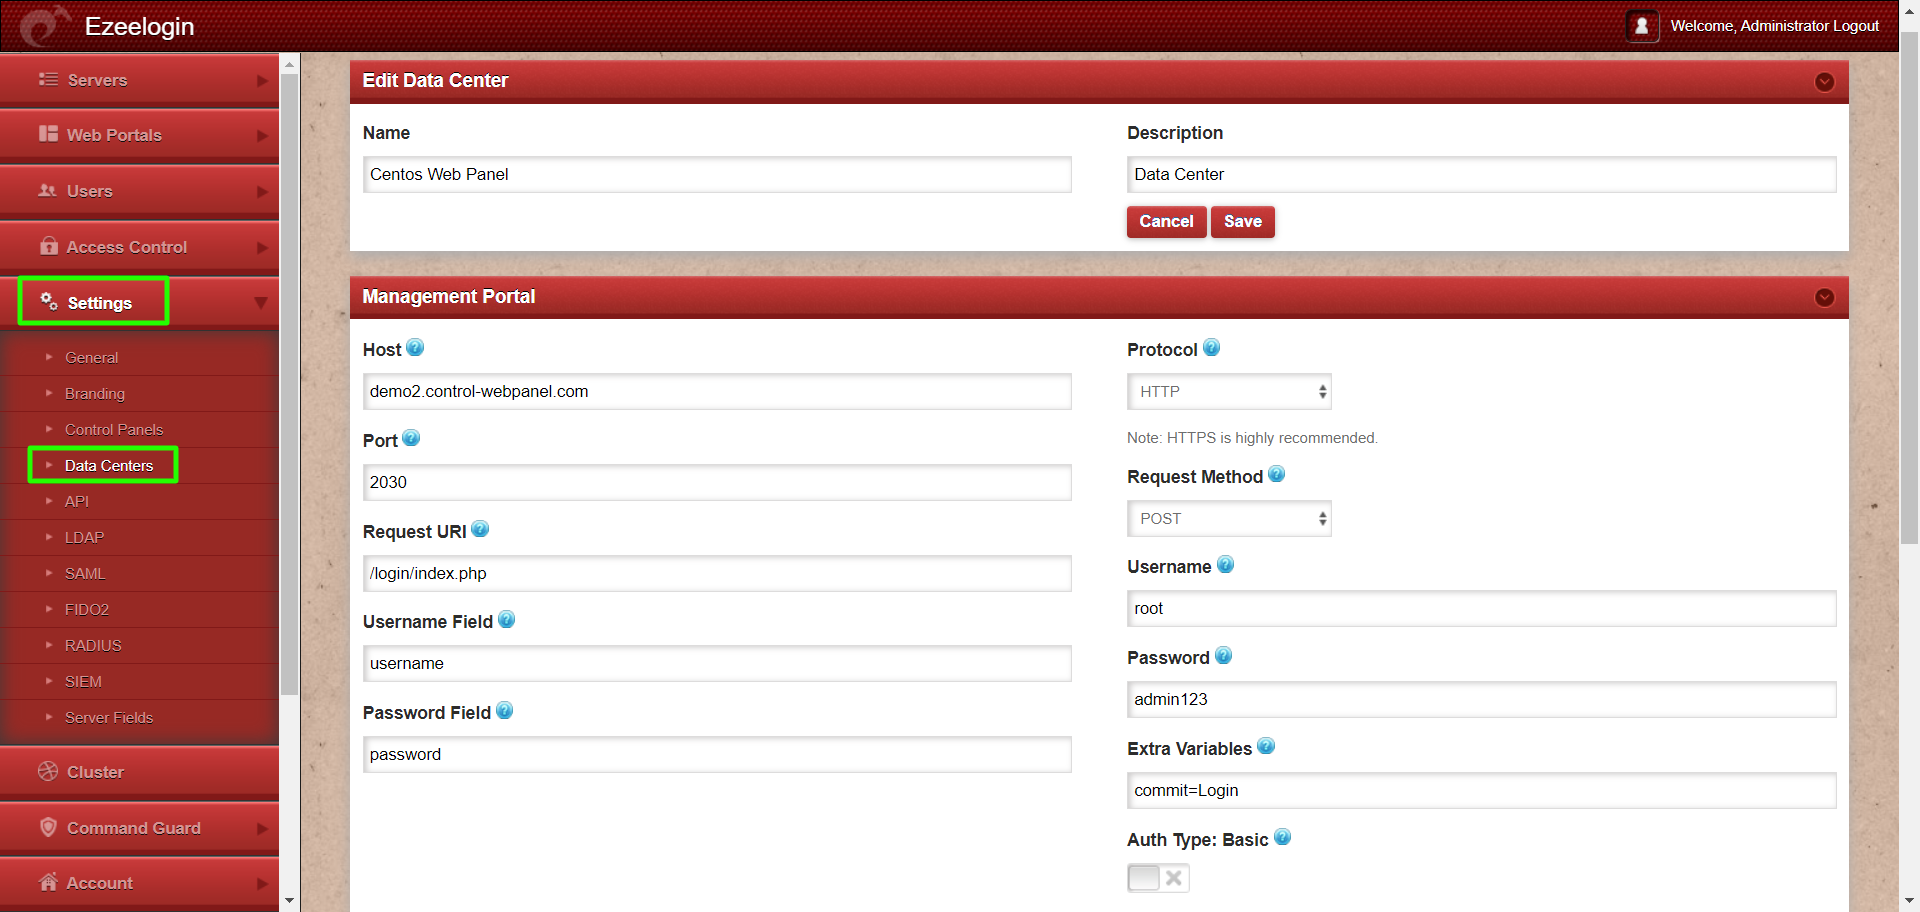
3. How to add Datacenter?
Step 3(A): Login to Ezeelogin GUI -> Settings -> Data centers. Refer below screenshot for an example of adding data centers.
Step 3(B): Go to the Servers tab and select the data center from the drop-down menu.
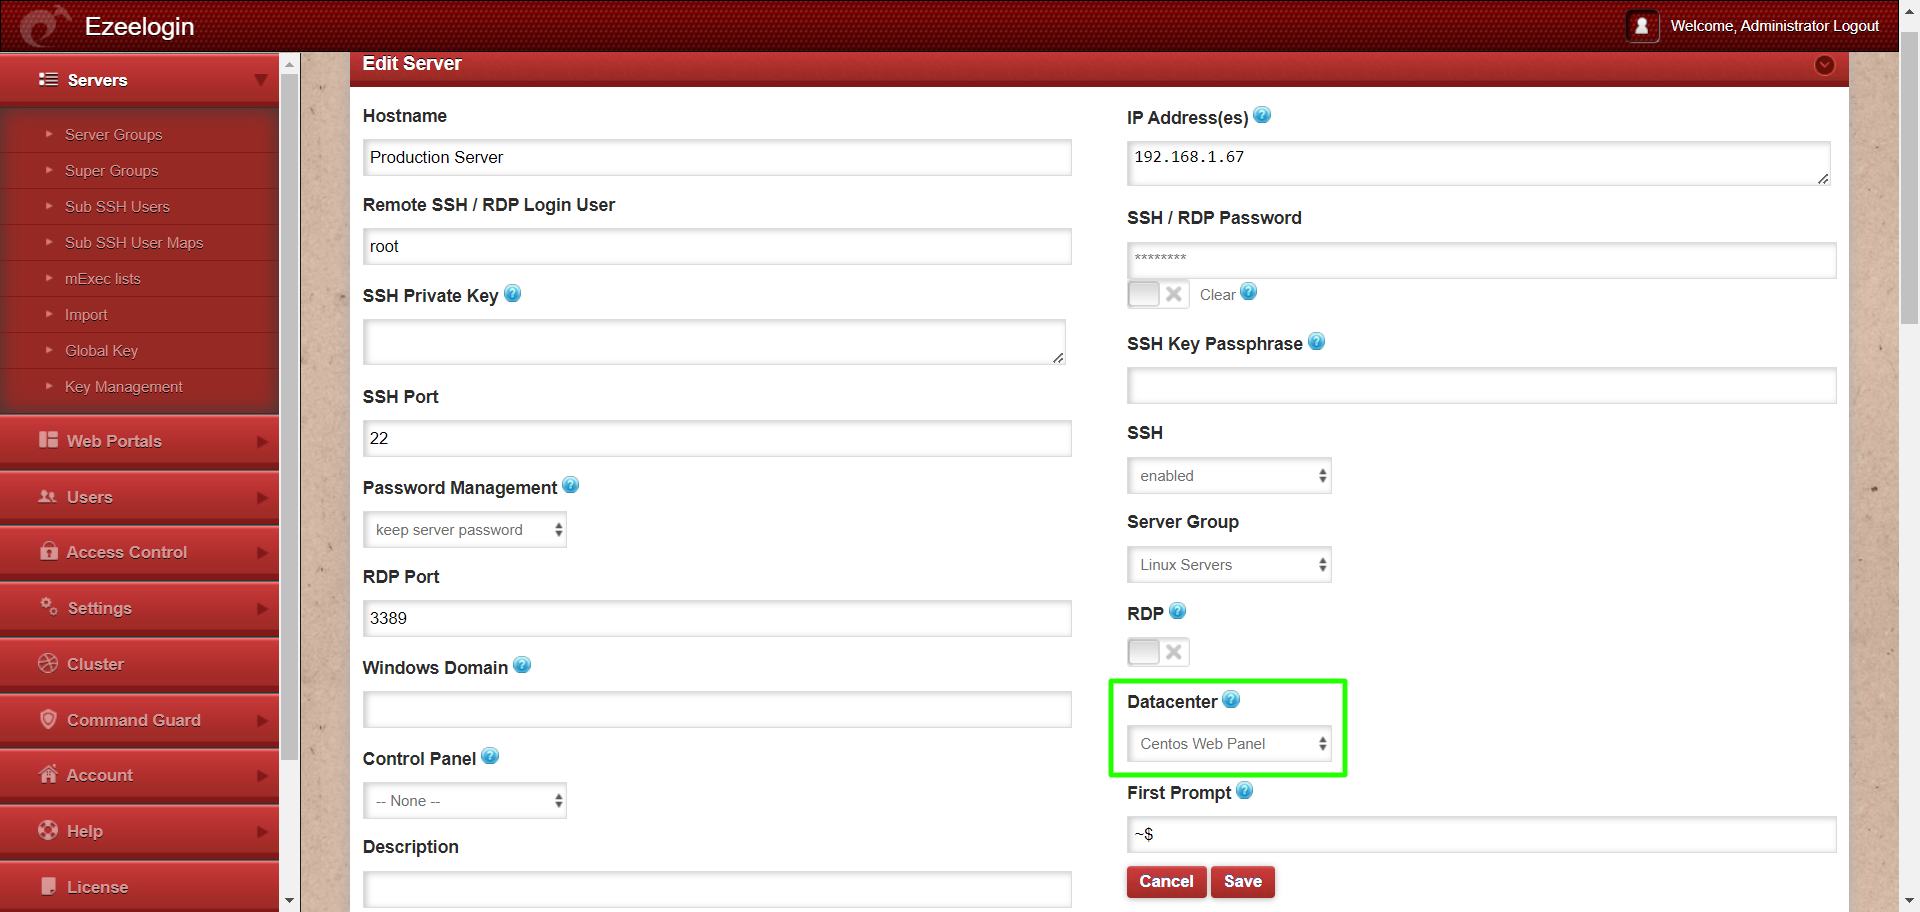
Step 3(C): After saving try to log in to the data center.
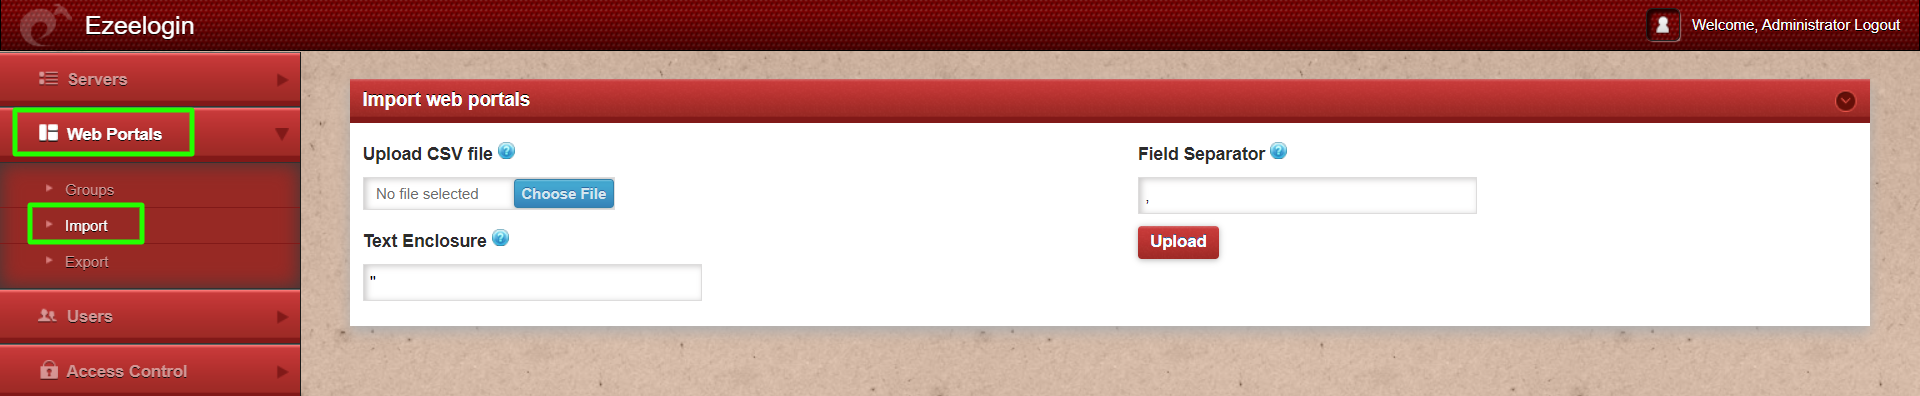
4. How to import Web Portals?
Step 4(A): To import a web portal into the Ezeelogin GUI, navigate to the Web Portals -> Import tab ![]()
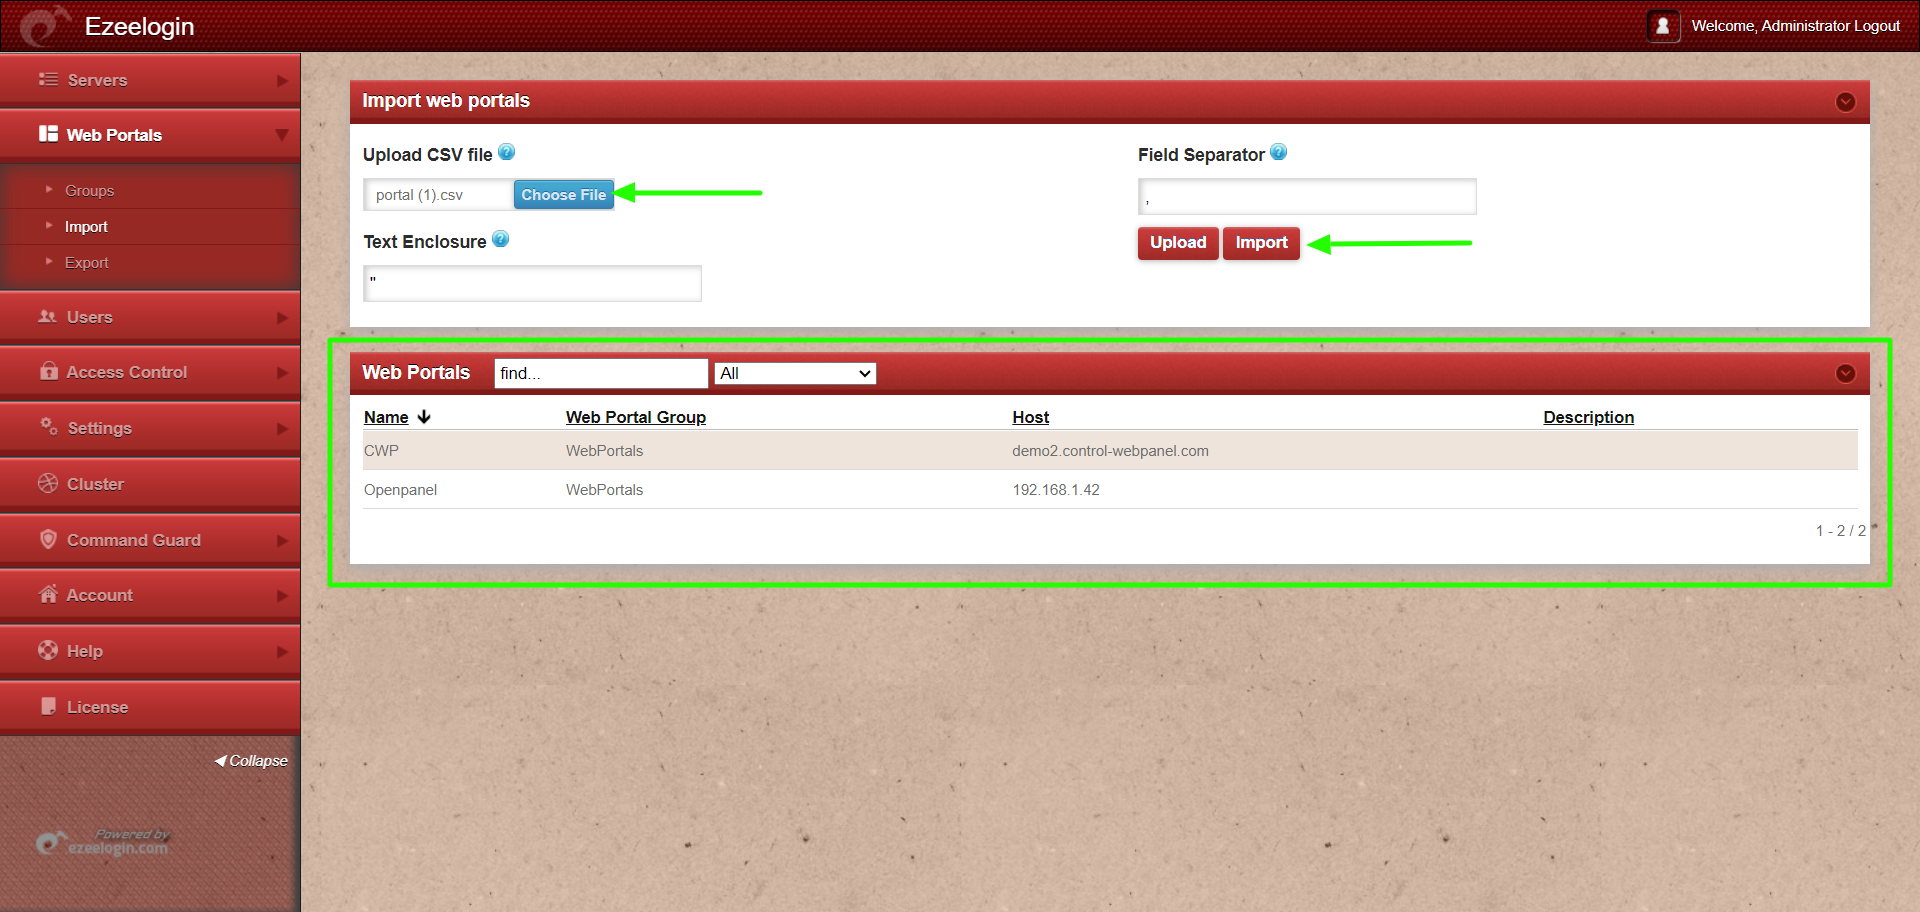
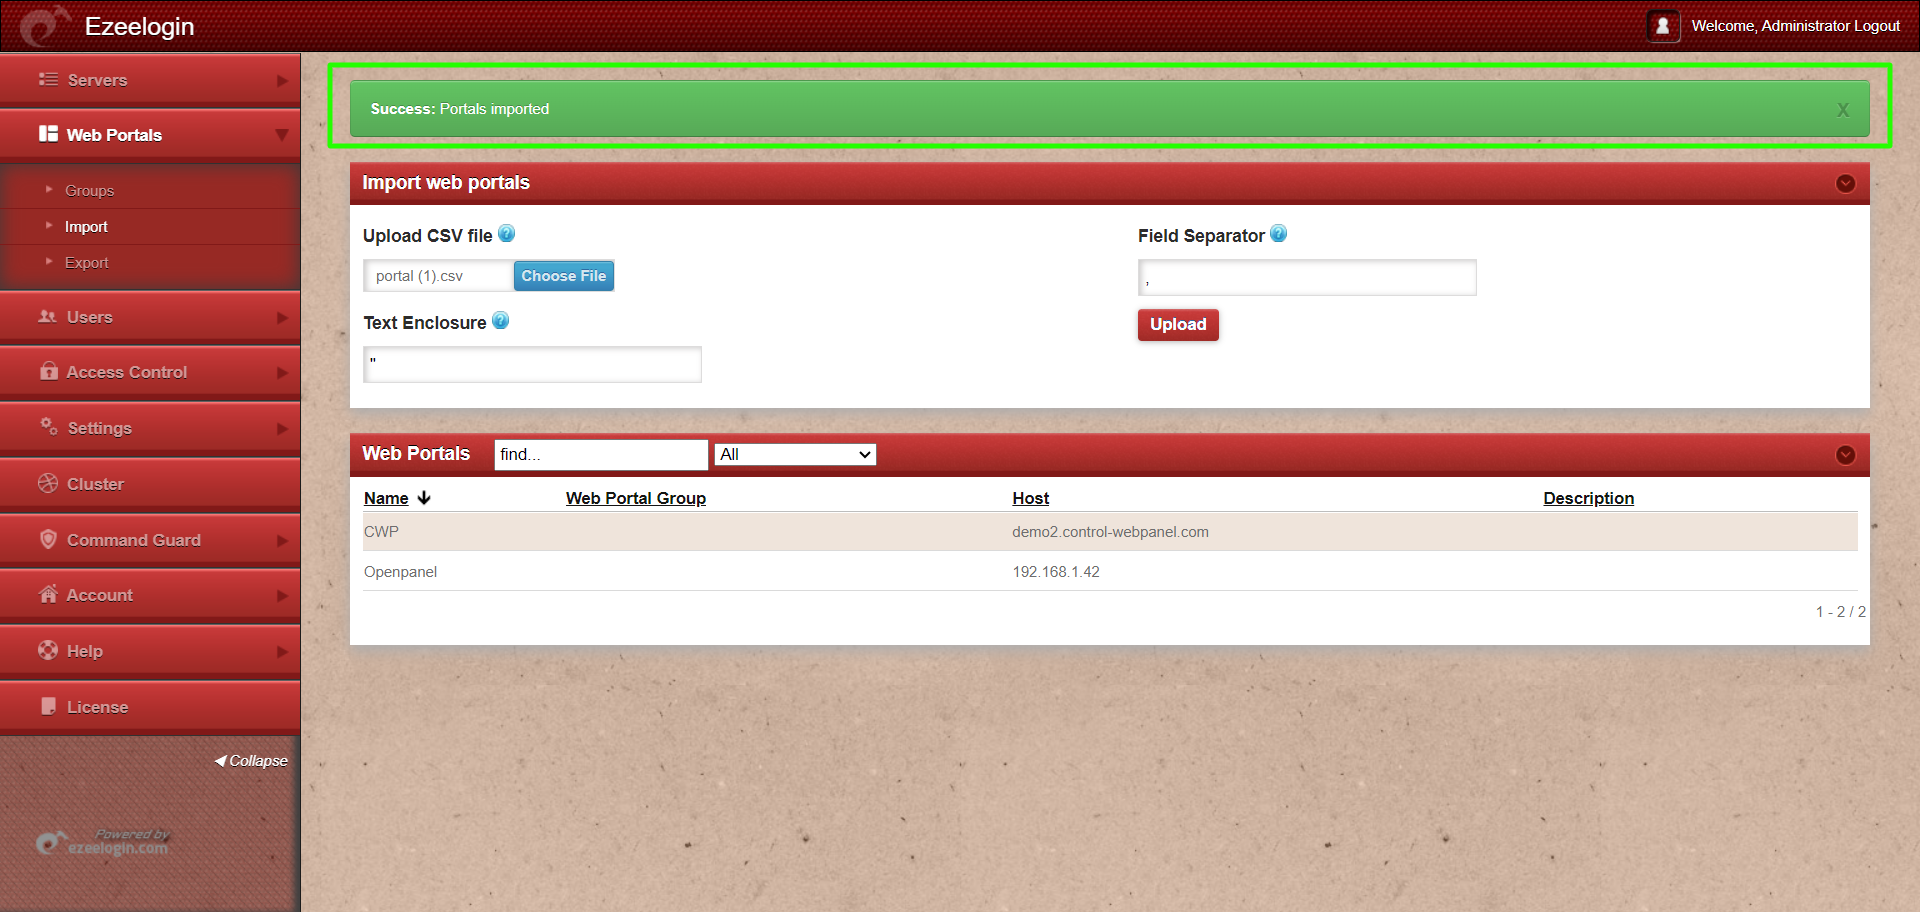
Step 4(B):. Select the CSV file and click on "Upload". After uploading the file, an "Import" button will appear. Click on the "Import" button to proceed.
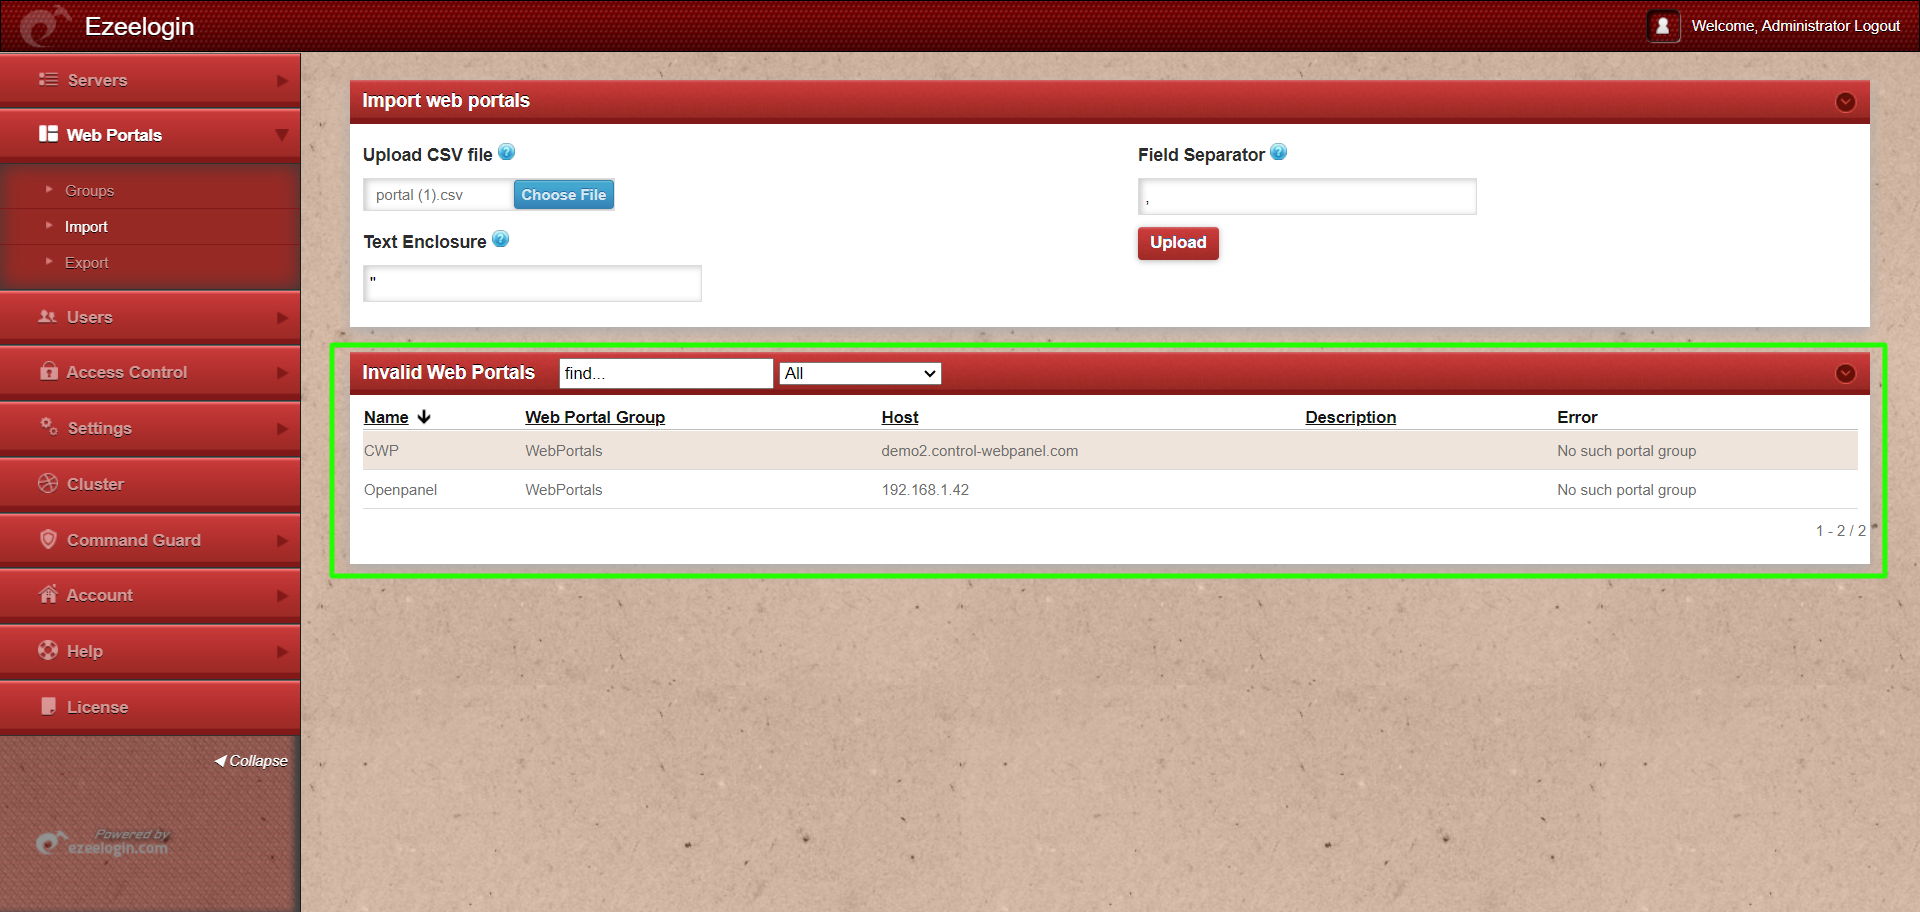
- If you encounter the following error while importing a CSV file, ensure that the web portal group created in the Ezeelogin GUI matches the group to which the web portals belong.
5. How to export Web Portals?
Step 5(A): To Export the web portals click on Web Portals -> Export tab.

Step 5(B): Web portals will be exported in CSV format and downloaded to the desktop.

cat portal.csv
"name","portalgroup","description","host","protocol","port","request_uri","request_method","user_field","user_field_selector","username","passwd_field","passwd_field_selector","password","submit_button_selector","accept_button_selector","basic_auth","extra_vars","login_url","private_user","auto_login","use_proxy","advanced_proxy","disclaimer","verify_ssl","follow_redirects"

"cpanel-2","portal group",,"demo3.control-webpanel.com","http","2030",,"POST","username",,"root","password",,"admin123",,,"N",,"http://demo3.control-webpanel.com:2030",,,"N",,,"N","N"
Troubleshooting steps
Step1: Ensure that Node version is above 19, Kernal >= 4 and NPM Version is >=6
Step 2: To get more detailed errors, append log_level trace in ez.conf.
Step 3: After, kill the current running node
Step 4: Run the below command to get the webportal start command from the latest log file, and then append DEBUG=* at the beginning of the command you get: