Integrate SAML Authentication in Ezeelogin GUI using Microsoft Azure SSO and Azure Active Directory
Configure Microsoft Azure SSO SAML-based Authentication in Ezeelogin GUI.
Overview: This article describes the brief guide to configuring Microsoft Azure SSO authentication with Ezeelogin GUI.
Note: SAML is an authentication mechanism for web applications. It's based on web protocols and it cannot be used for user authentication over SSH.
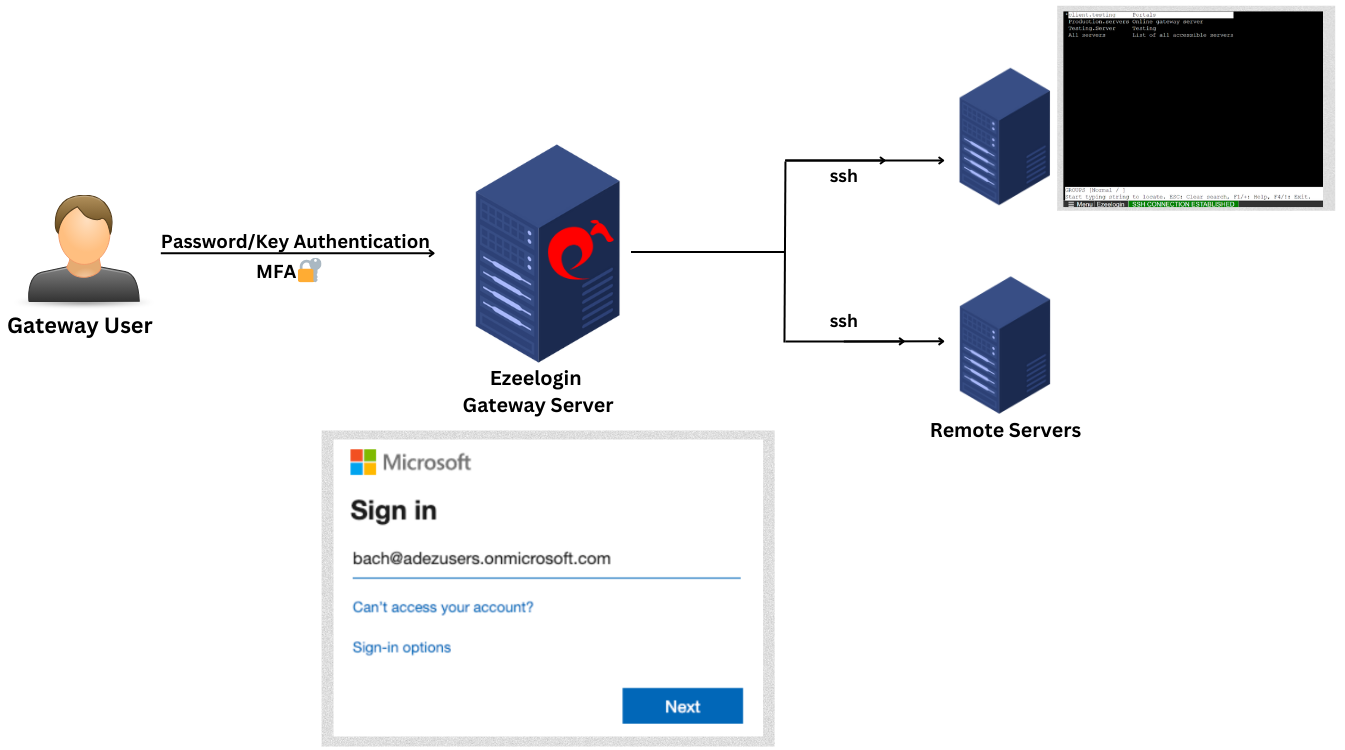
- Login into your Microsoft Azure account and Create an Active Directory service.
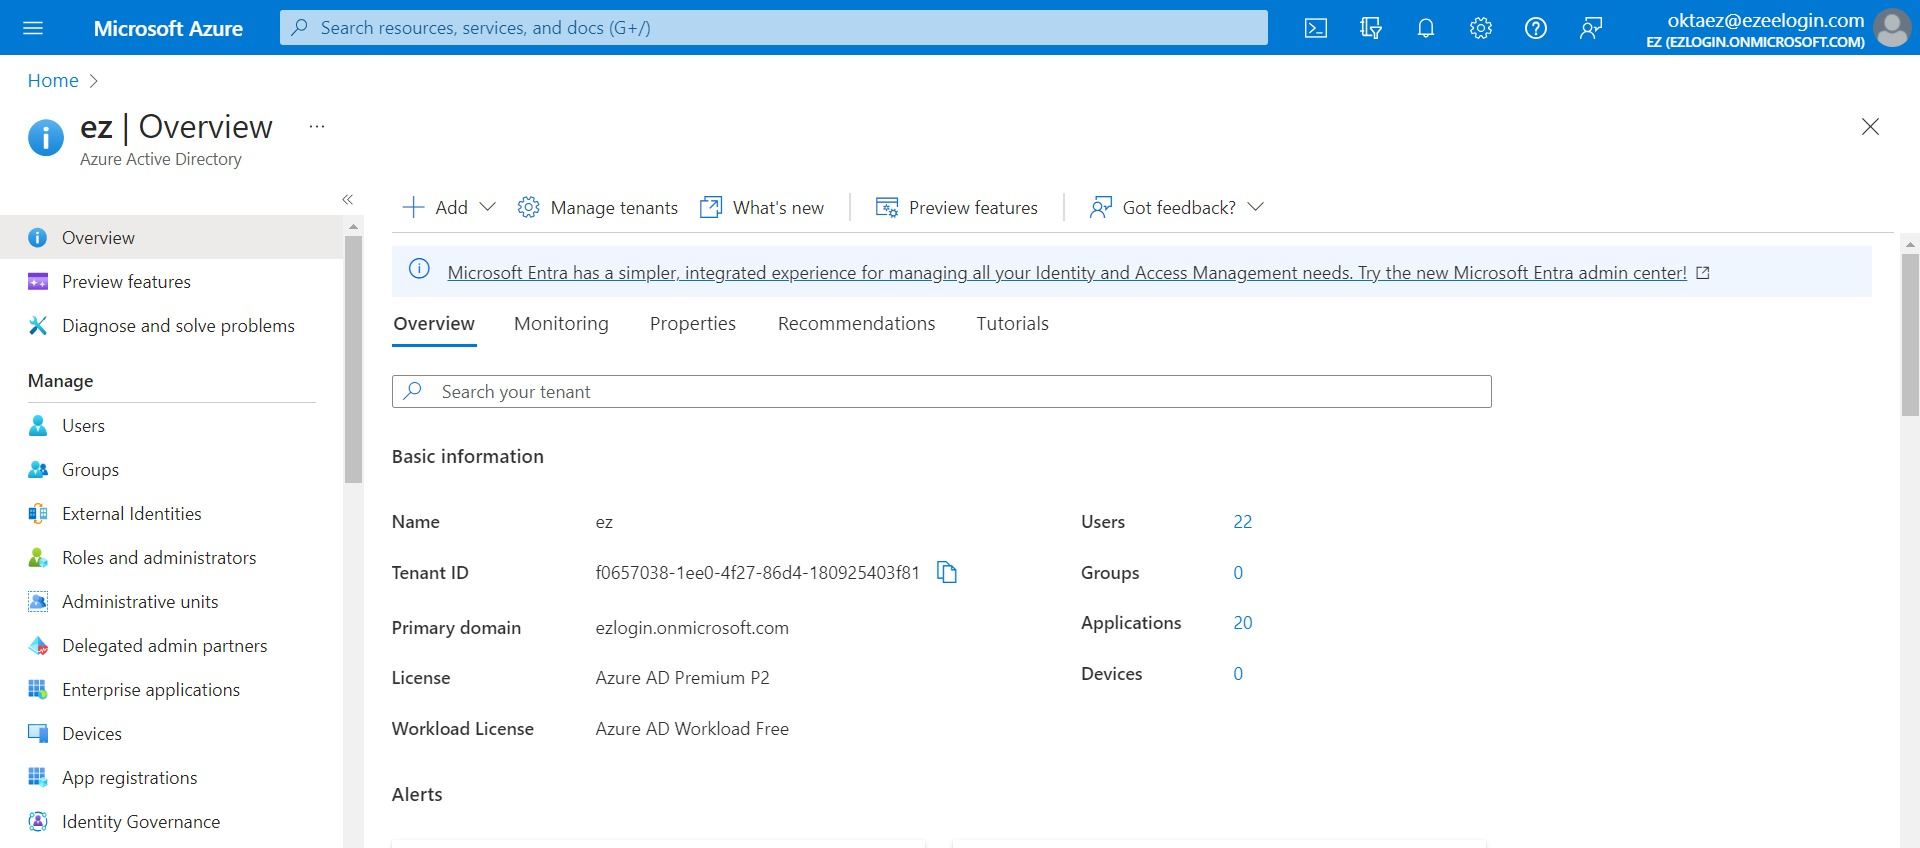
2. Add Users in AD (Skip this step, if Users already exist). This user in turn would authenticate into the Ezeelogin GUI.
To create a user in AD, click on User tab >> New user >> Provide the user name, name, password, etc, and click Create.
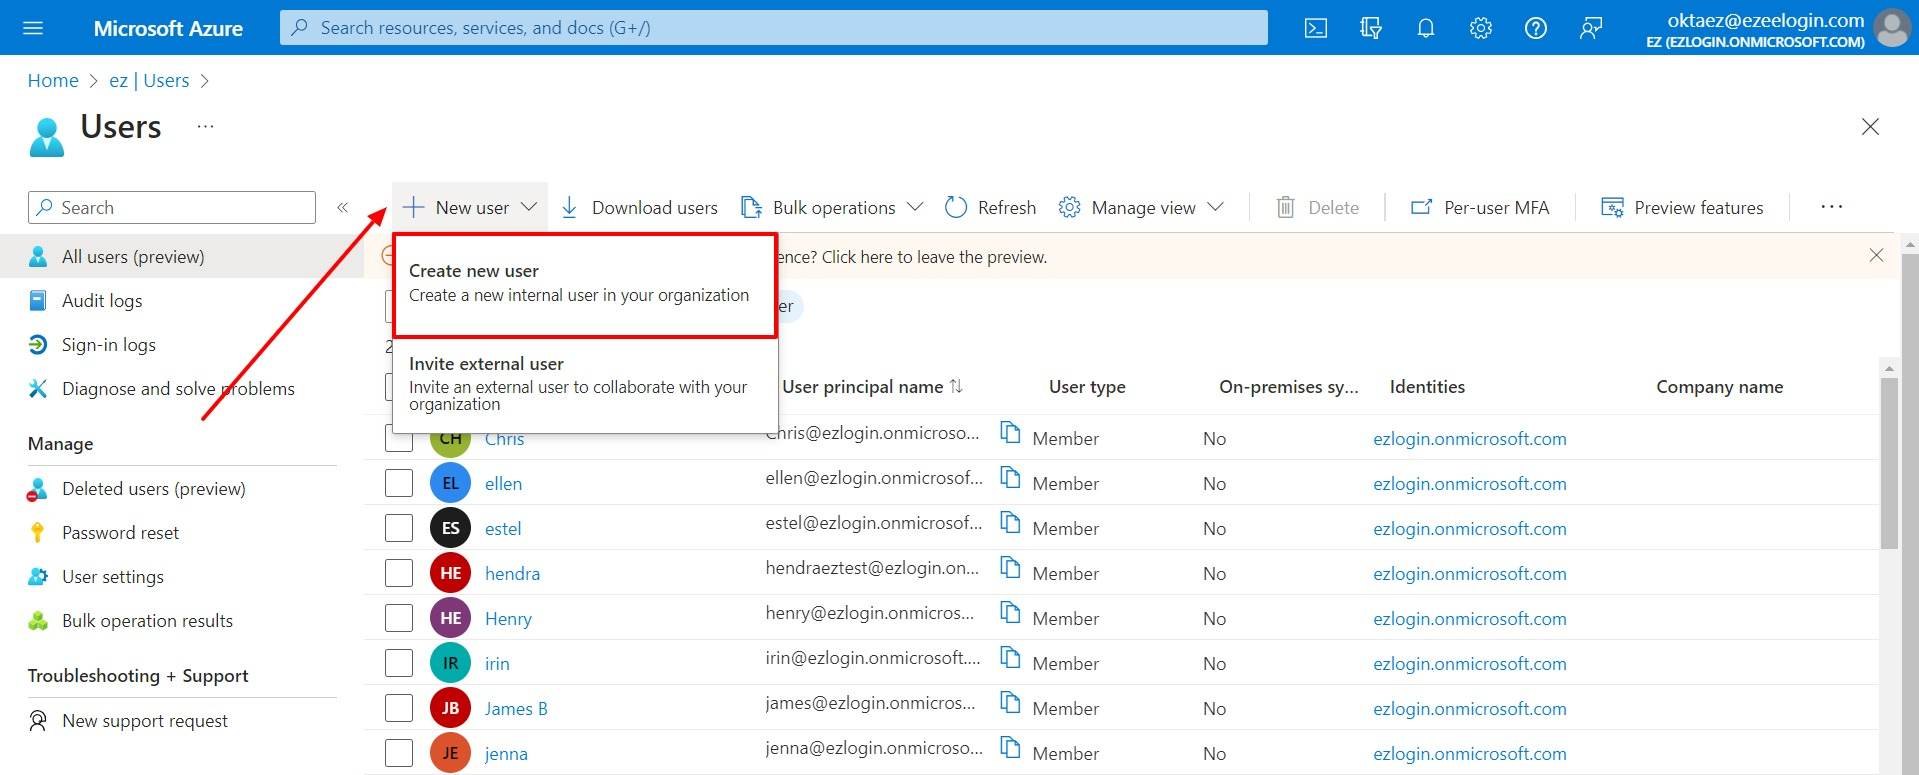
3. Create an Enterprise Application. Click on Enterprise applications.
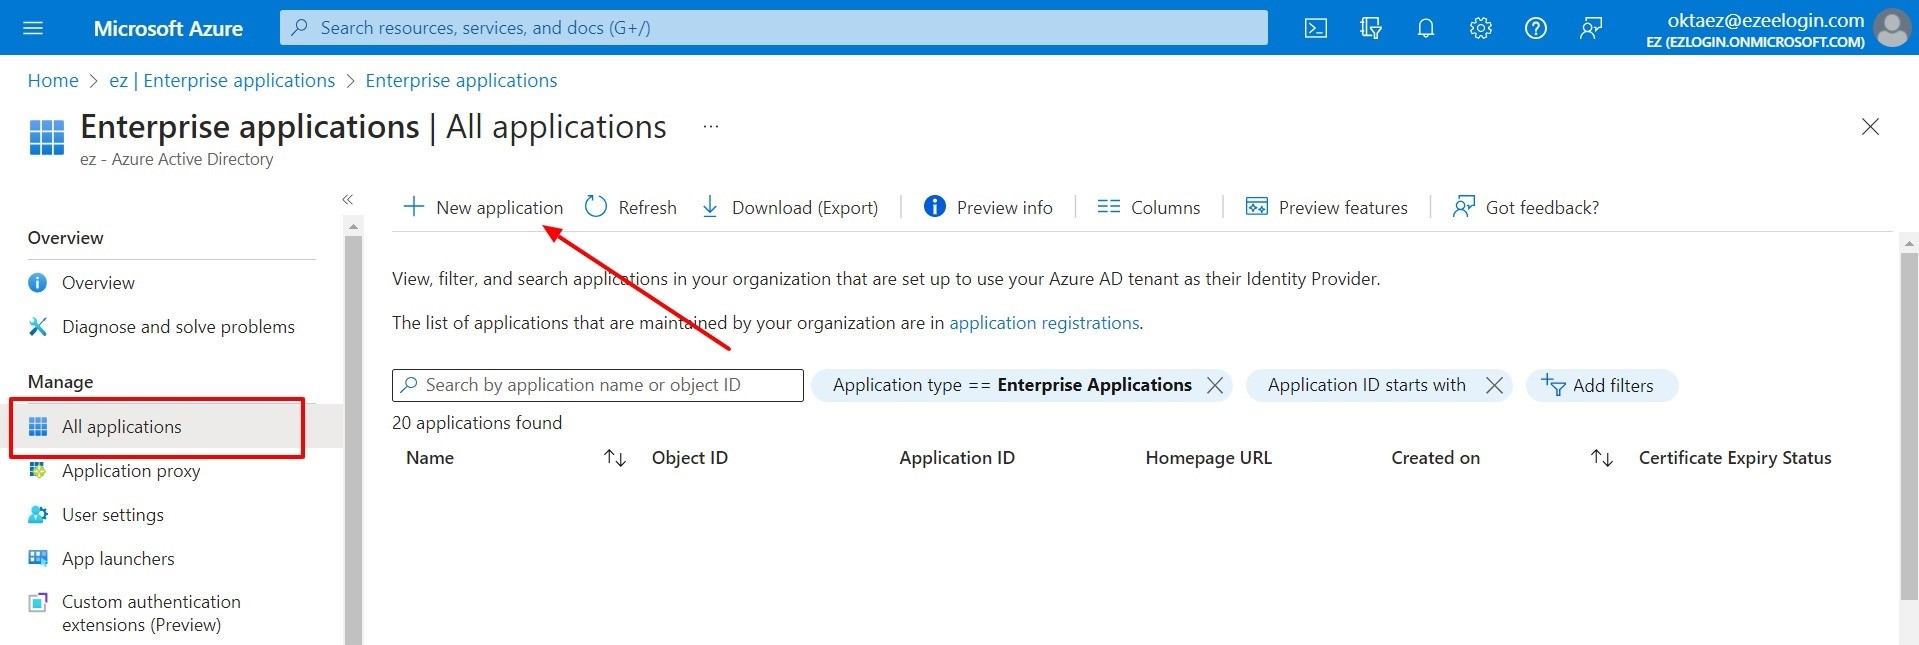
- Click on All applications >> New application.
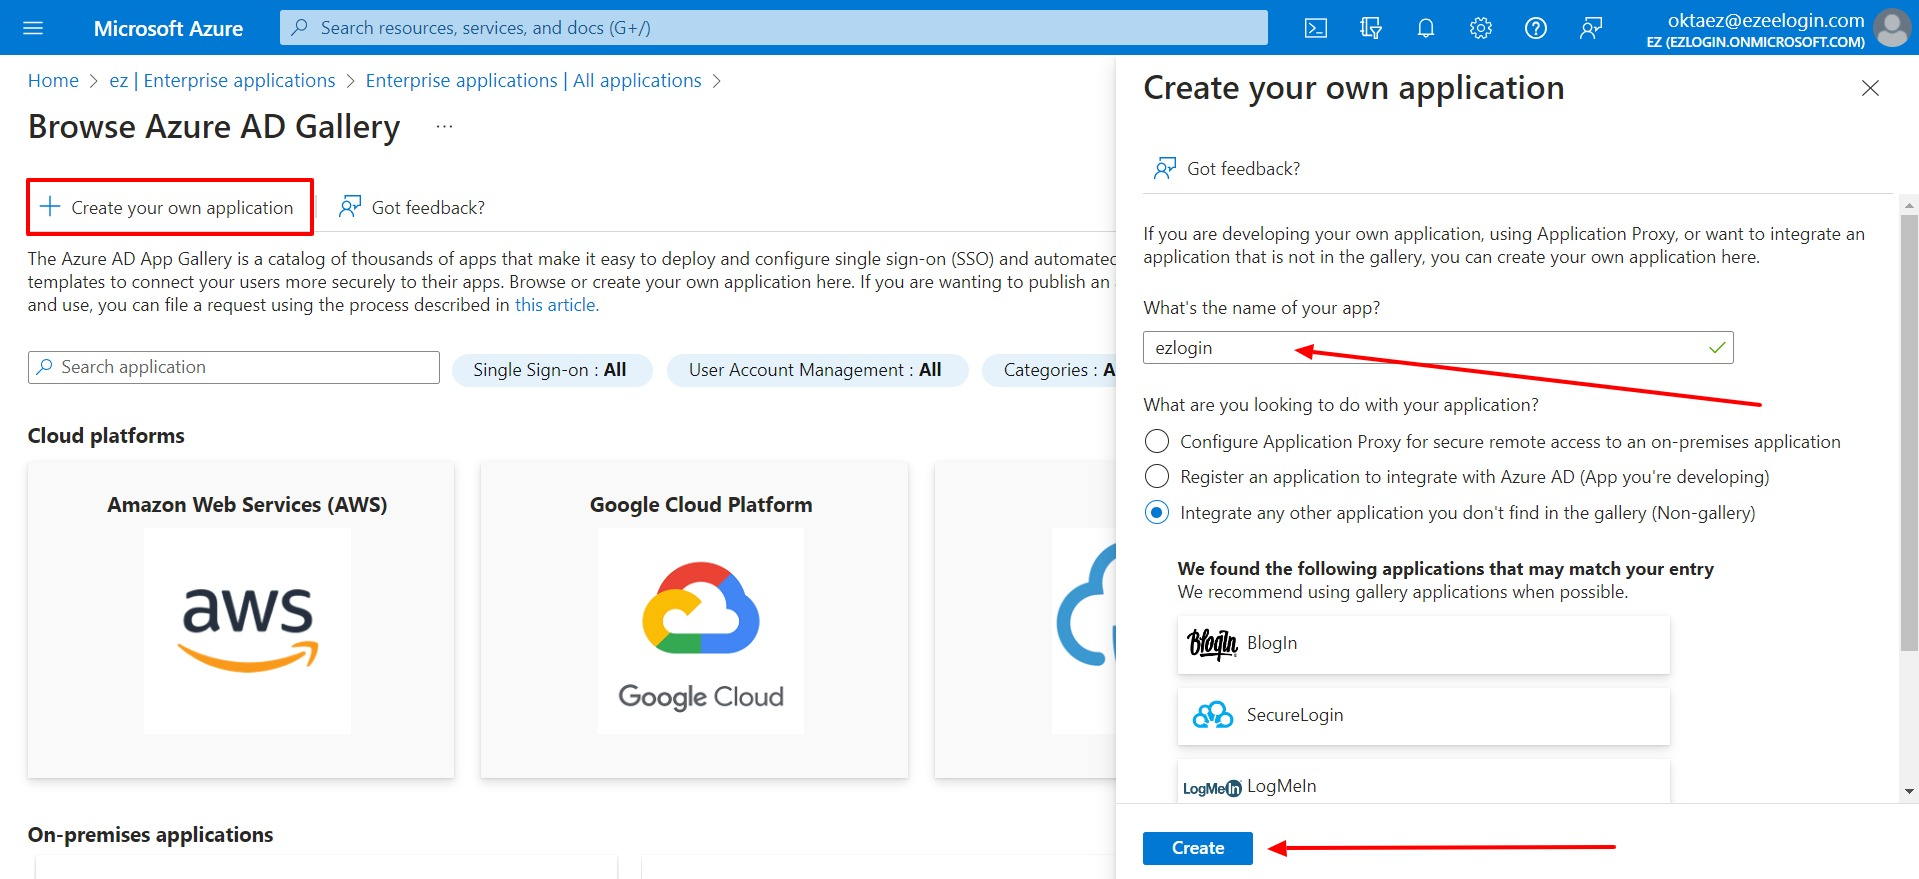
- Click on Create your own application >> Provide the name for your application >> Check Integrate any other application you don't find in the gallery(Non-gallery) >> Create.
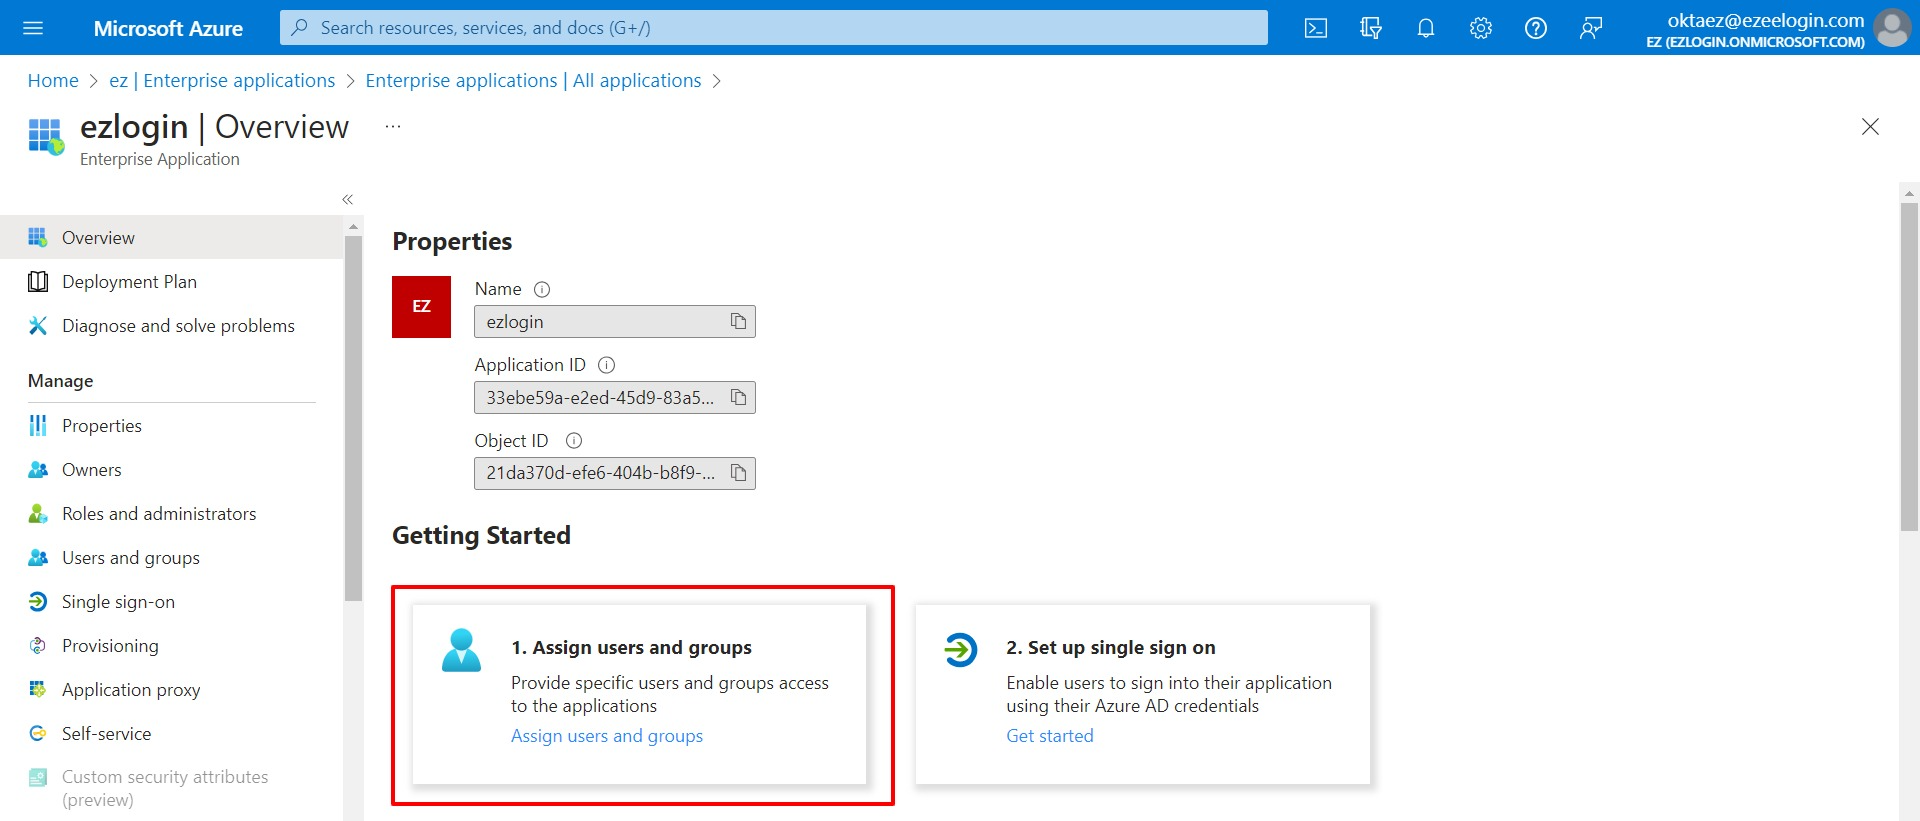
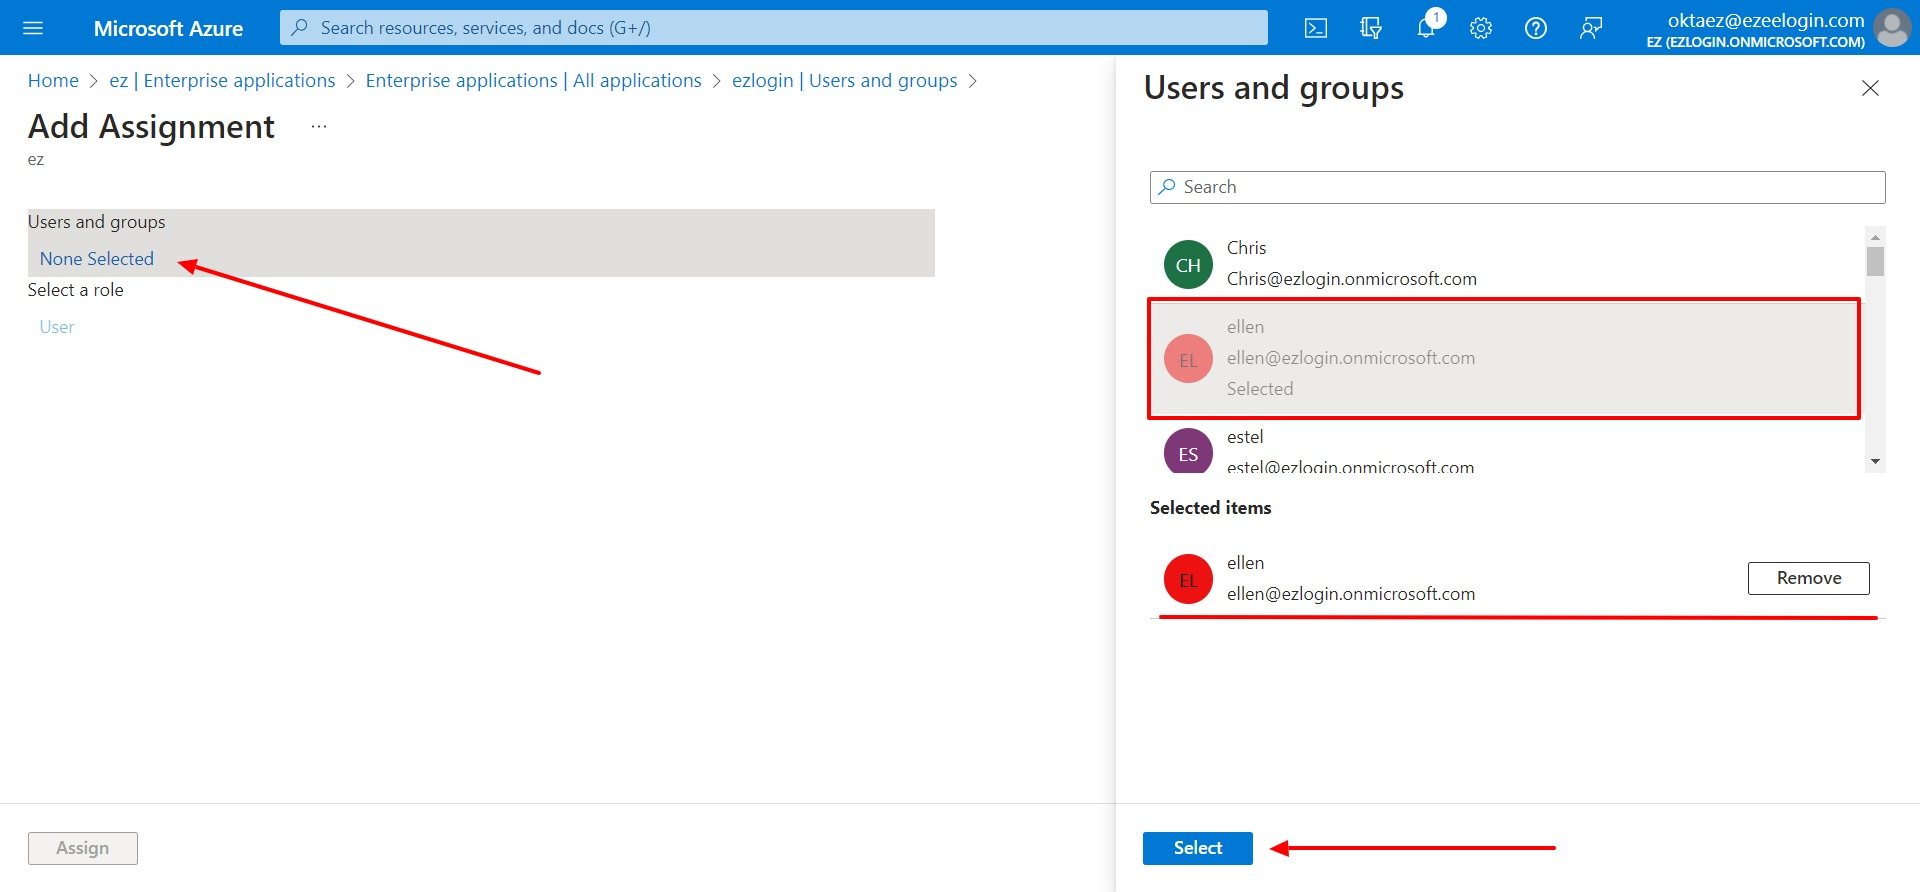
4. Assign the user to the Enterprise application. Click on Assign users and groups.
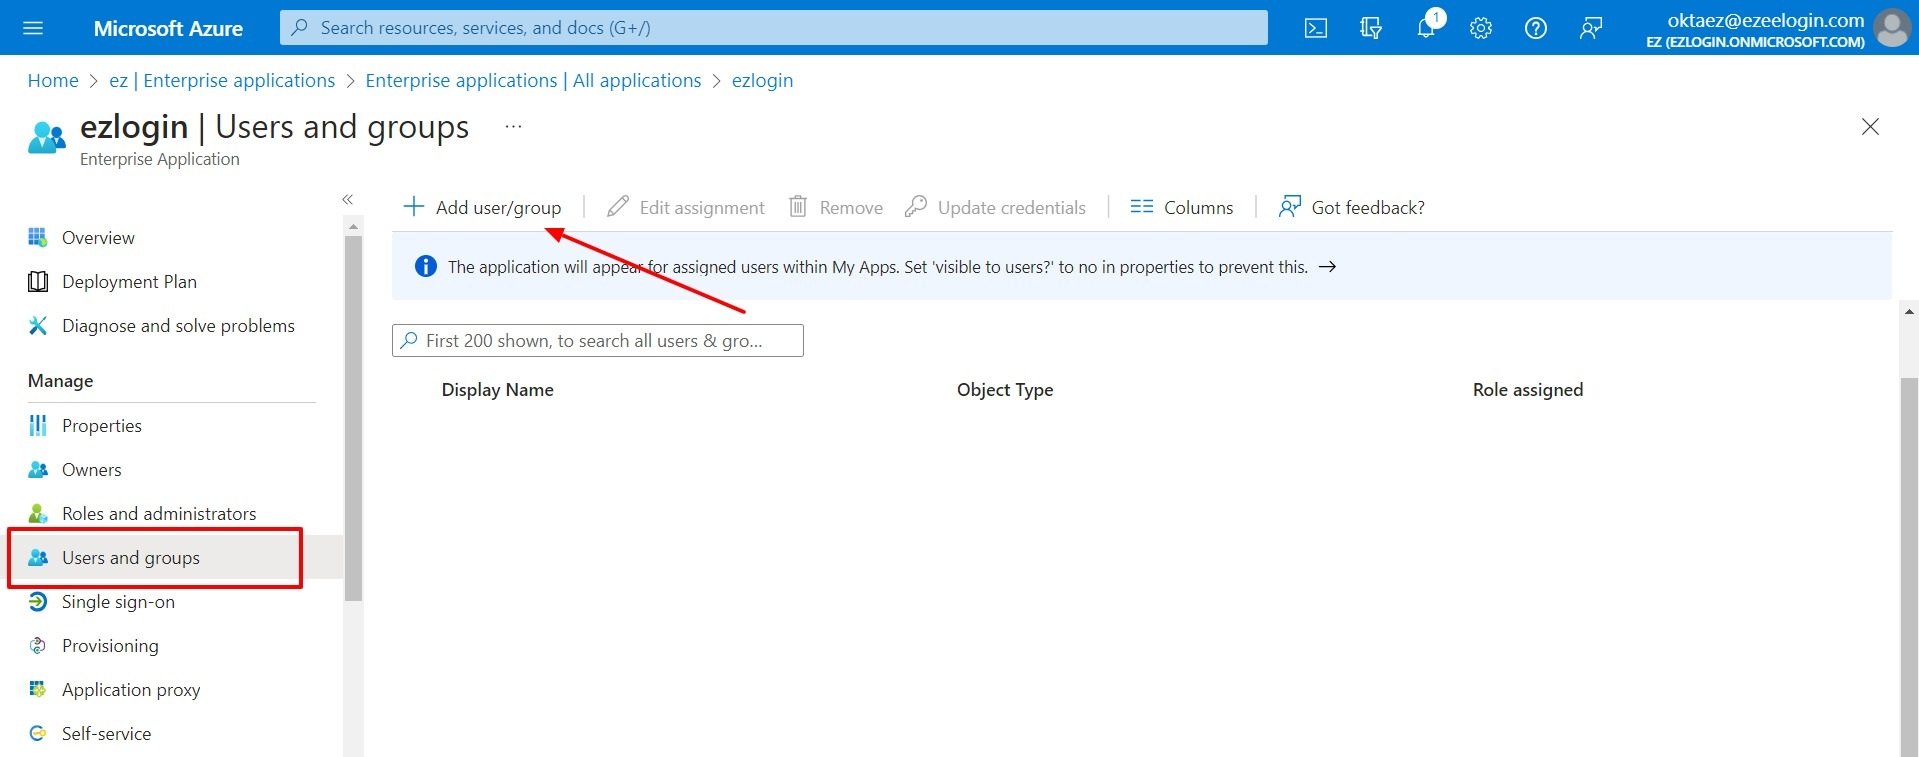
- Click on Add user/group to assign the user to the application.
- Click on None Selected >> select the users who want to assign to the application >> select.
5. Configure Single Sign On ( SAML )
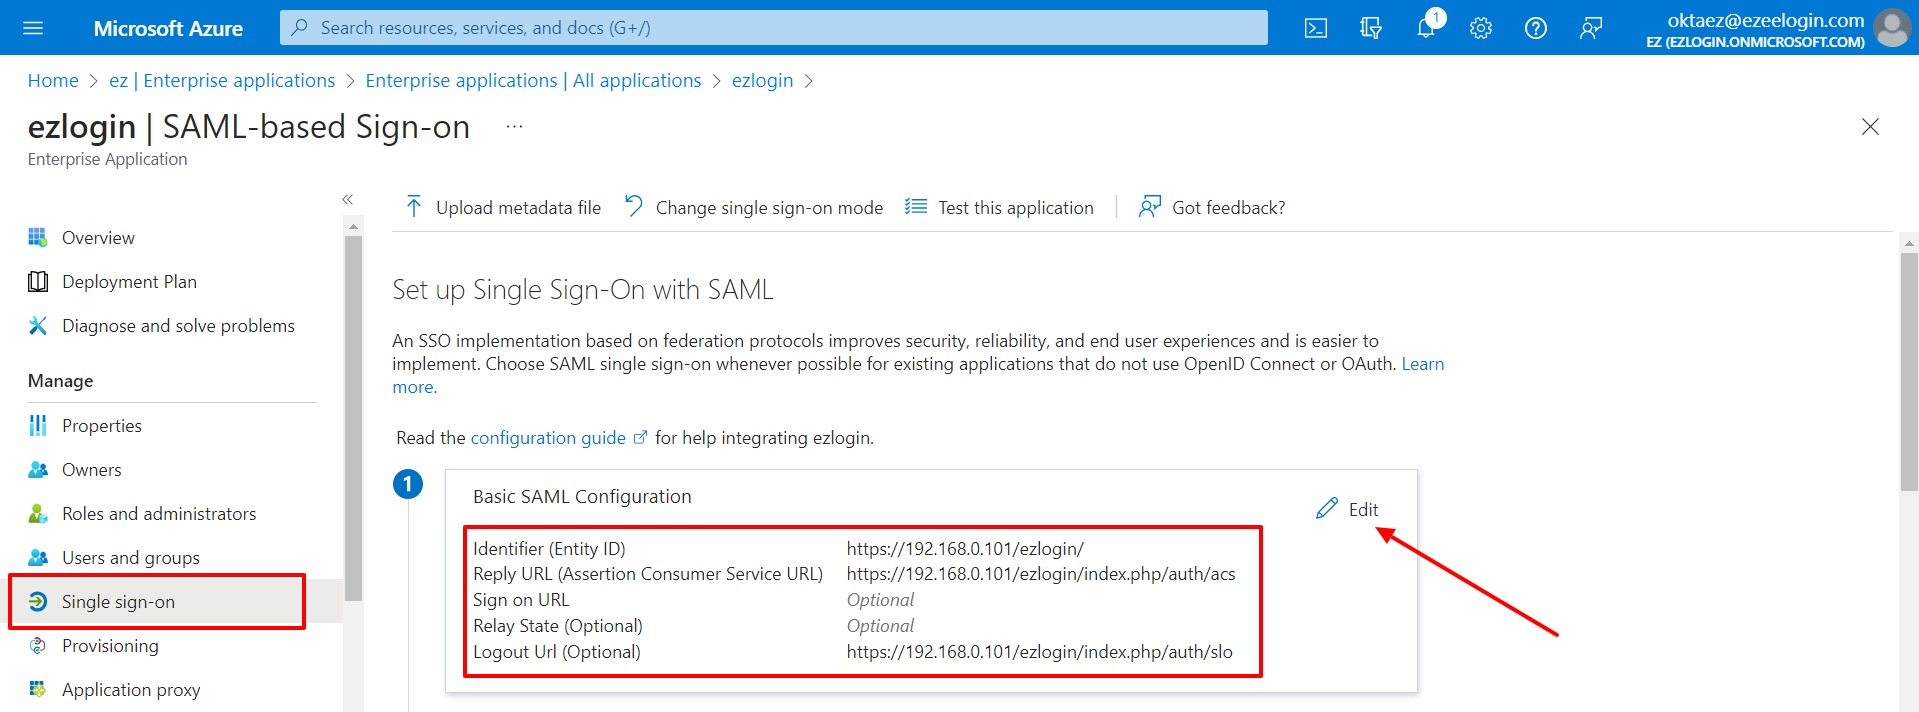
- Identifier (Entity ID) - You can find it from Ezeelogin GUI > Settings > SAML> Entity ID)
- Reply URL (Assertion Consumer Service URL) - You can find it from Ezeelogin GUI > Settings > SAML>Assertion Consumer Service URL)
- Logout Url (Optional) - You can find it from Ezeelogin GUI > Settings > SAML>Single Logout Service URL
.jpg)
- Click on Single sign-on >> Basic SAML Configuration Edit >> Copy Entity ID, Assertion Consumer Service URL, and Logout Url from Ezeelogin and paste in the specified fields.
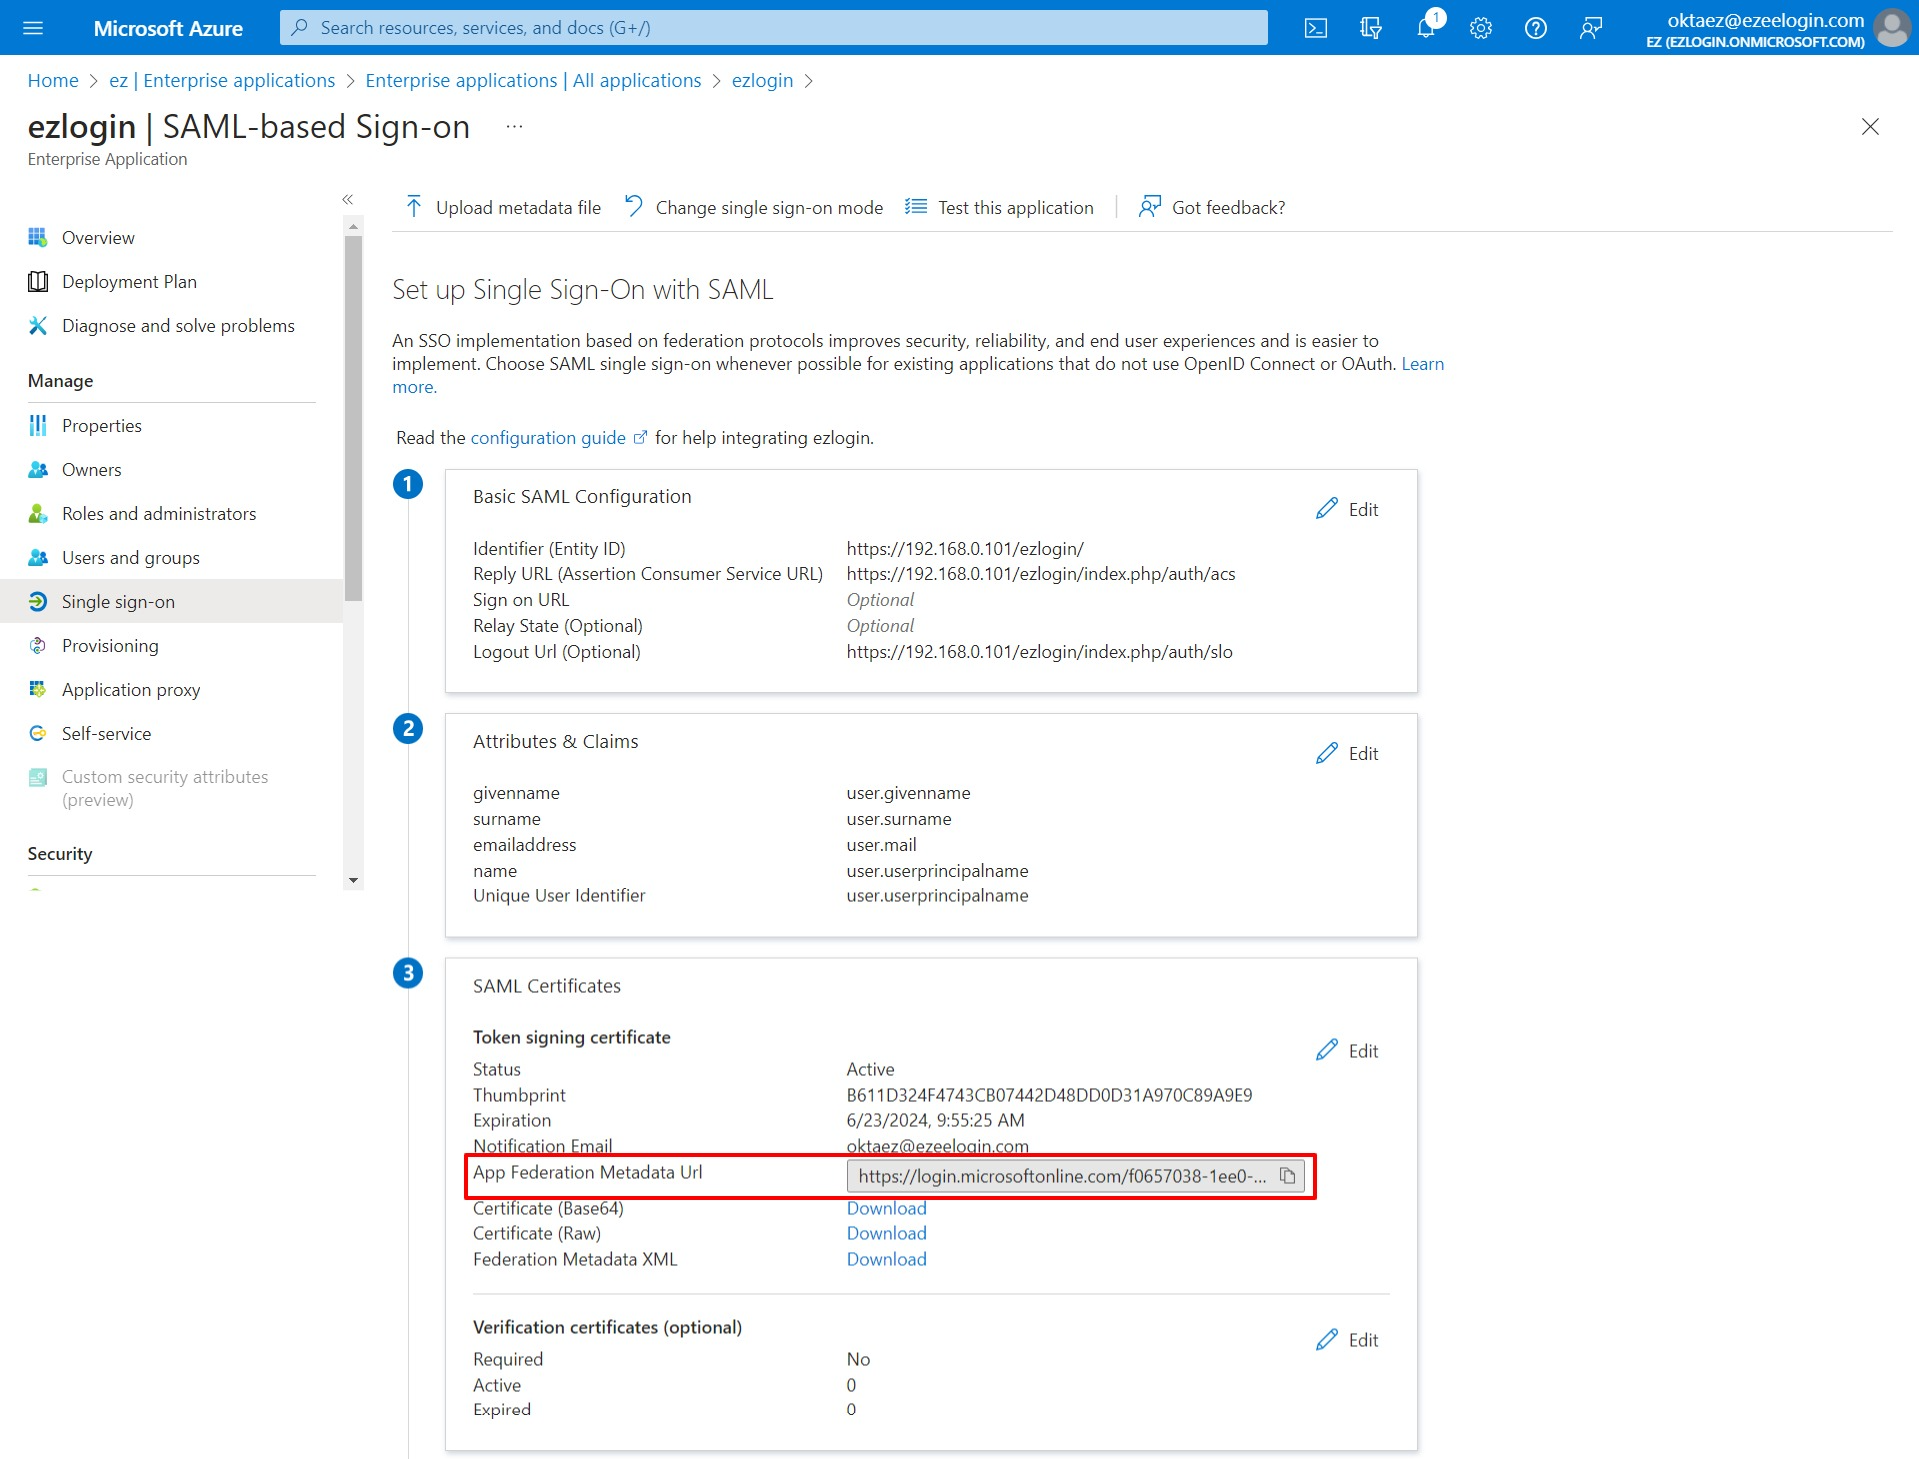
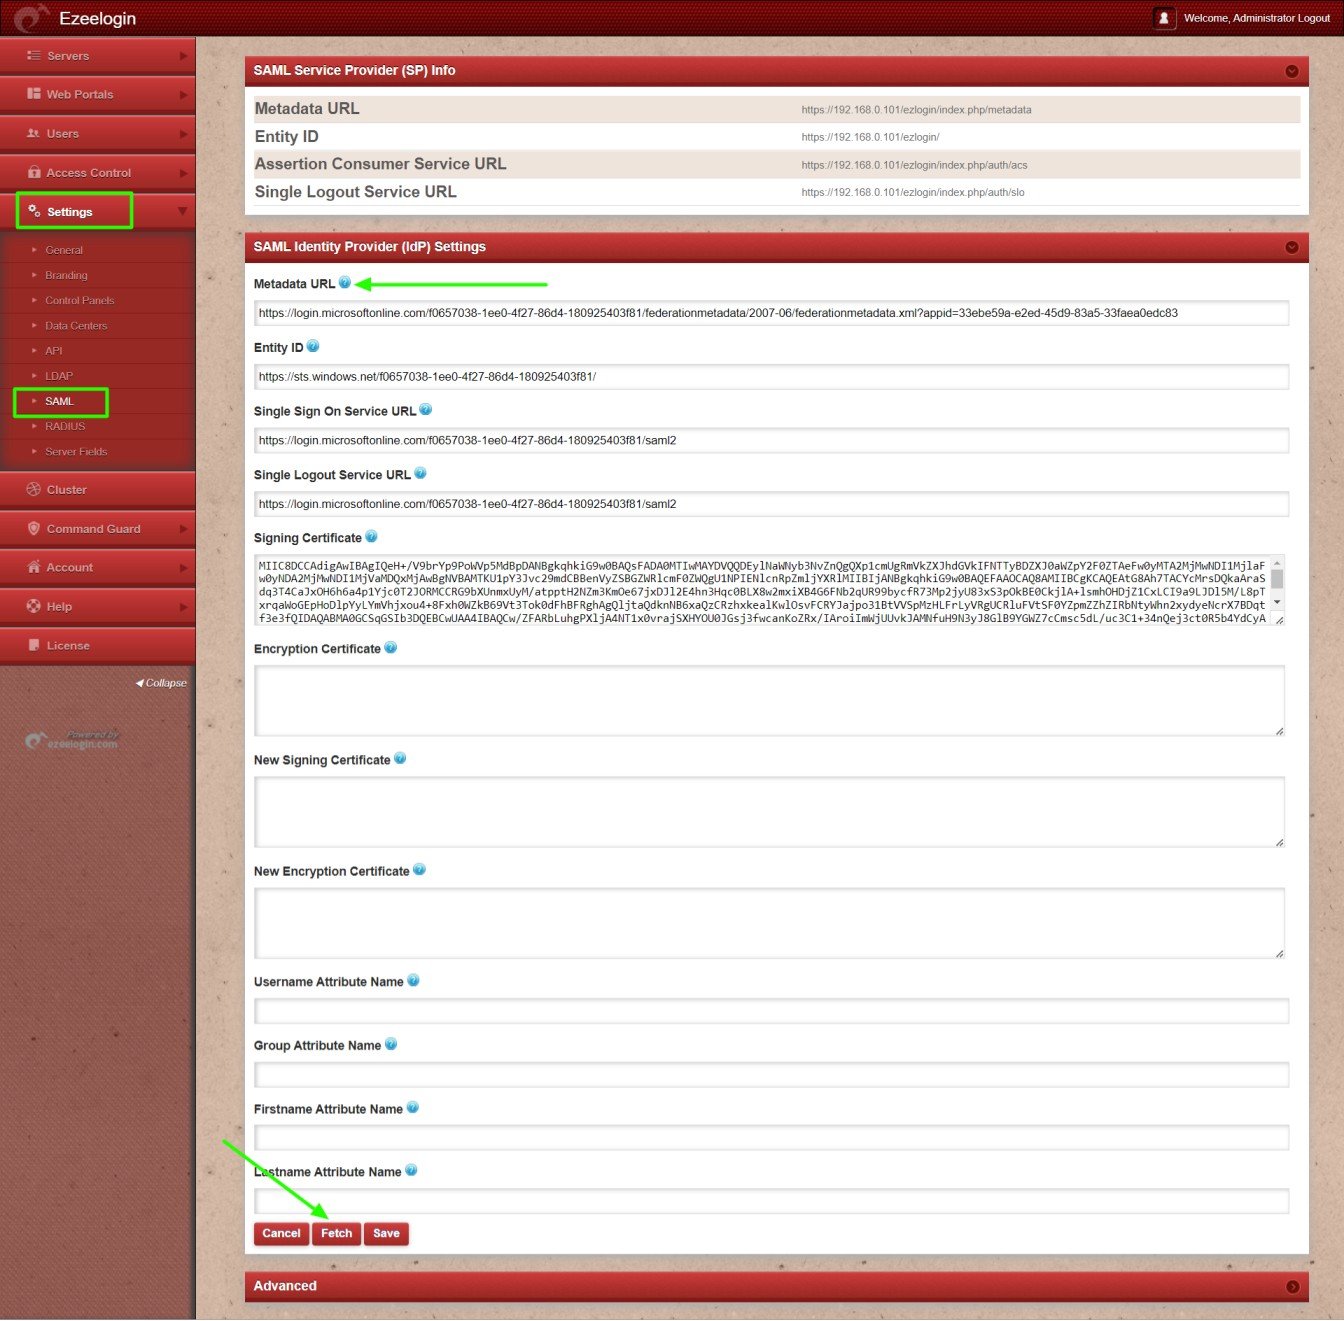
6. Copy the Metadata URL and paste it to the Metadata URL on Ezeelogin GUI > Settings > SAML Metadata URL and click on the fetch button, it will auto-fill the SAML setting and SAVE it.
7. Add users in your Azure AD Directory into the Ezeelogin GUI. Make sure the email ID entered in GUI is identical to the one in SAML.

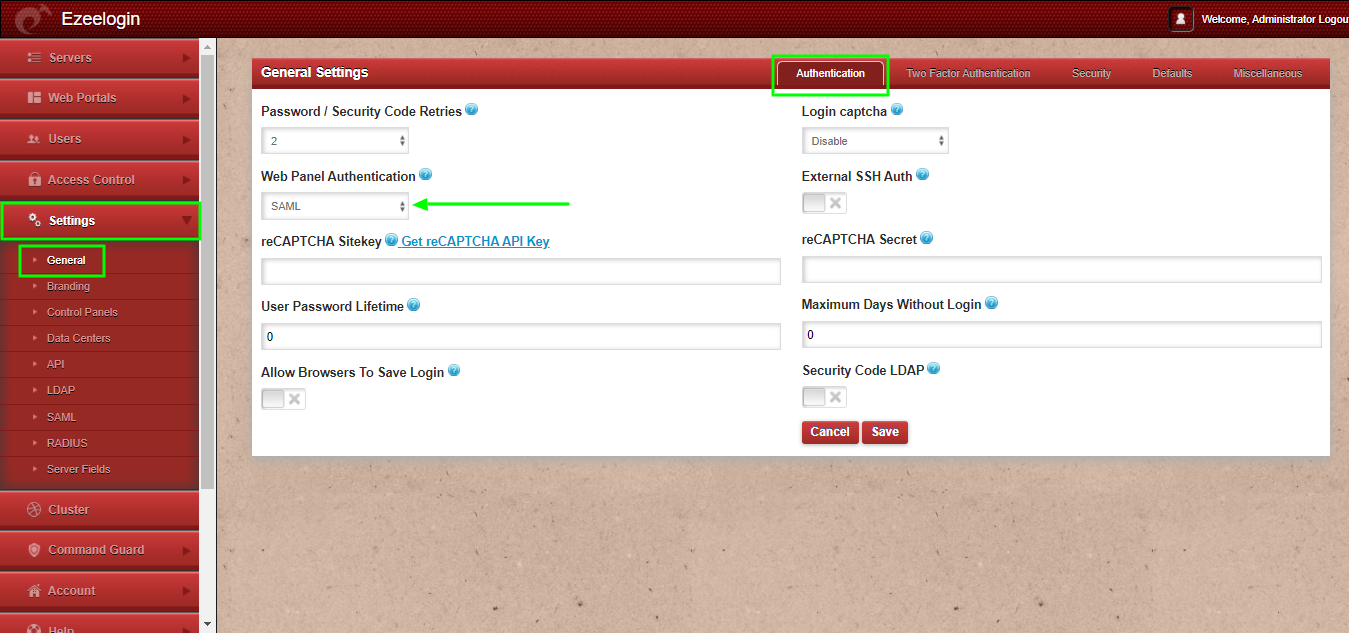
9. Set Web Panel Authentication to SAML Under Settings -> General -> Authentication -> SAML.
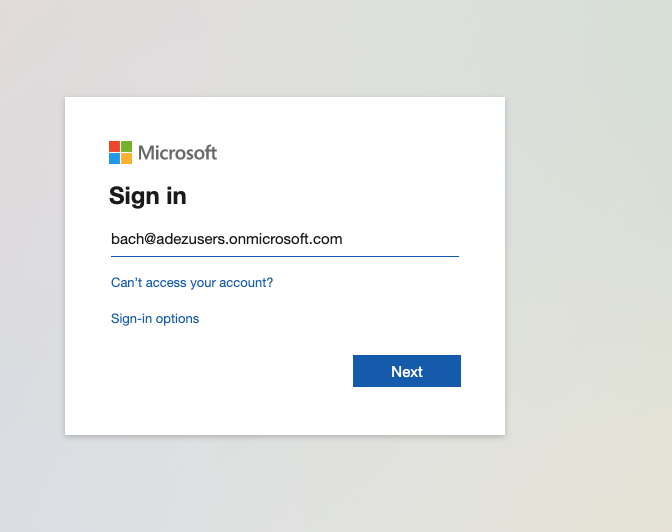
10. Login into the Ezeelogin GUI and you will be prompted with the Microsoft Azure Login Page where you will need to enter the login credentials to be authenticated into the Ezeelogin Application.
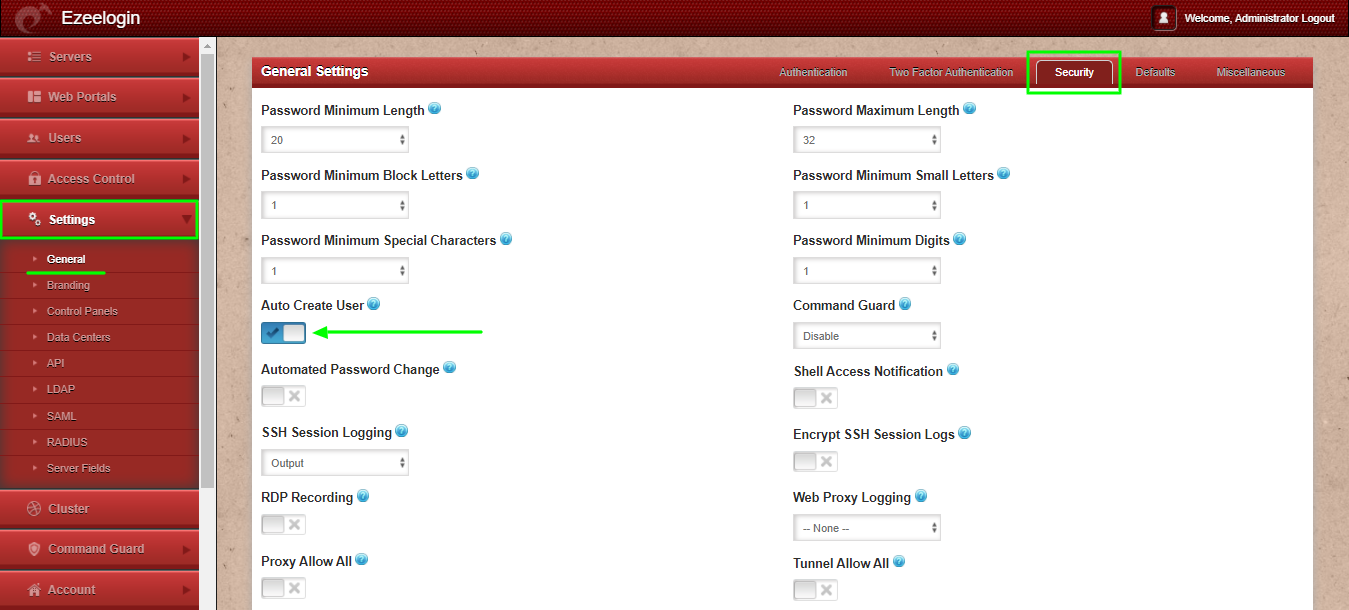
11. Finally, you will be logged into the Ezeelogin GUI using SAML Authentication. The user will be created automatically on Ezeelogin after successful authentication from Azure SSO.

12. After logging into the GUI, you need to reset the password and security code of the SAML user under Account -> Password in order to SSH to the Ezsh shell.

13. You can log in to Ezeelogin shell via Webssh shell or using any SSH client such as Putty or terminal etc.
- WebSSH: Click on the 'Open Web SSH Console' icon to SSH via the browser.

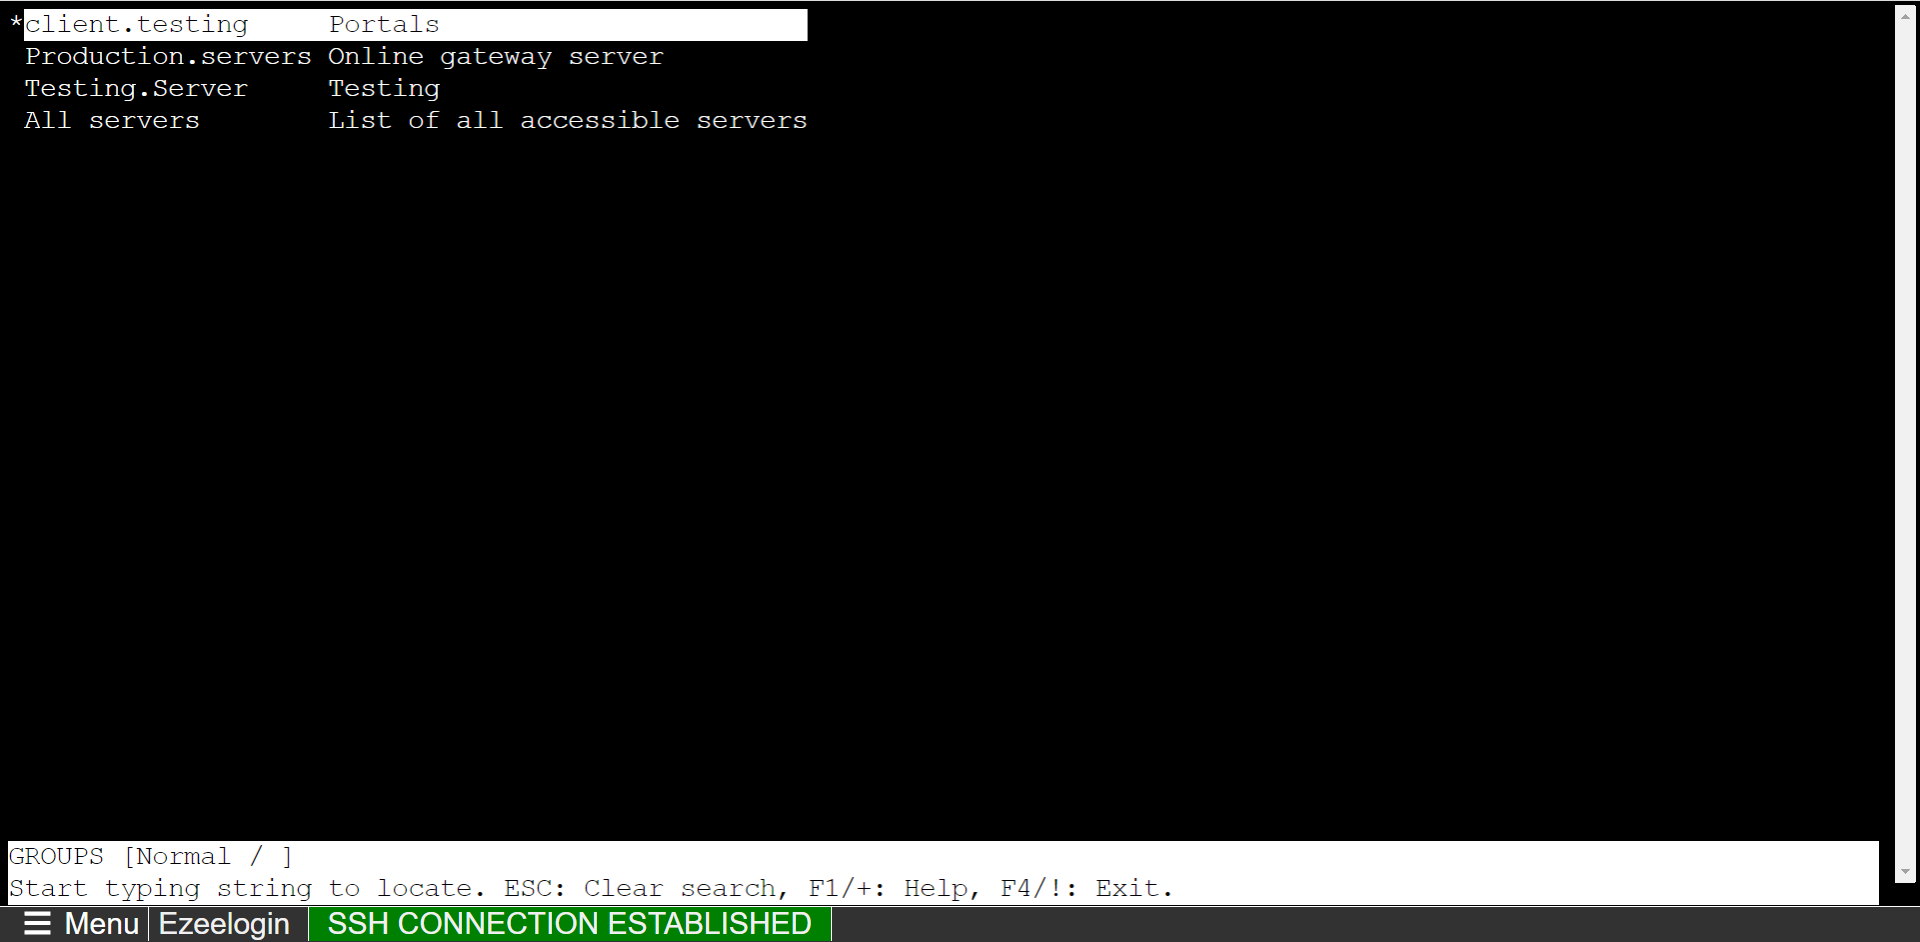
- WebSSH terminal will open like below. Users can navigate the server group with the Up and Down arrow buttons and enter to log into the server.
- Native SSH Client: After resetting the password and security code you can SSH to the Ezsh shell (using Terminal or Putty) with the SAML username.

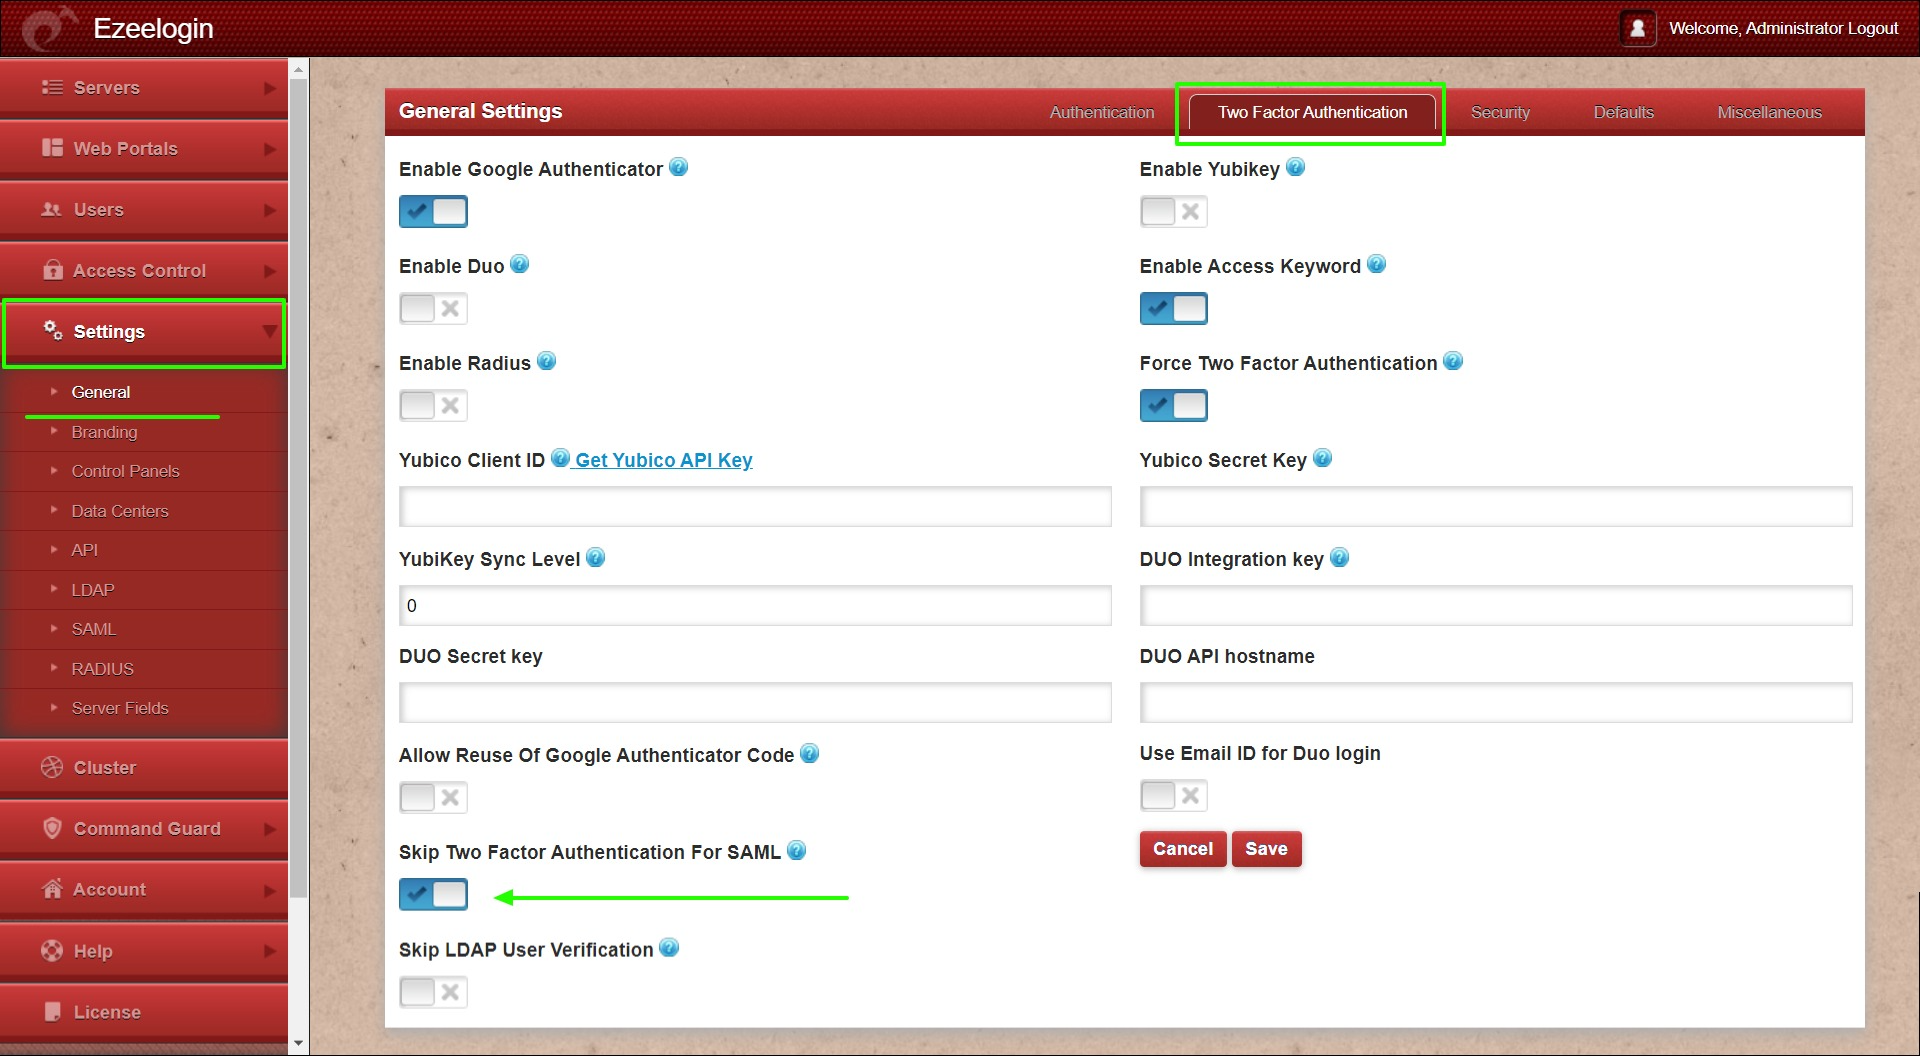
14. If you are SSHing with 2FA enabled using Putty or Terminal it would prompt you to enter the 2FA codes, The 2FA step can be disabled for SAML Authentication under Settings -> Two Factor Authentication -> Skip Two Factor Authentication for SAML.
- The user will be able to ssh without being prompted for the 2FA codes only if the user is logged into the web panel, otherwise, if the user is not logged into the web panel it would prompt for the 2FA codes.
15. It is recommended to use the webssh shell for the SAML authentication. The webssh shell is more convenient as the user would not have to open an SSH client such as Putty/terminal and enter the username/password and 2FA codes.
- Using the webssh, the user can ssh from the web panel itself and 2fa will not be prompted if you have enabled the Skip Two factor Authentication for SAML.

Refer article to enable encryption in Microsoft Azure SSO with Ezeelogin
How to fetch Username, Firstname, Lastname, and Usergroup Attributes from Azure to Ezeelogin?
Note: Delete and log in again with Azure credentials after configuring the steps below to fetch details from Azure AD to Ezeelogin.
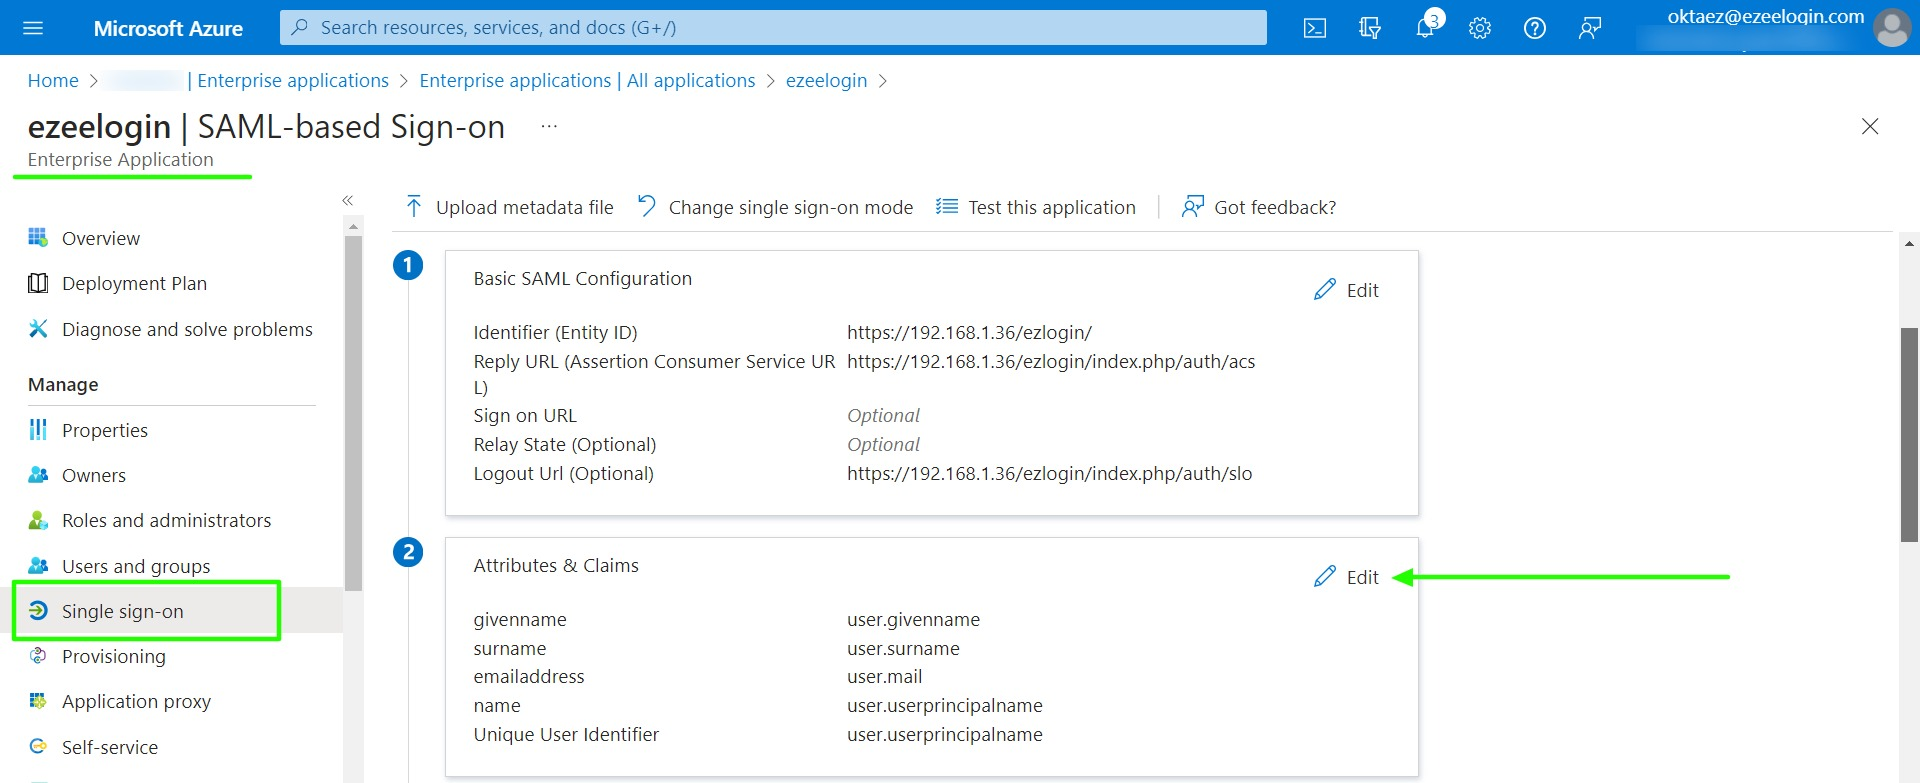
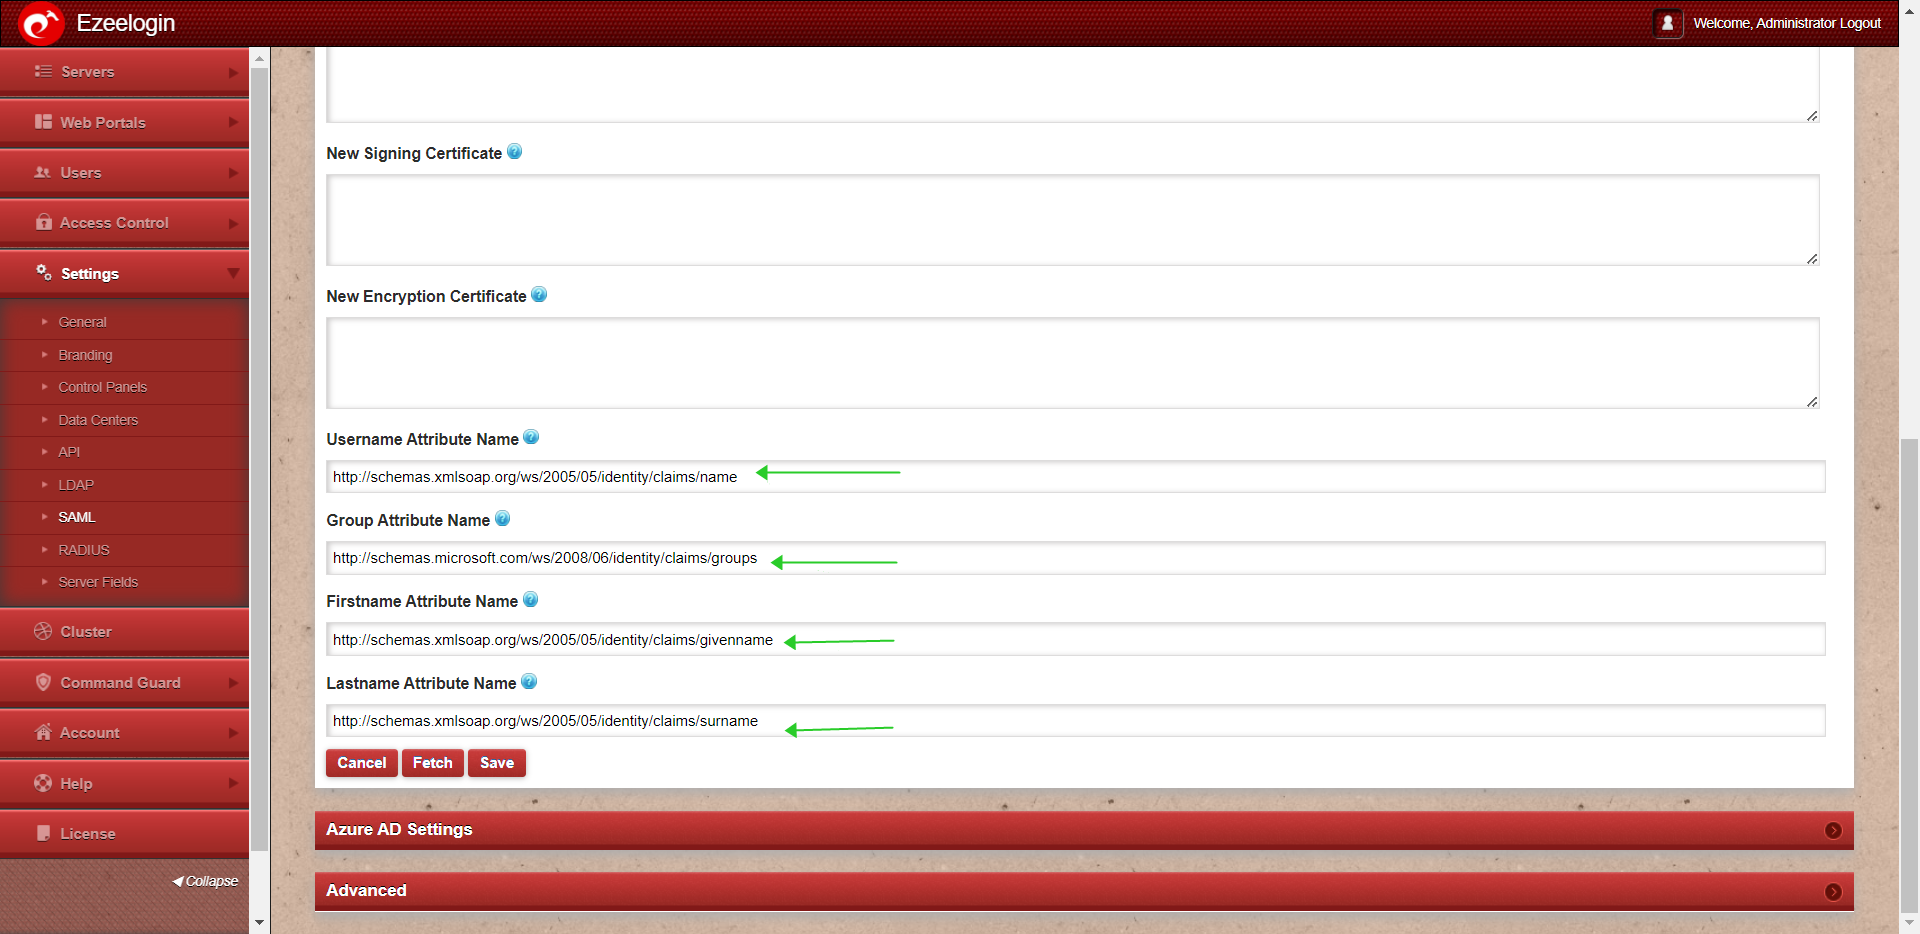
1. Click on Single sign-on -> Attributes & Claims Edit -> Copy Claim names and paste them into the advanced SAML setting in Ezeelogin.
2. Copy the Claim names and paste them into the SAML setting of Ezeelogin.
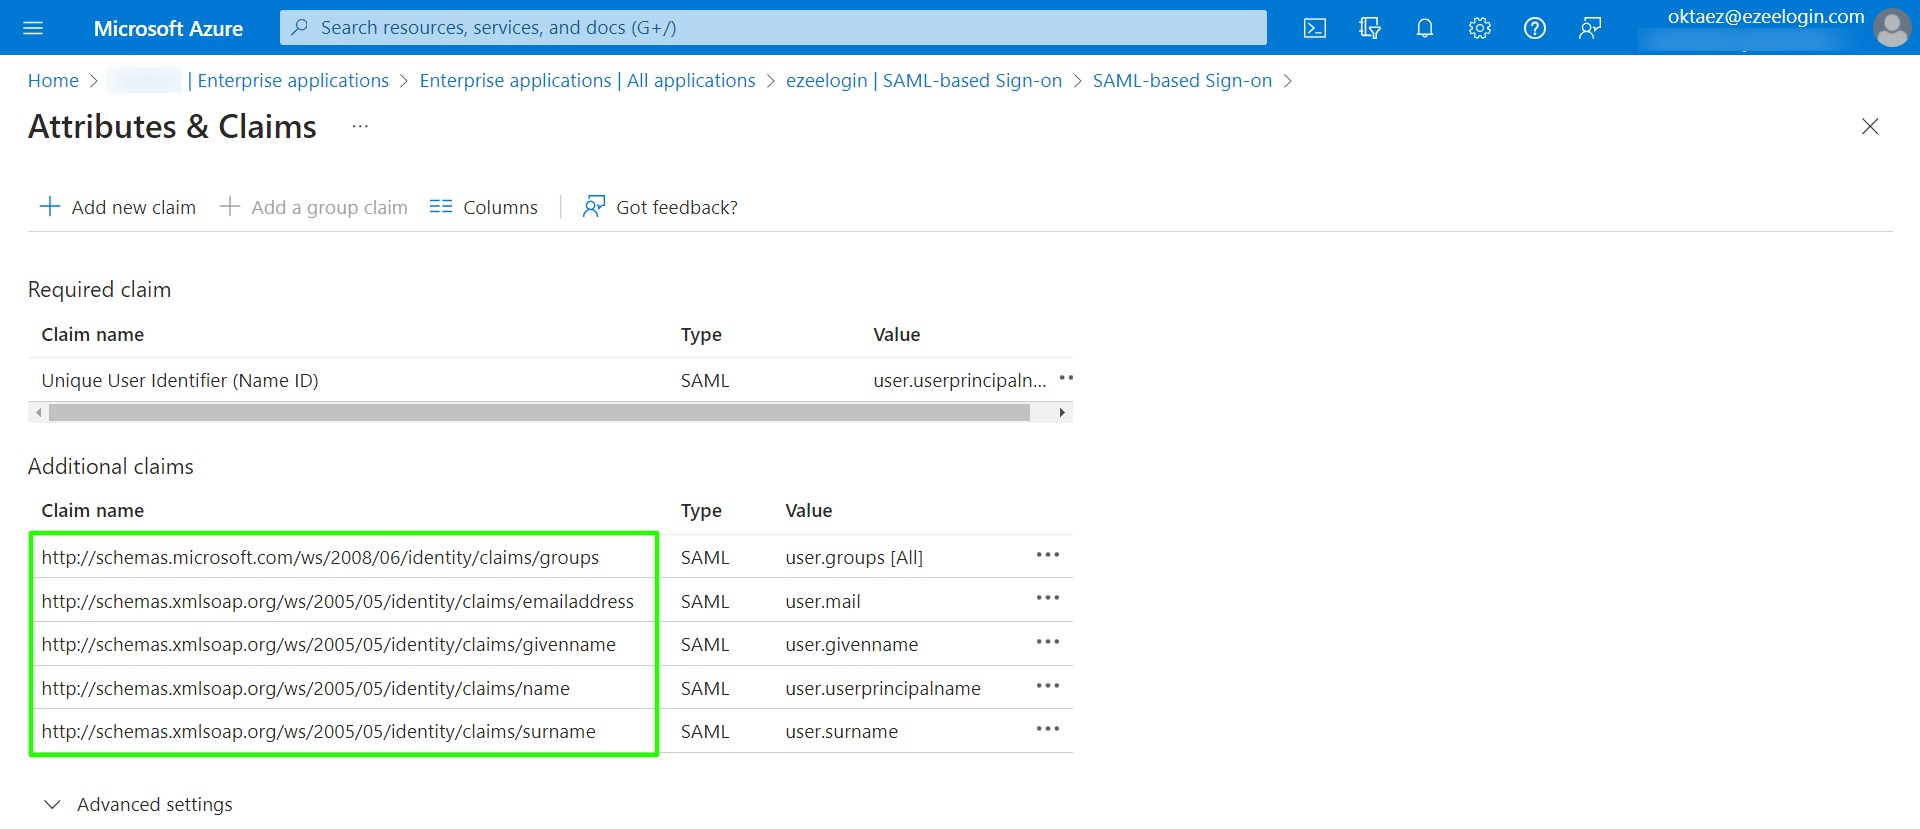
Review the attributes listed below if you encounter the following error while attempting to log in as a SAML user.
Could not get the username from the SAML response
We recommend using the web ssh shell when you are using SAML authentication, which is a lot more convenient as you would not have to worry about the SSH password or the security code for the users.
- Add a different email address for each user. By default, Ezeelogin uses email addresses for creating users.
- If you want to add an existing user in Ezeelogin to SSO, Add the user with the exact username, and email address as follows. (Ezeelogin will verify with the email address of the users by default). Make sure to add the email address for the Ezeelogin Administrator user.
- Saml authentication is not supported for slaves if the URL is IP-based. If you want to authenticate slave using saml you have to use the domain name.
3. Refer detailed article to create users in Ezeelogin with the same user group in Azure AD.
How to auto-create the Azure SSO user to the same group in Ezeelogin?
Refer to the article tomap the existing user group from SAML Provider(AZURE) to Ezeelogin as the Ezeelogin user group.
Related Articles:
Login as superadmin when SSO is enabled globally
Token encryption in Microsoft Azure SSO with Ezeelogin
setup web SSH console in Ezeelogin and SSH via browser
Unable to log in with Azure SSO
How to auto-create the Azure SSO user to the same group in Ezeelogin?